Four-strand Braid (2)
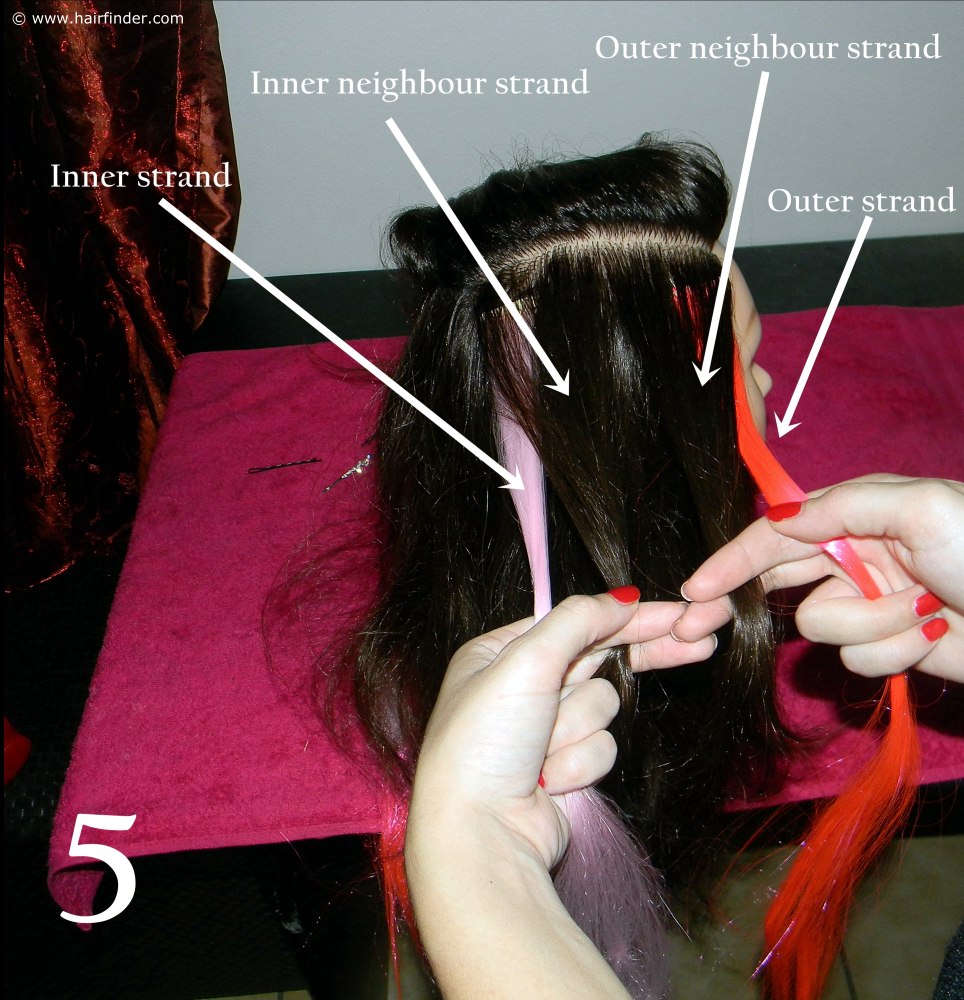
Previous Page6. On the picture you will see the strands named as: Outer strand, outer neighbouring strand, Inner neighbouring strand and inner strand.
To braid the hair in a four-strand plait, you must follow this braiding sequence: First put the outer strand over the outer neighbouring strand and under the inner neighbouring strand. Then take the inner strand and put it under the inner neighbouring strand and over the outer neighbouring stand.
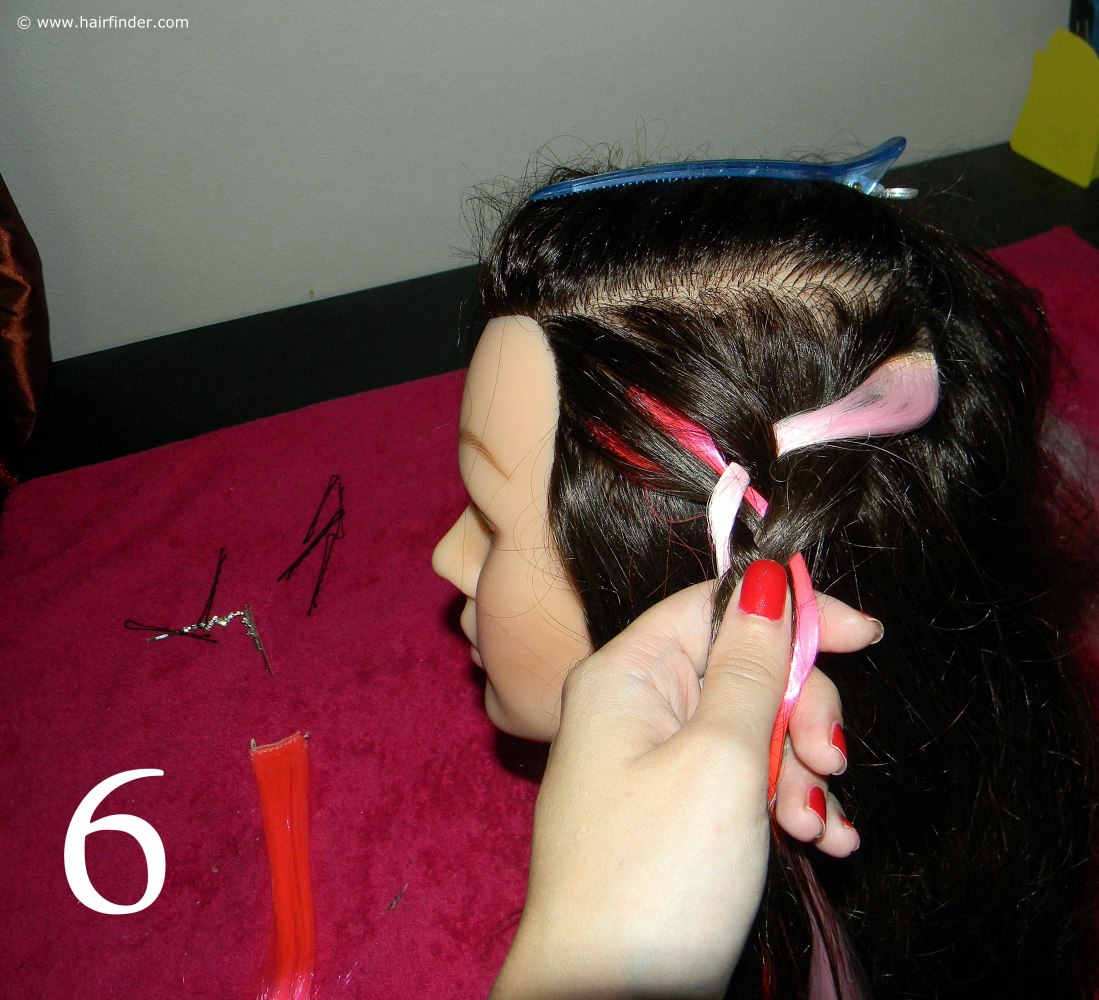
7. Repeat the above “over-under, under-over” process until you reach the tips of the length of the hair. In the case of this braid you need to braid the hair in a very relaxed fashion in order to give the braid that distinctive pattern. If you braid too tight, you’ll only end up with a messy braid.
It is also important that you keep your strands clearly separated and free from tangles and knots in the braiding process, as any one of these factors will compensate the neatness and pattern of your braid.
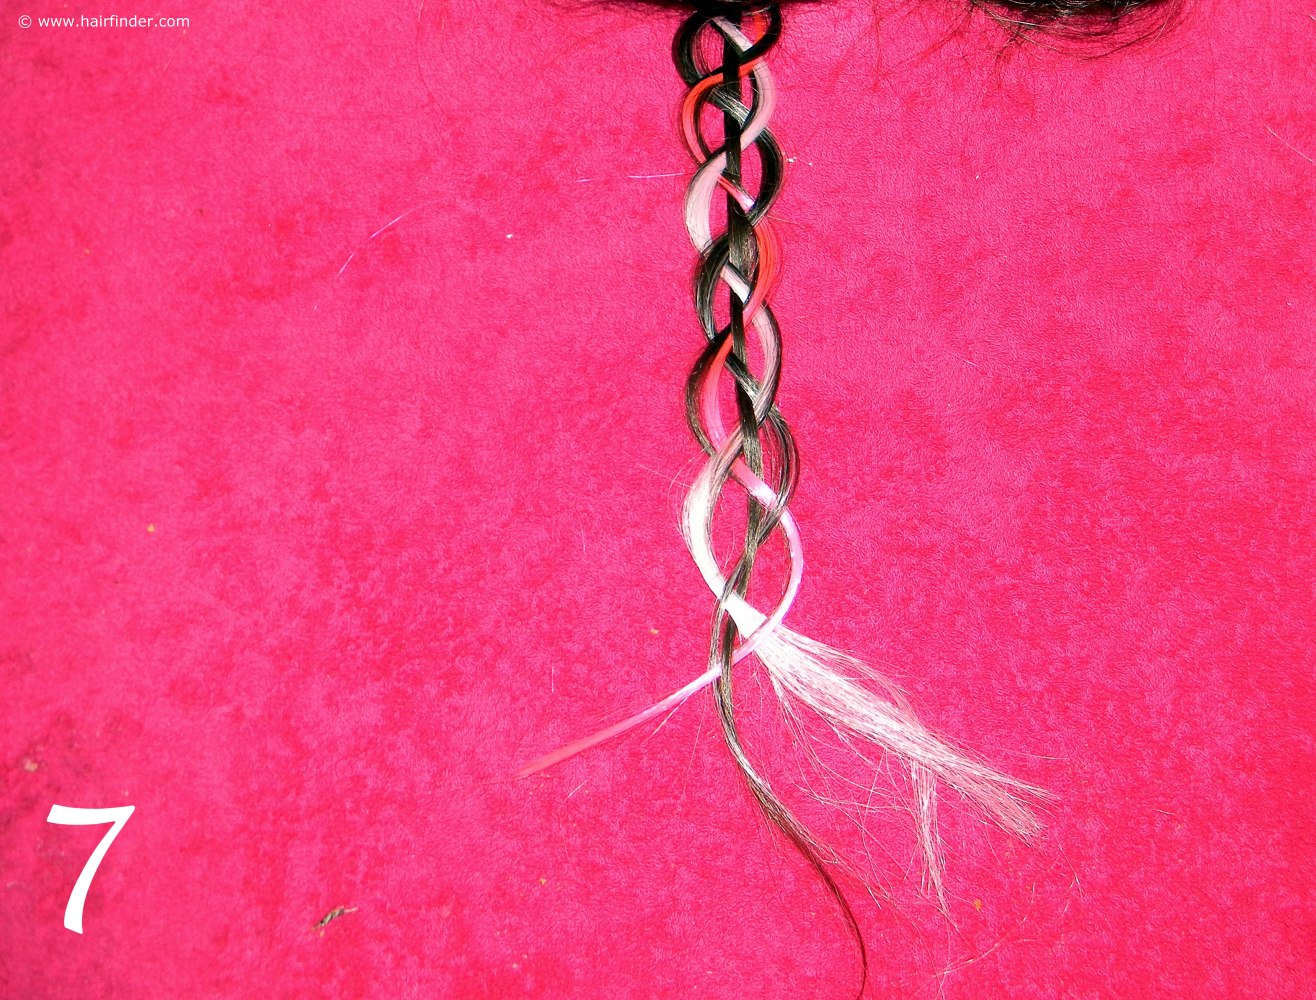
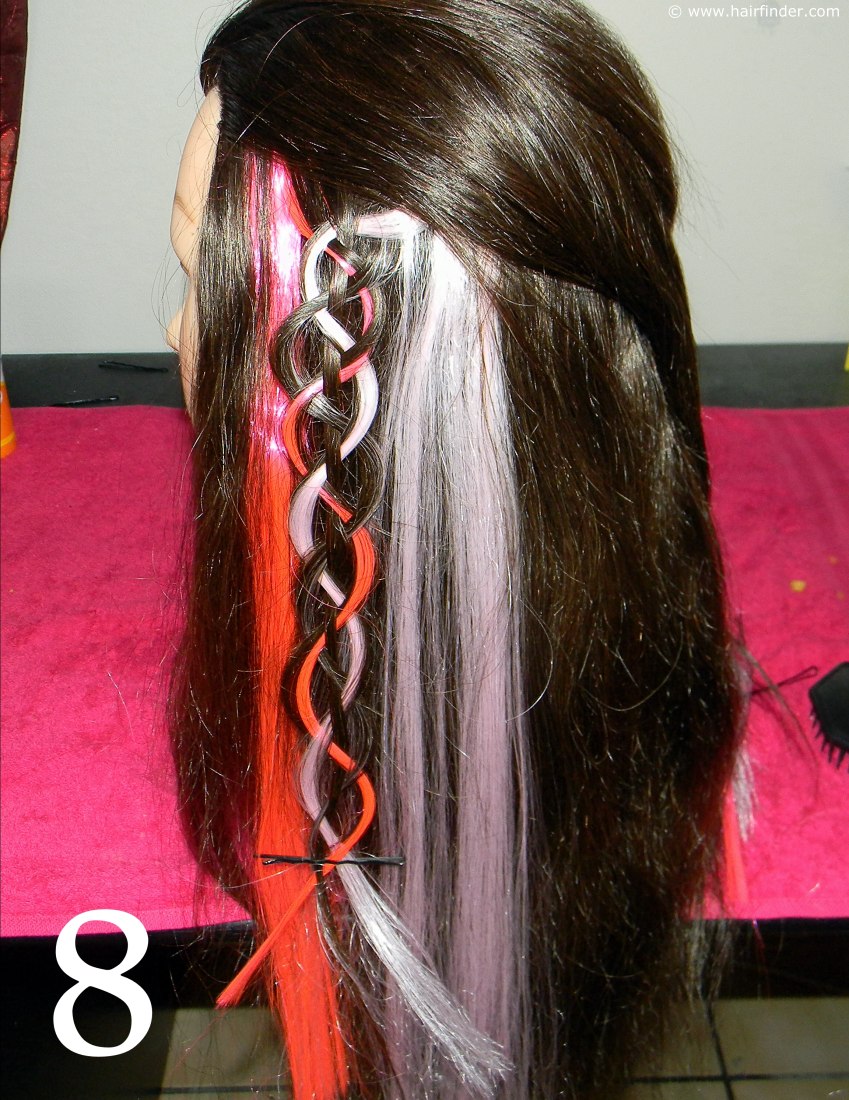
8. Note the pattern of the braid. There is one string that continuously runs down the middle of the braid, while the other three strands weave around this centre-strand. It’s important that your braid effectively showcases this specific pattern.
If you find that your braid doesn’t look like this, you probably braided it too tight or made a mistake during the braiding-sequence of the process. It can take a while to perfect, so practice the braid before attempting it on your model.
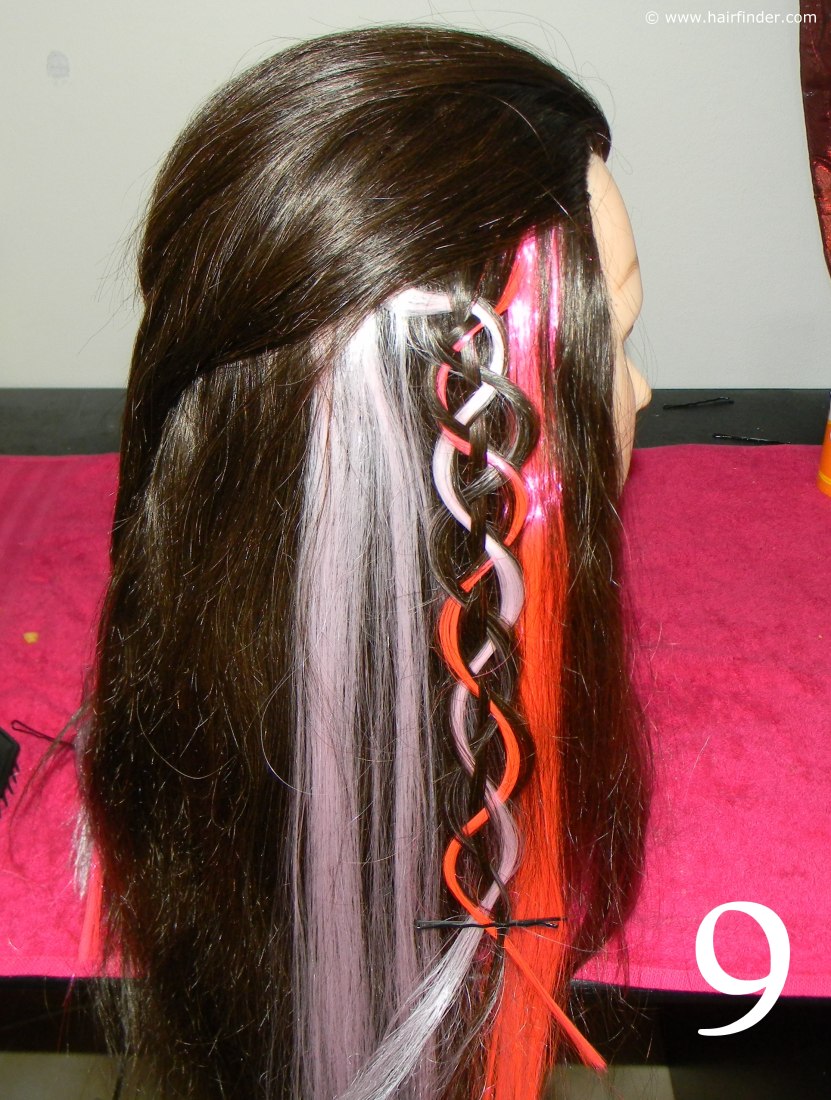
9. When you have braided the hair all the way to the tips of the length of hair, secure the braid with a clip or band. Remember that this clip/band will be taken out again shortly, so do whatever will be easiest to take out without compensating the braid.
10. Repeat the exact same process at the opposite side of the model’s head. The goal is to braid two braids; one on each side of the head, that are structurally similar and on the same height. These two factors are important as they will contribute to the largest part of the structural balance and symmetrical aesthetic stimulation of the hairstyle.
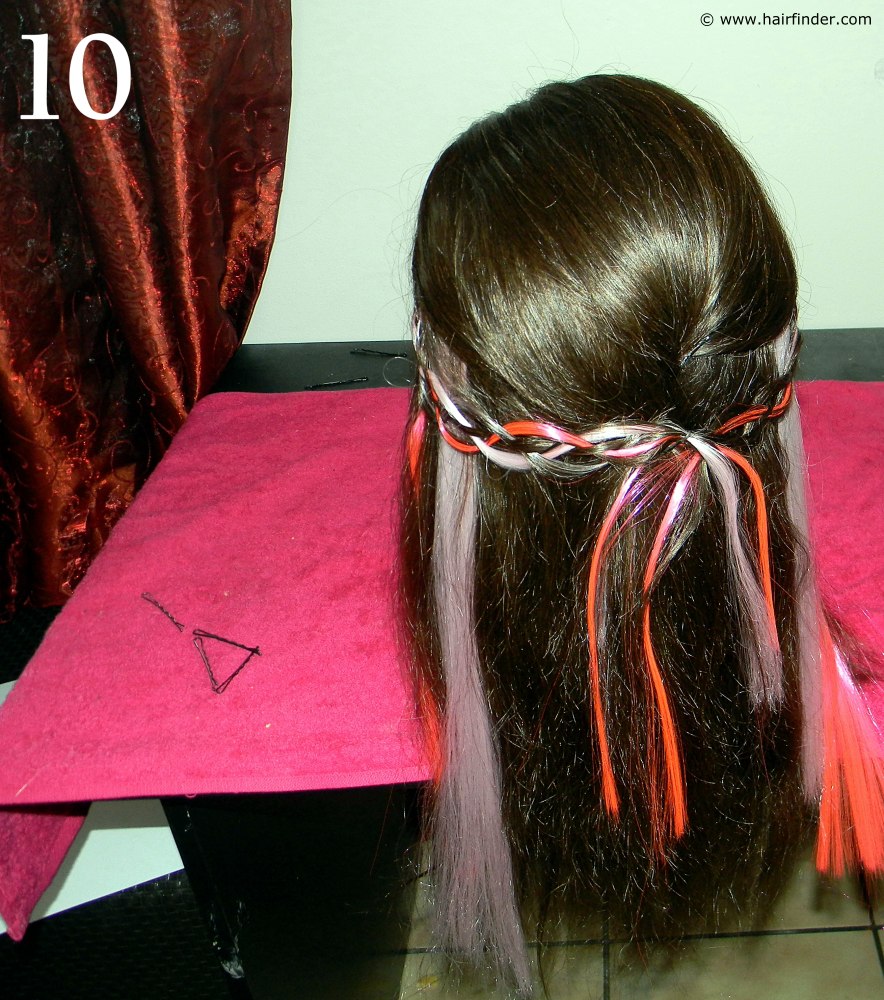
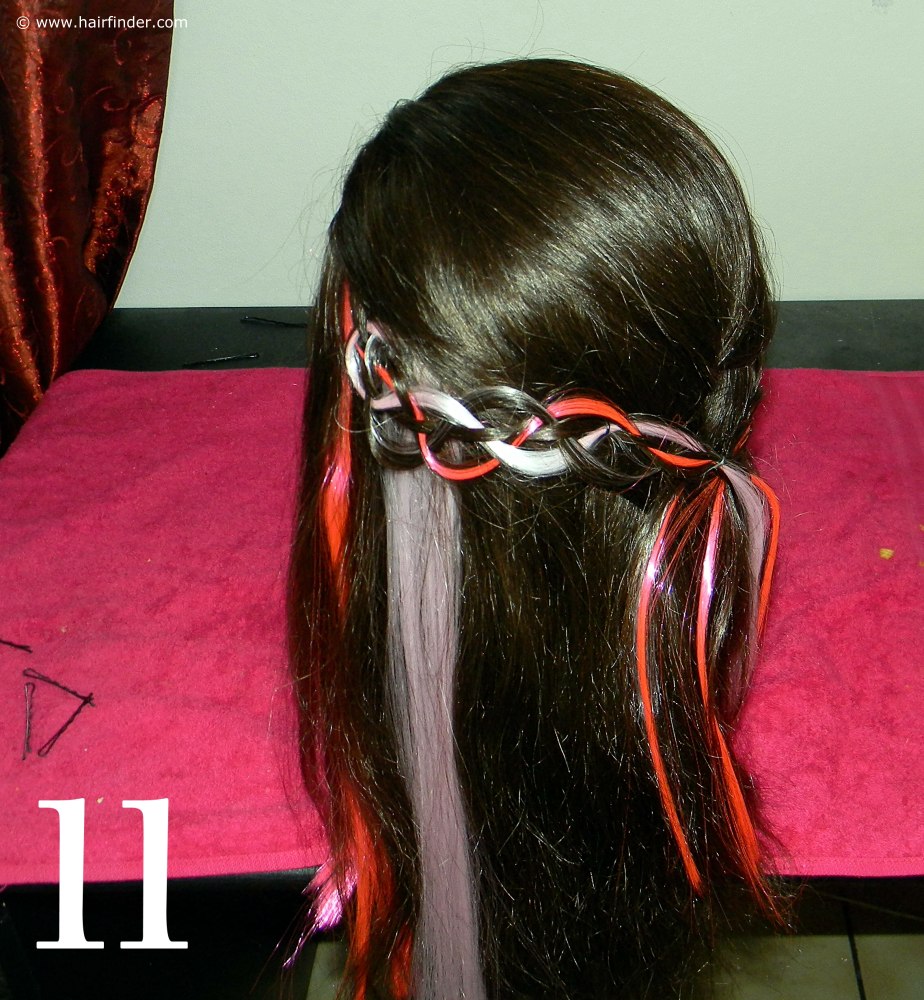
11. Gently cross the two braids over each other at the back of the head, and secure it with a well placed bobby pin. Try to disguise the pin as well as possible without compensating the structural stability of the braids. You don’t want the plaits coming apart in mid-evening. If you don’t feel certain that the bobby-pin will effectively hold the cross-over of the braids secure, rather use a small clear-plastic rubber band.
12. Spray the hair with a medium-hold hairspray to keep the style in place and to smooth down any fly-away hair. Gently add a few spritzes of silicone-based shine spray to block out any humidity and to add that extra shine and dimension to the style. This style can easily be dressed up or down, depending on what look you’re aiming for and the choice of wardrobe.
© www.hairfinder.com
See also:
Hairline Braid with a Twisted Bun
How to do the Romantic Side-Braid