How to do the Romantic Side-Braid
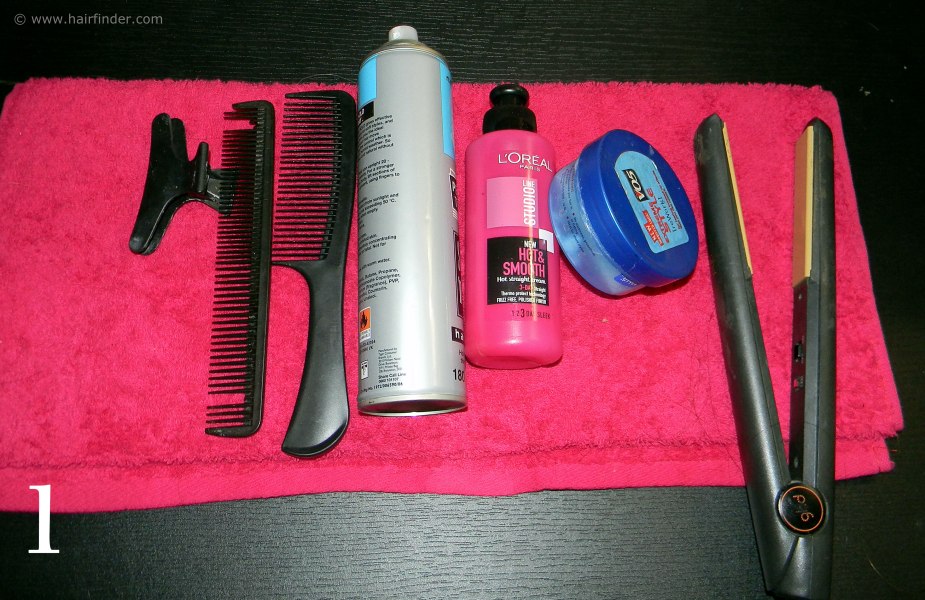
1. What you will need:
• Crocodile clip
• Bobby pins
• Teasing comb
• Hairspray
• Heat protectant
• Flat iron
2. If your model's hair is curly, apply heat protectant and flat iron the hair relatively straight. This makes the hair more shiny and more manageable. Section the hair on the side, making a part with your comb and securing this section with a clip. Comb all the other hair back from the face.
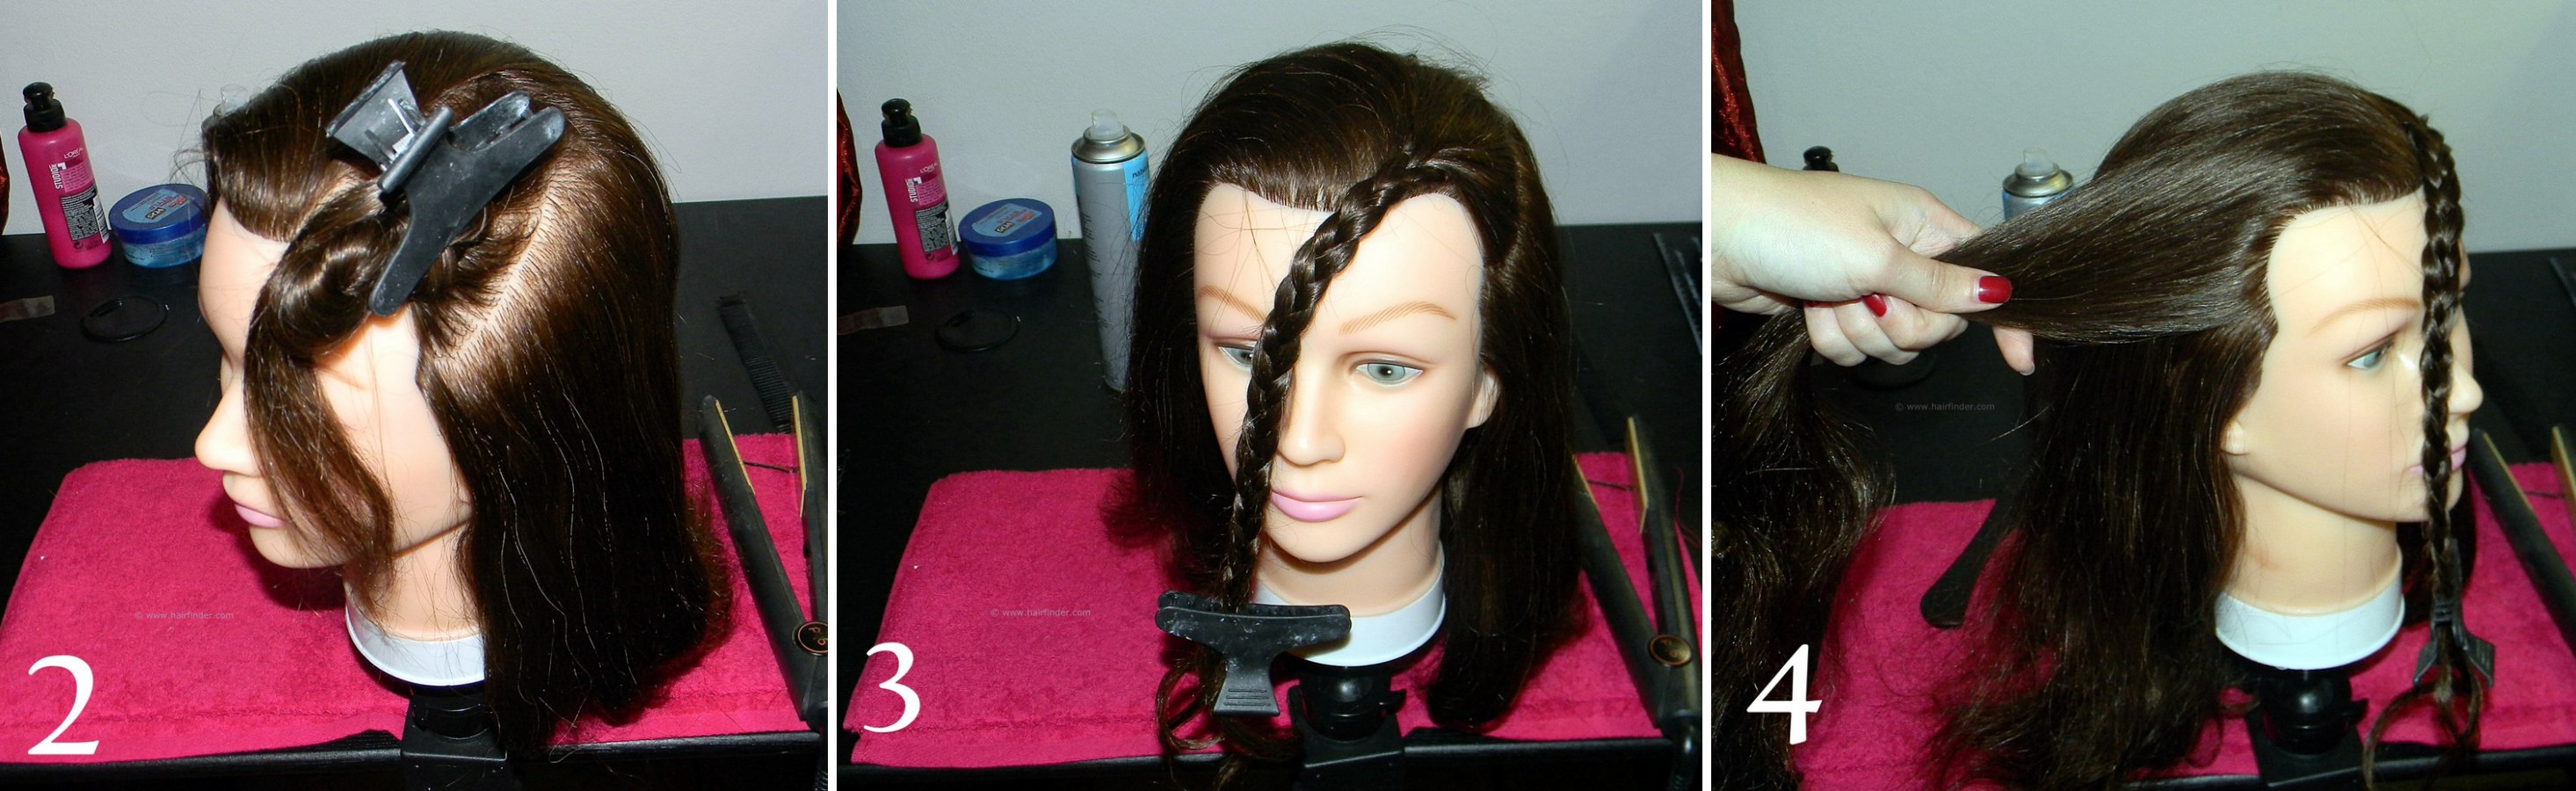
4. Now let's begin with the side braid. Take a large section from the side of the head and comb the hair straight.
5. Comb the hair at the back of the head straight and neat, then gather the opposite outer section of hair. This is another simple three-strand braid, but it should be larger and thicker than the braid at the front of the head.
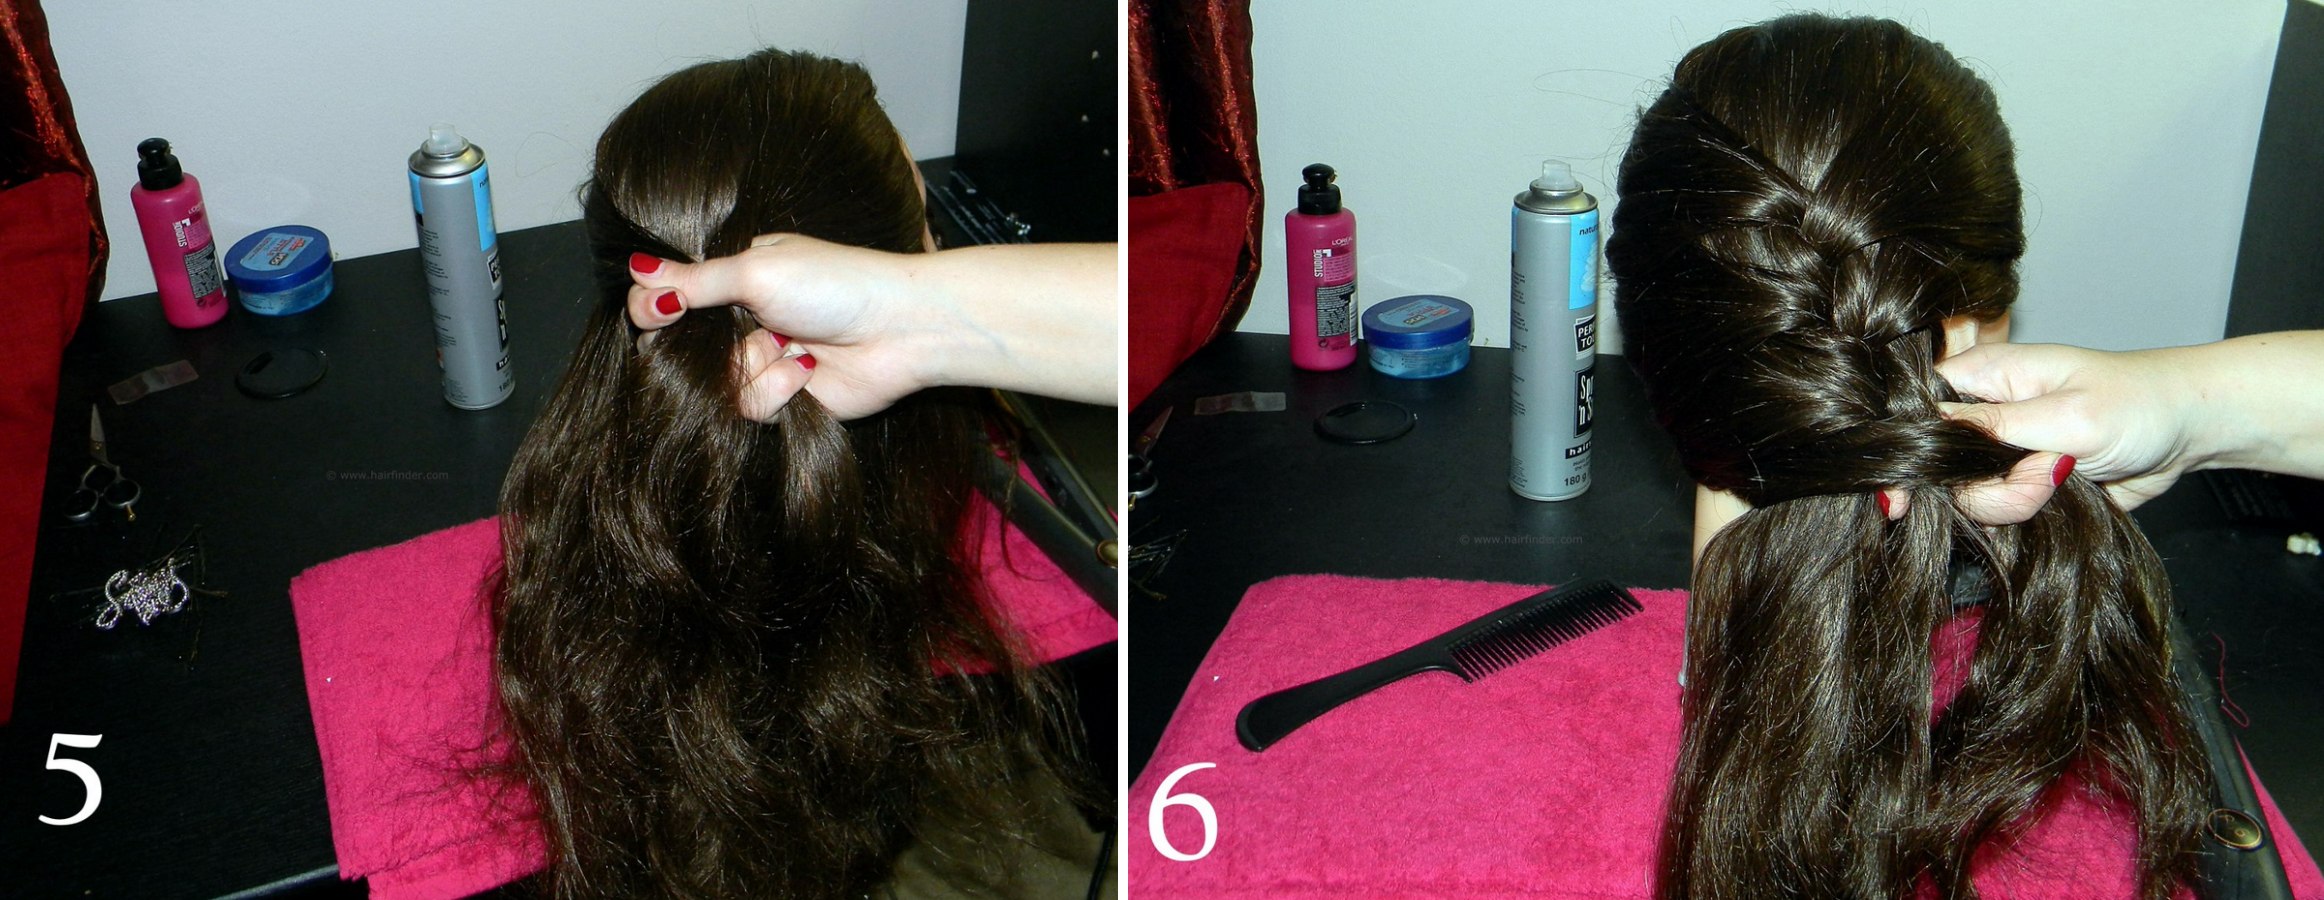
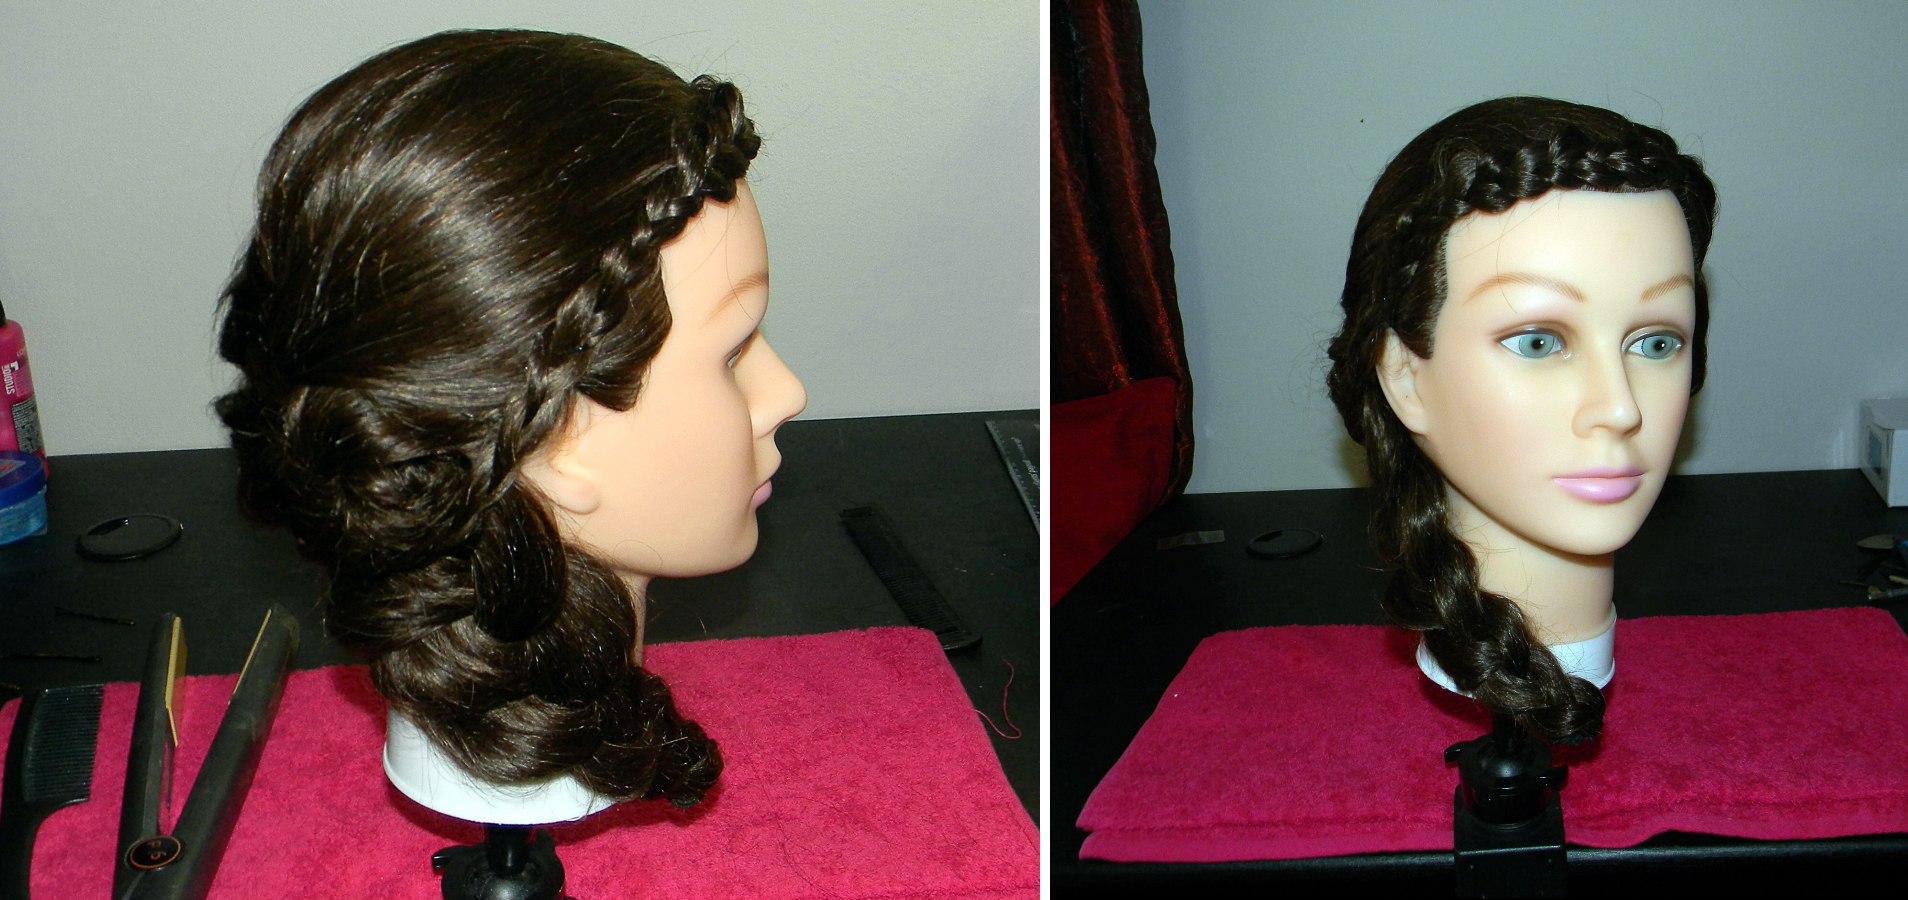
6. Braid the hair neatly in an off-center line running from one side of the head toward the opposite side, eventually leading down to the model's shoulder. Maintain tight tension on the sections and maintain control of the hair while braiding. Tension and control are the two most important elements of a well-executed braid.
7. Braid this main side braid all the way down until you reach the ends of the hair, then secure it with a hair band. If you have dark hair, use a dark hair band; if you have light hair, use a light one. This helps to disguise the hair band, as the end of the braid will be flipped inward later on.
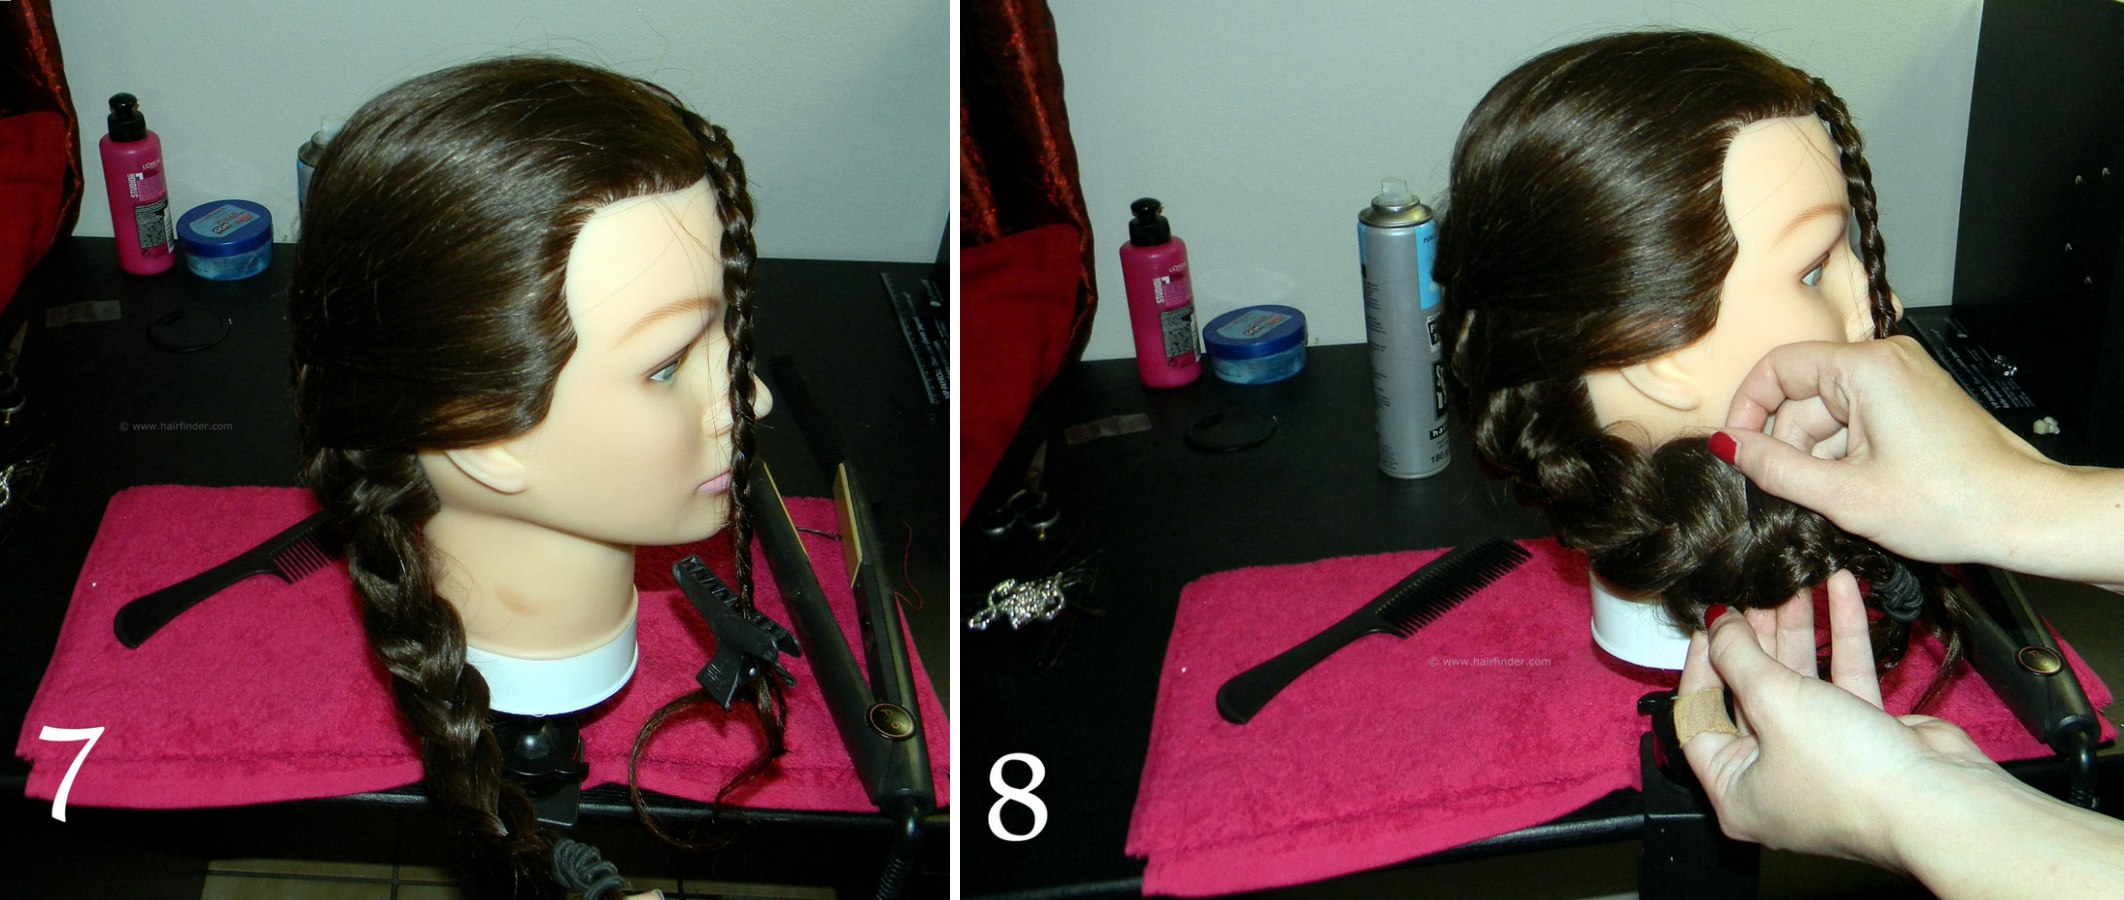
8. Use your fingertips to widen the sections of the braid, gently pulling the hair toward the outside of the braid to create a softer, romantic look. This is easier if you have long nails. Be careful not to pull the hair too far, as this could cause the braid to come apart. Start at the top of the braid near the nape area, and work your way down.
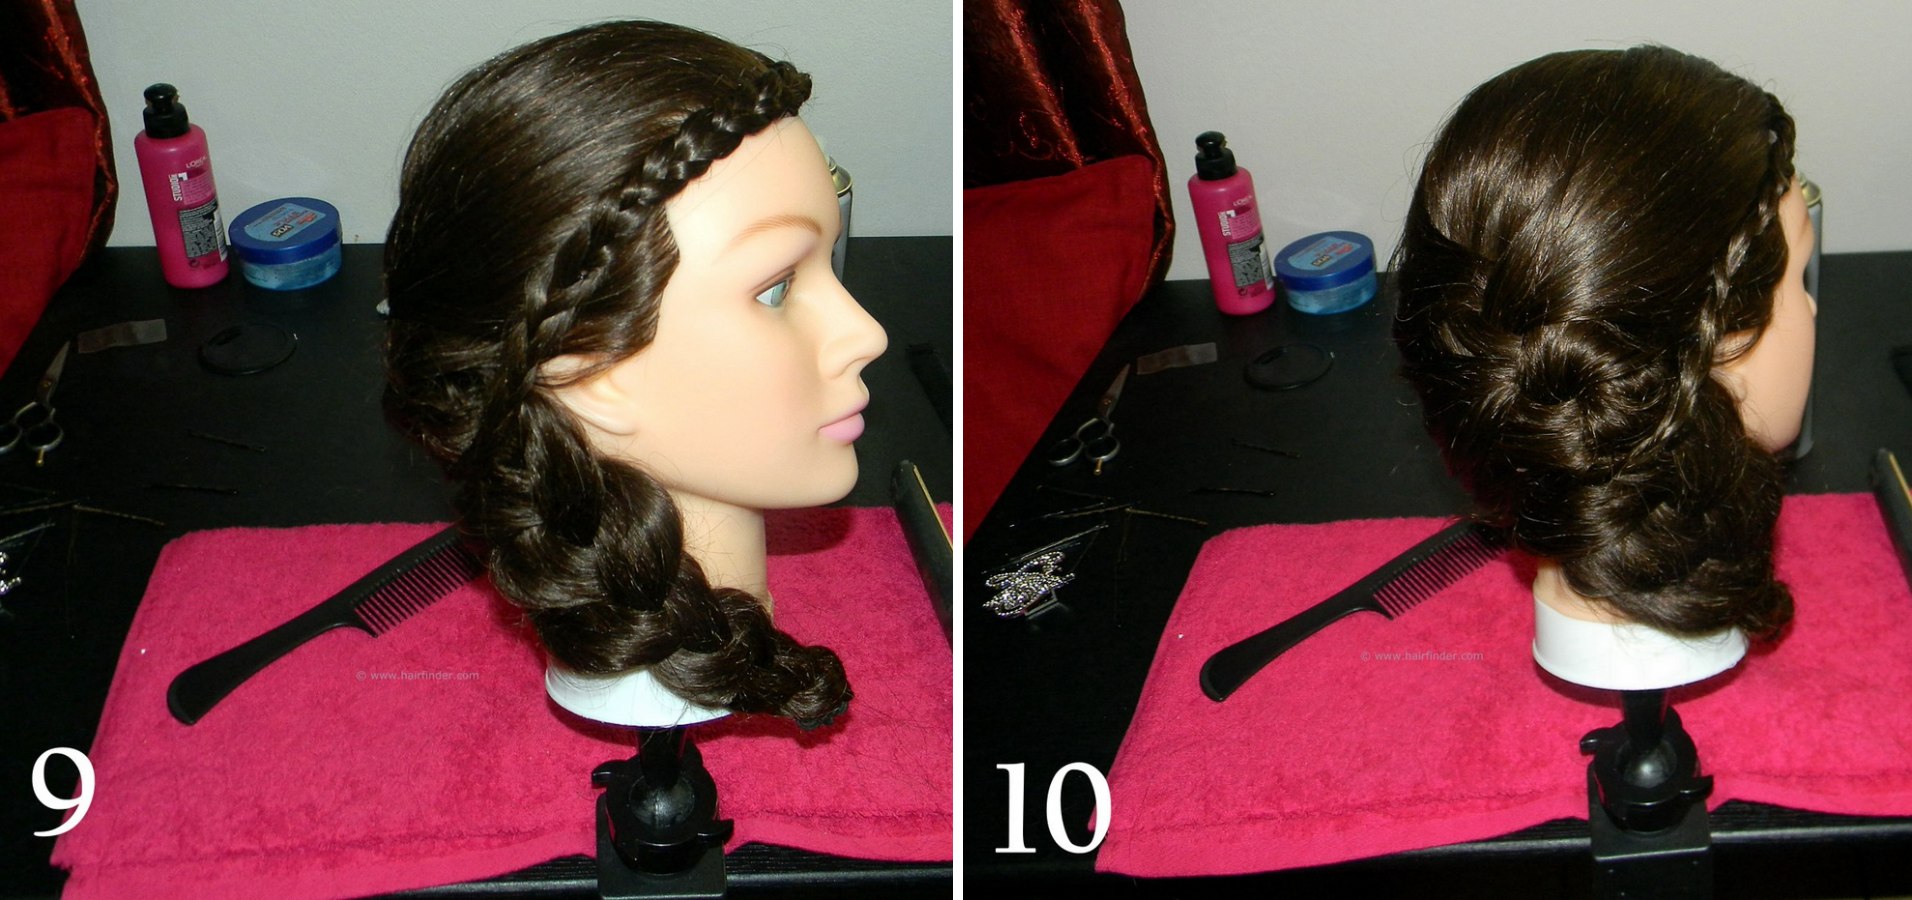
9. Flip the end of the braid inward and secure it with a bobby pin. Use a black bobby pin for dark hair and a light one for light hair. Once again, the purpose is to ensure that the flipped-in part is not visible.
10. Secure the end of the smaller braid you completed at the beginning of the style with a bobby pin, integrating it into the back part of the style. This should appear seamless, with the bobby pin well-disguised yet secure.
11. Gently adjust the main braid so that it sits securely on the side of the head, running down the model's shoulder. If necessary, secure the braid in place with a few well-placed and well-disguised bobby pins.
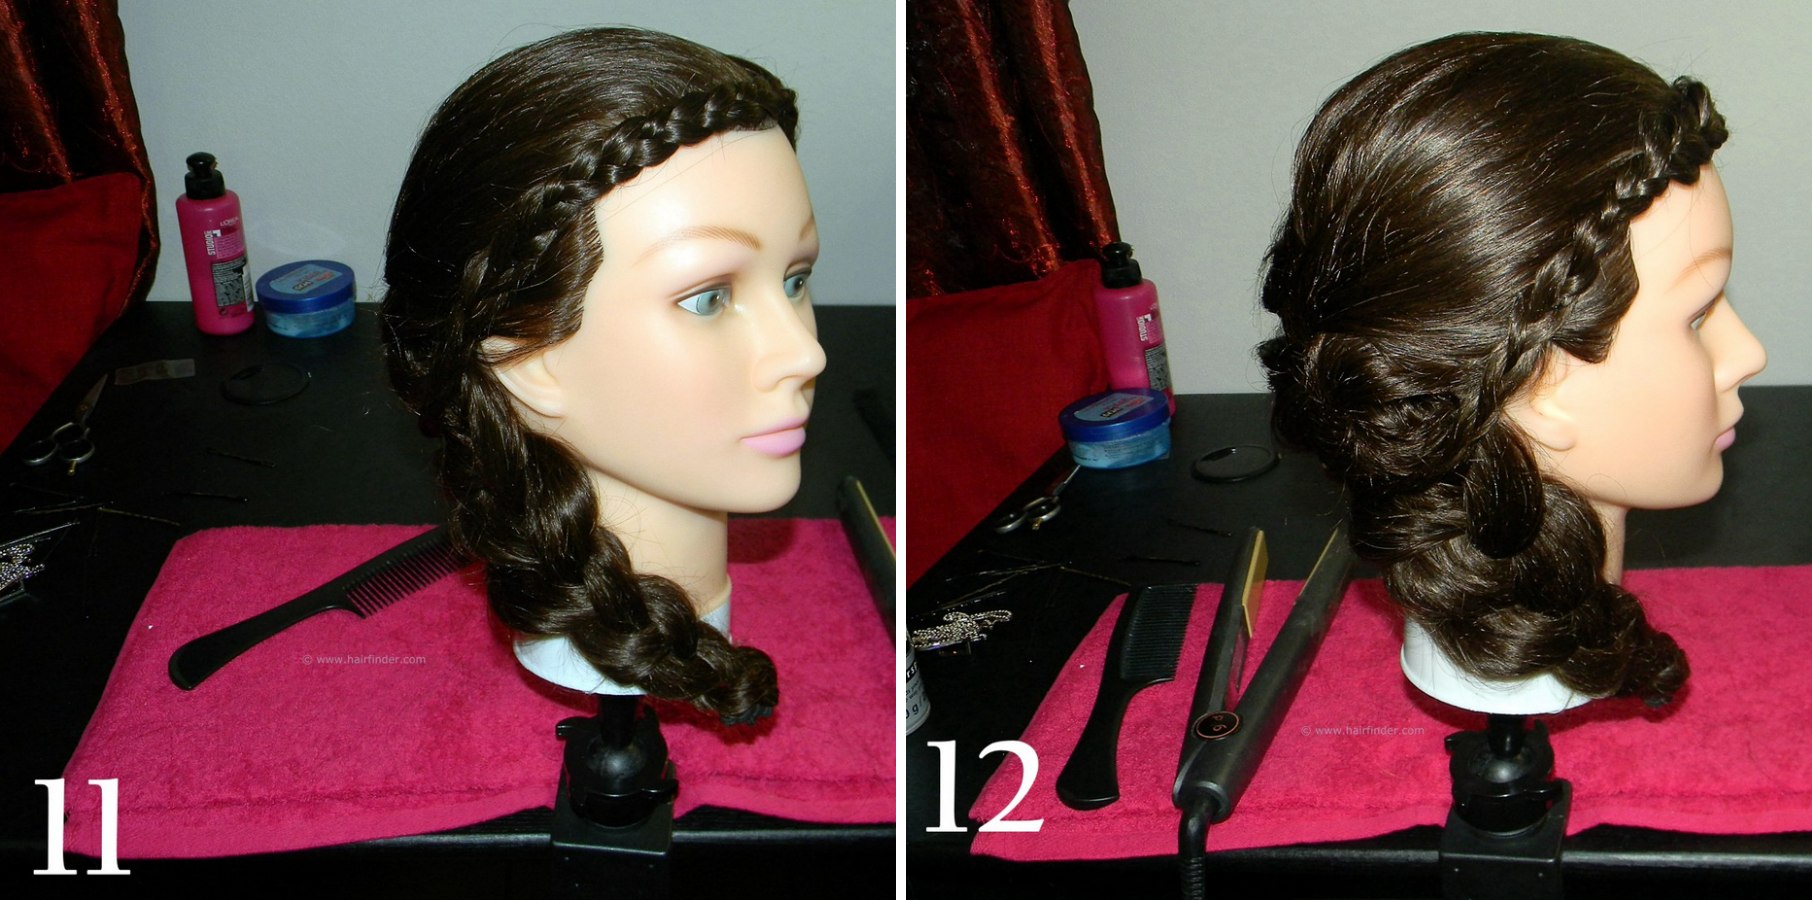
12. Finally, use your hairspray and the end of your teasing comb to flatten and neaten any stray or flyaway hair. Be careful not to over-comb the hair, as this can ruin the braid. Also, avoid using too much hairspray, as it can make the hair appear tacky and almost wet-like.
See also: More about Braiding