Lorana's Straightening
Step One of the Make-Over
I arrived at Lorana’s apartment on the afternoon of July 26th having prepared my hairdressing kit and been to the beauty supply store to get a suitable straightening product for Lorana’s hair. I selected One’n’Only’s Curl Remover product because I am familiar with the product line and because I wanted a product that would be gentle on Lorana’s hair.
Since Lorana had admitted that her hair has been chemically straightened before, I was concerned about using anything that would be too harsh, since the last thing I want is to damage a client’s hair.
Prior to my arrival, Lorana had shampooed and conditioned her hair to remove any styling product residue that would potentially interfere with the straightening process. Given that her hair was previously chemically treated, I didn’t feel this would be a bad thing, necessarily.

Once I arrived, I began to set up the area in which we would be working and I proceeded to comb out Lorana’s damp, towel-dried hair. According to the product directions, the hair is to be sectioned into a “T-Section” parting. This means that the hair on the top of the head (from the middle of the crown forward) is parted down the middle and the two front sides are secured. This leaves the back of the head (from the middle of the crown down to the nape of the neck). This back section is also secured.
The goal here is to divide the hair into three, roughly equal portions with which to work.
Straightening:
We begin applying the straightening product by lowering the rear section in three-quarter inch strips, working from the bottom up. The straightening formula is applied and combed through carefully. Another strip is lowered, plied with straightener and combed. This is continued until the entire rear section is treated and combed through.
We move to one of the forward sections and proceed to apply the straightener in the same manner as with the rear section. We need to work quickly, since we are only supposed to process the hair for a maximum of 15 minutes according to the package instructions.
Once all the hair has been coated with straightener, we continue combing through the hair to keep the hair as smooth and straight as possible while the chemicals do their job. After the fifteen minutes has elapsed, Lorana moves to the sink as I begin rinsing the straightener from her hair.
Neutralizing:
Once the straightener has been rinsed away, we blot the hair to absorb as much excess water as possible and then comb through the hair to keep it as straight as possible in preparation for the application of the neutralizer. The entire scalp must be coated in order to ensure that ALL the hair is treated with the neutralizer. All the while, we continue combing through the hair to assert the new straighter configuration.
The hair is neutralized for five minutes and we again return to the sink for a rinse out. The hair is blotted again and we look at the results.
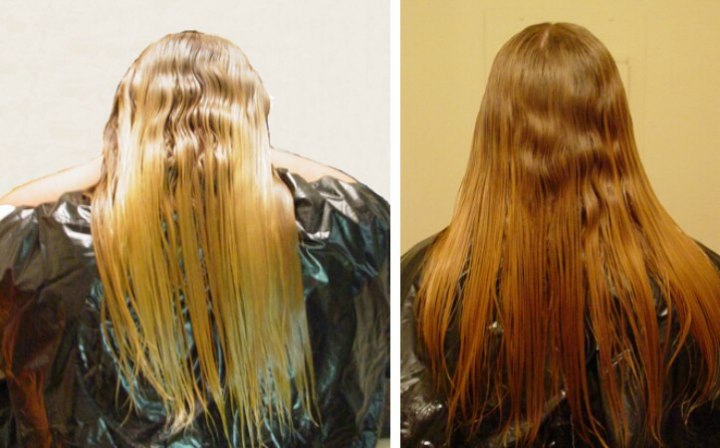
The Results:
The hair is less curly, but not as straight as I had desired or hoped. In further discussions with Lorana, she explained that she nearly always straightens her hair to some degree when styling it.
This means that I erred when I estimated the level of curl I would be dealing with, and that I should have selected a much stronger straightening product. On a positive note, given that the process used was so gentle, we will be able to retry the straightening again after giving her a couple of weeks to allow her hair to rest.
We will be making a second straightening attempt then, and will have more photos available to show the results.
©Hairfinder.com
See also: Lorena's Haircut