Vintage Pin-up Rolls How To (2)
Previous Page6. Spray your model’s fringe with heat-protection spray, and flat-iron the fringe as neat and flat as you can. Note that the goal is to get the fringe as perfect and seamless as possible.
The best fringe to work with in this case is a long fringe that touches the eyebrows of your model, and is gradually tapered to the side to soften the look. The fringe is full and very straight.
7. Separate the top section of hair into a middle part, and secure the part that you’ll work with later with a clip. Comb the hair of the section that you’re currently working with, with a fine-tooth comb. Use your hairspray while combing the hair to get rid of nay micro-tangles or uneven occurrences on the surface of the hair.

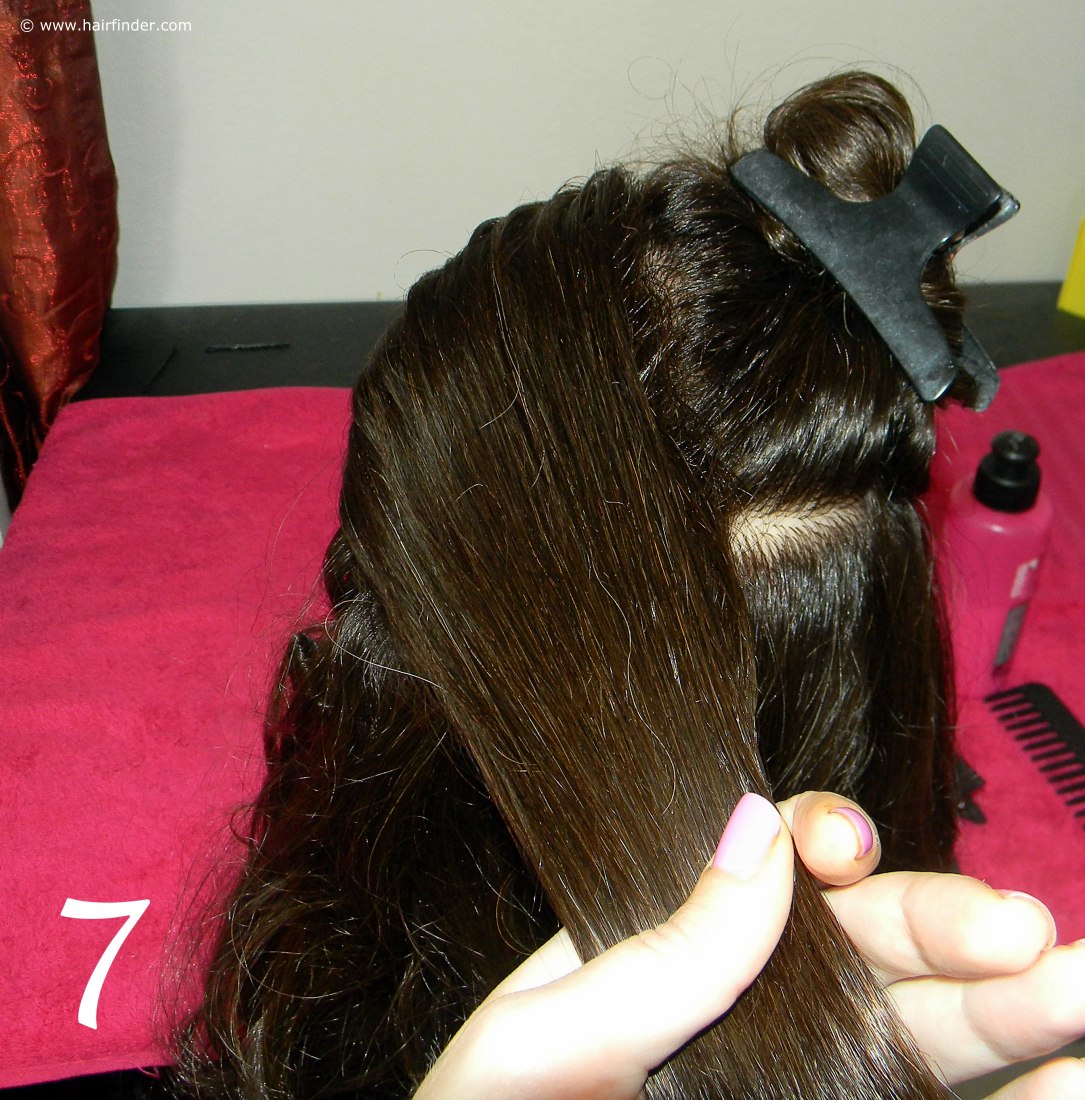
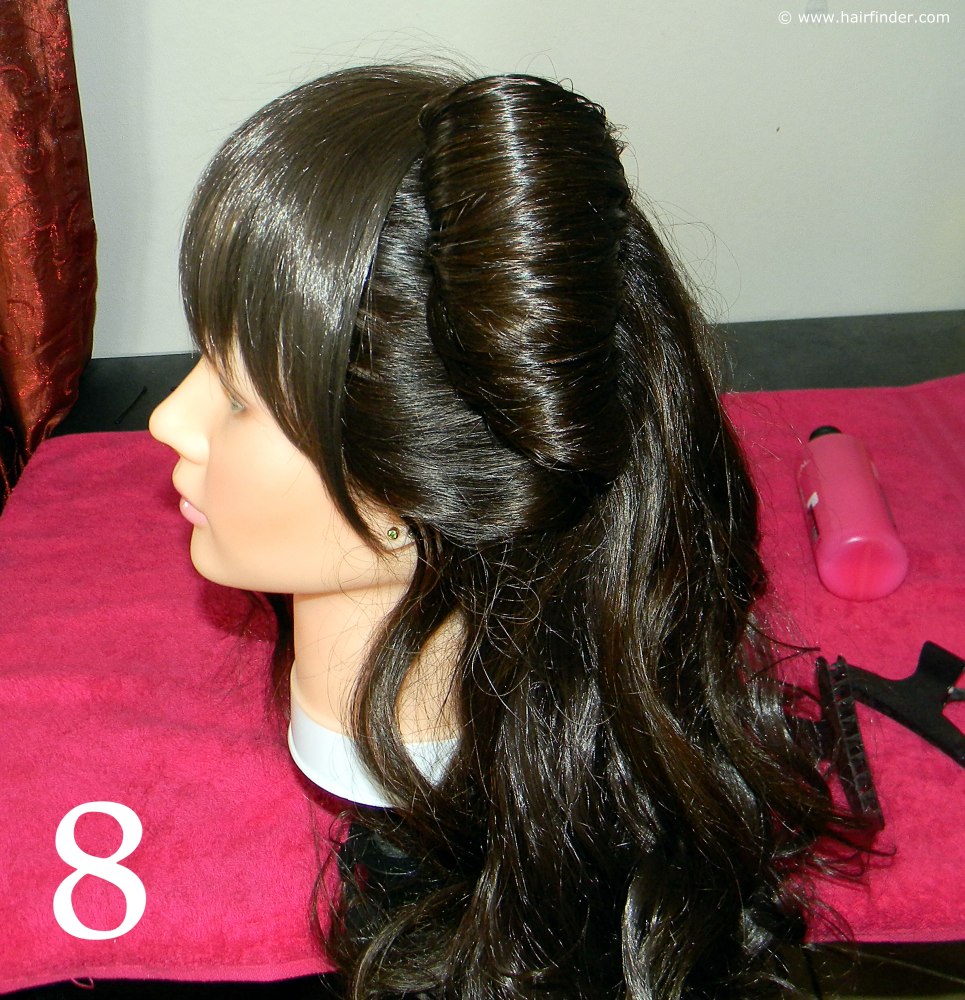

8. Gently and carefully roll the section around your middle- and forefinger to create the roll. Remember that the base of the roll must sit directly on the side of the model’s face, and the two rolls will have to be horizontal with one another. The goal is once again to keep the seamless and perfect surface that you have created; so use your hairspray to spray and comb while you’re creating the curl.
The hairspray will only improve the base of the curl and the strength of its structure in any event, so don’t be shy with the spray. Once you have this done to your satisfaction, you will use bobby-pins to secure the curl on its base. Use black pins for dark hair and golden pins for blonde hair. You should take care to disguise the pins in the fold of hair between the body of the curl and its base.
9. Note that the whole front part of hair was used to from the pin-up curl. This will ensure that you have enough hair to work with in order to create full curls. Once the curl is pinned into place, spray it with a strong-hold hairspray. Always use a lot of hairspray, but not the point of excess where the hair gets tacky or wet.
When/if you see droplets of spray forming on the hair, you know you’re going overboard. Stop spraying and wait for the hair to dry before going further. Don’t dab the wet droplets of spray with your hand or a towel, as the hair is sticky and could potentially be ruined by excessive patting or tampering.
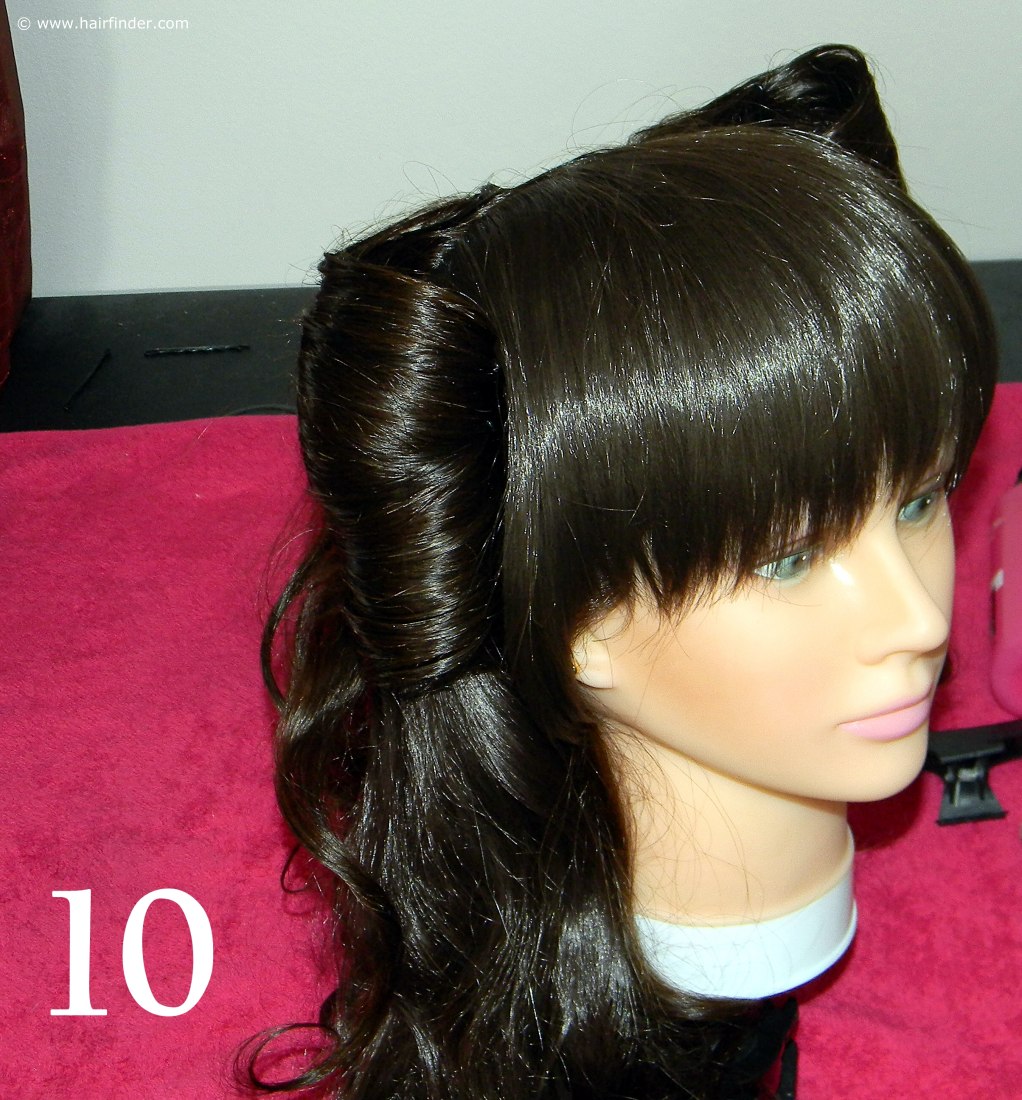
10. Repeat the exact same process on the opposite side of the head. Remember that the pin-up curls have to be in line with one another, and the curls must be proportionally in equilibrium with each other and the silhouette of the model. You’ll notice that the style looks rather unbalanced from the side-view at this stage, but this will be corrected in the next stage.
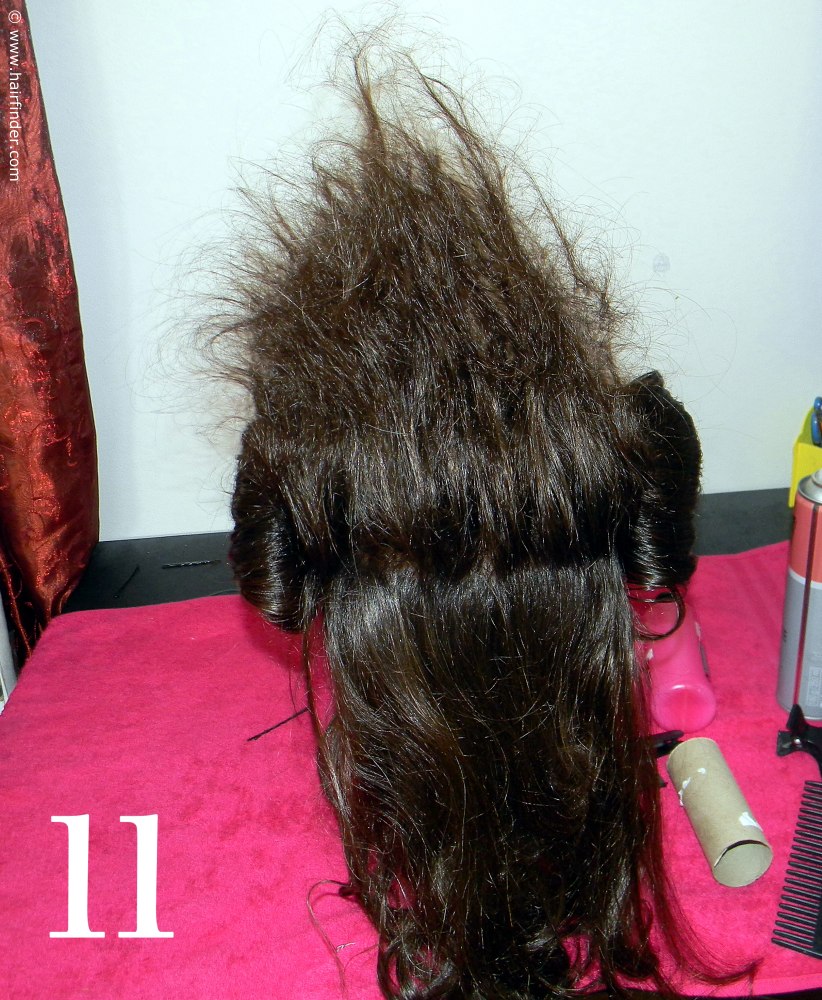
11. Use the hair that is still clipped in the crown area to create a bubble-like structure which will correct the flat/unbalanced look from the side of the model’s head. Tease this section of hair to create enough volume for your structure, and then gently comb the surface. Use the teased section to create the bubble.
Comb and spray until you are satisfied with the form and structure of the bubble, and then secure it with well placed bobby-pins. As with all up-styles, instruct the model to tell you if the pins are hurting her scalp at any stage, so that you can remove the relevant pin and insert it in a better position or place.
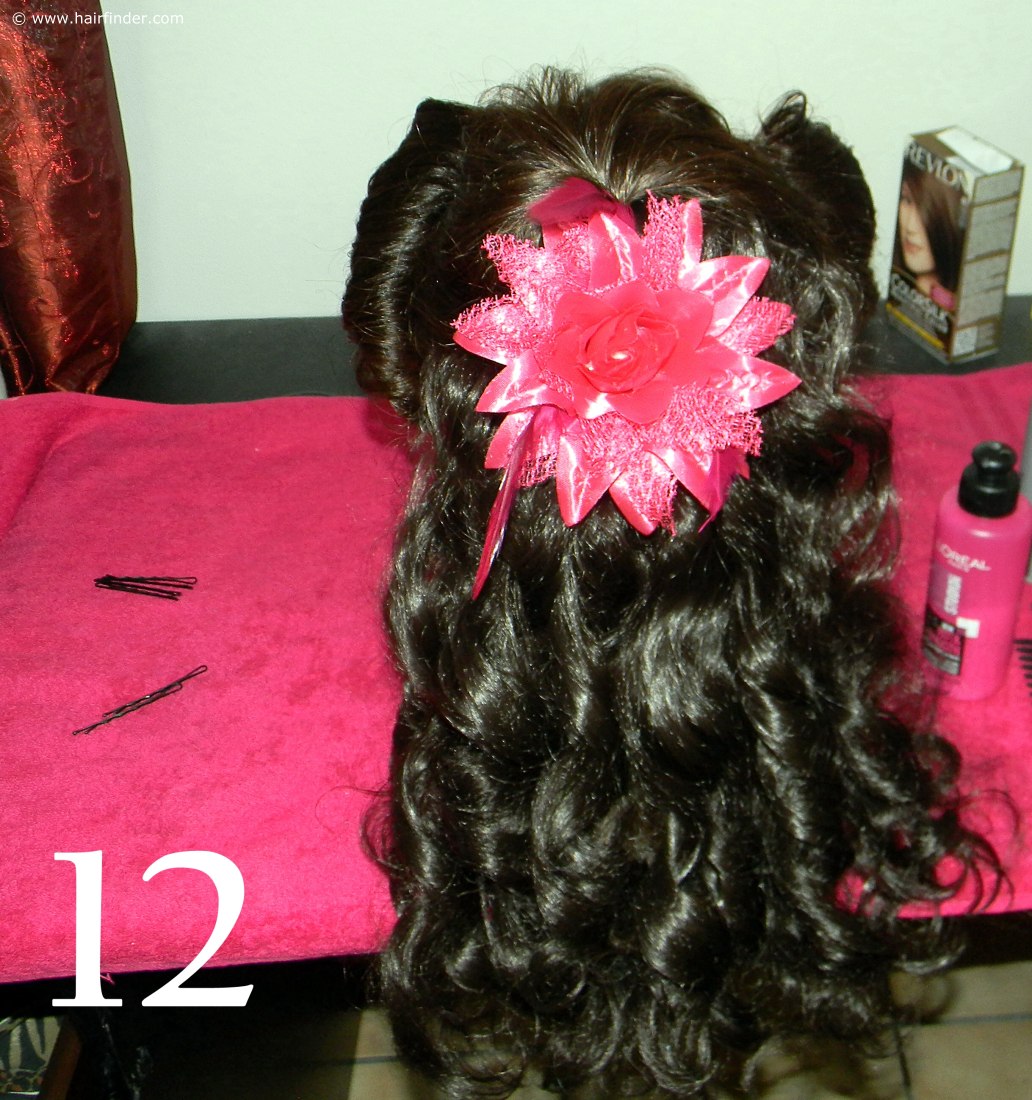
12. I have used a flowered hair accessory in this case, as this style tends to be very glamorous at the front, but mildly lacking interest at the back. The flower also adds volume and height to the back, improving the balance of the style and complementing the silhouette of the model. You can use any accessory as long as it is not too heavy, resulting in dragging down the style or collapsing the bubble structure.
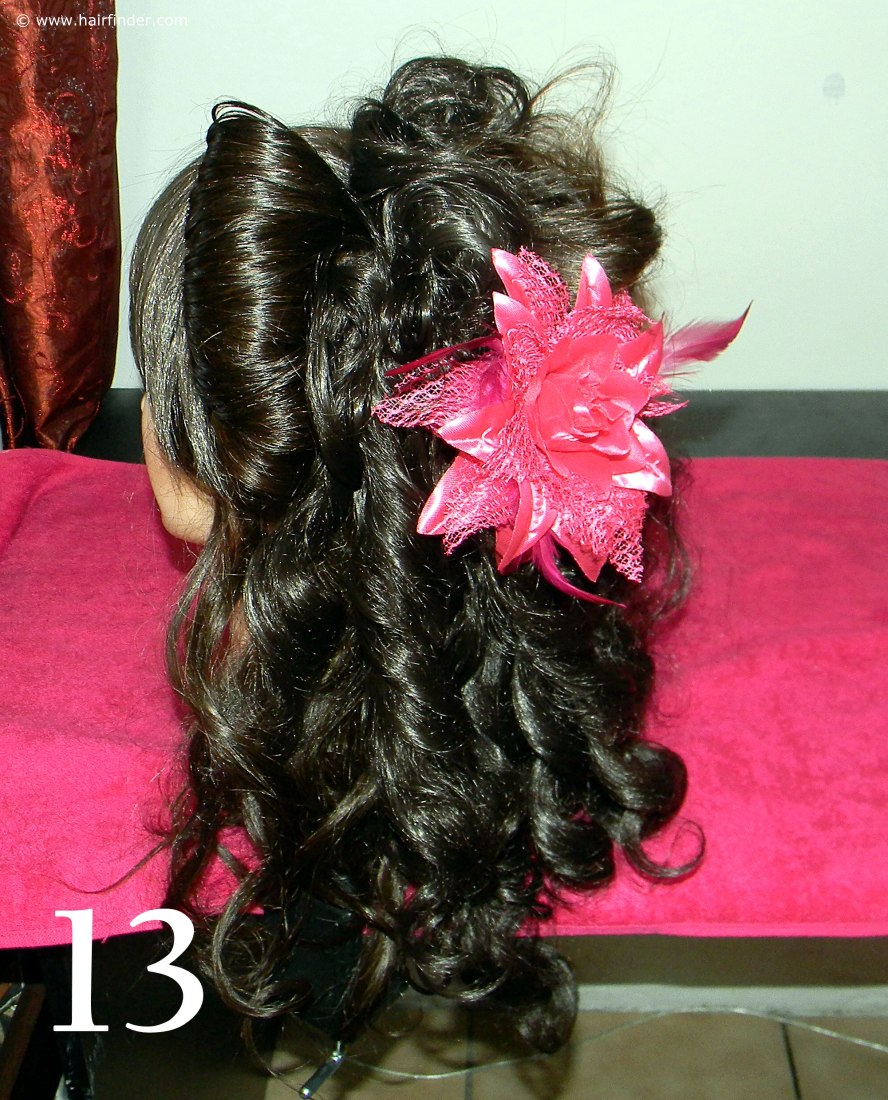
13. Note the equilibrium and balanced silhouette from the side and back of the model. The curls at the back are long enough to cascade down the model’s shoulders, while the hair accessory at the back adds that bit of spark to the back view as well as complementing the silhouette and style.
End-off the style with a few sprays of silicone-based shine spray to improve shine and dimension, while simultaneously blocking out any humidity or moisture in the air.
© www.hairfinder.com
See also:
Three Roll Vintage Up-Style
Lady Gaga Inspired Up-Style