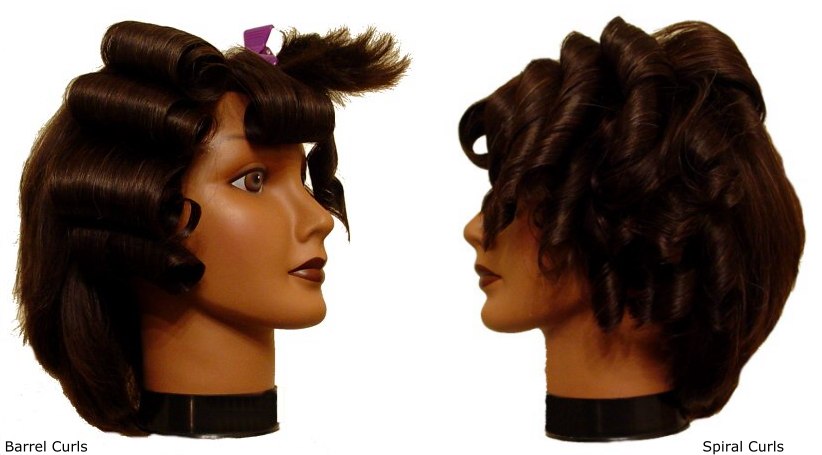
Barrel Curls & Spiral Curls
Curling Iron Styling Demonstation
There are two different types of curls that are most common in curling iron styling: barrel curls and spiral curls. Both are useful for adding volume and/or interest to various hairstyles. In addition, curling iron styling lets you target curls specifically where you want them with ease. In order to help you understand how to achieve the proper results with these curls, we performed a demonstration on a manikin.
We began our demonstration using a manikin that had been shampooed, conditioned with a rinse-through conditioner, and treated with a leave-in conditioner to protect the hair from heat-styling damage. The manikin's hair was then thoroughly dried with a blow dryer and brushed thoroughly to remove any tangles. Now, we can begin creating the curls.
Barrel curls are the type of curl you get from standard roller sets, but with a curling iron, you can get the same effect in a fraction of the time. To begin creating barrel curls, we divided our manikin's hair along the center parting and sectioned off a panel of hair on the right side just before the ear. The panel was made to be just a little narrower than the length of our curling iron's barrel.
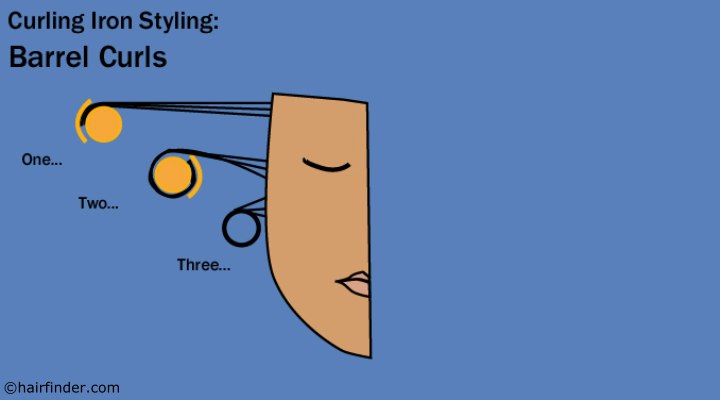
We then proceeded to divide the panel into segments about as thick as our curling iron and clipped them up out of the way. Once this was done, we began creating the curls. Starting with the bottom-most segment of the panel, we combed the hair to make sure it was free of tangles, then lightly misted the hair with hairspray.
At this point, we took the curling iron in hand and inserted the segment of hair between the clamp and barrel of the iron, sliding the iron down to the ends of the hair so that the clamp covered them. Then, we turned the iron to roll the hair onto the barrel, stopping just short of the scalp. You can use a comb laid flat against the head to prevent the iron from resting on the scalp and accidentally burning the skin.
We held the iron in place for a few seconds until the heat thoroughly penetrated the hair, then carefully unwound the iron and slid it from the curl.
Note: You should always test your curling iron before placing it against the hair, unless you are sure of the temperature of the iron. To test your iron, lightly moisten a piece of tissue paper with water (it should only be slightly damp, not wet) and place it between the clamp and plate of the iron. A little steam is alright, but if there is any smoke, scorching, or discoloration, your iron is too hot, and the temperature should be adjusted downwards to prevent burning your hair.
For our demonstration, we continued with the other segments of the panel and also curled half of the bangs on the manikin with a barrel curl. You can see the results in the photo. After completing the curls, we made sure to let them cool completely to set the curls fully.
Once cooled, barrel curls can be combed or brushed out and styled as desired.
Spiral Curls:
After finishing the barrel curls, we turn to the left side of the manikin and prepare to create the spiral curls. Once again, we separate a panel of hair to work with and further divide the panel into segments. For spiral curls, we continue by dividing the horizontal segments into slices of about half to three-quarters of an inch square.
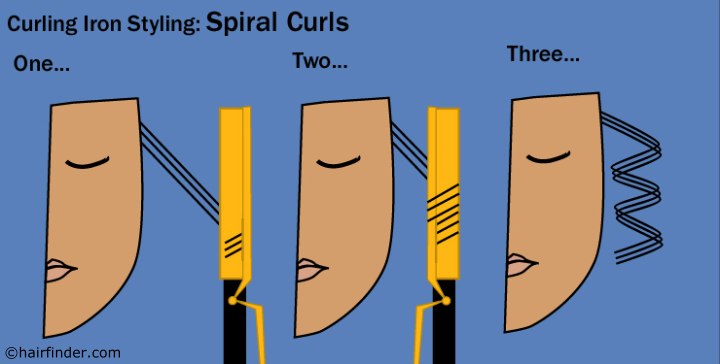
As with the segments for the barrel curl, we applied a small amount of hairspray and slid the segment into the curling iron. The difference is that we positioned the segment so that it was at the base of the iron, and we rolled the iron so that the hair wound at an angle, overlapping slightly until we reached the scalp.
Once more, we held the iron in place for a few seconds, and then unwound the iron a bit, enabling us to slide it out from the end of the curl. We continued with the next slice of the bottom segment and repeated the process, segment by segment, until we had fully curled the entire panel in layers of spiral curls. In addition, we divided the right half of the manikin's bangs into spiral curls as well.
You can see the spiral curl results in the photo. After allowing the curls to cool, you can finish the style as you wish, or simply use a pick or large-tooth comb to carefully separate the curls into thinner strips of curl. Lastly, another misting of hairspray and some gentle scrunching will define the curls and help the style last all night.