The Warm Iron Pin Curl (2)
Previous pageForming the Downward Curl
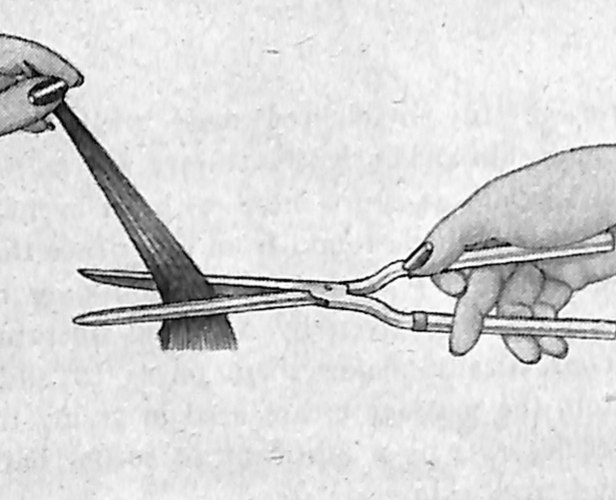
Figure 7 - To form a curl that is to turn downward, balance the iron with the thumb and fingers in the same manner described for making an upward curl (Figure 2). For the downward curl, however, hold the iron at the start of the curl so that the round prong is in front of the strand. (This reverses the iron position for the upward curl, Figure 2, where the round prong is held in back of the strand.) With the left hand, hold the strand straight up from the scalp. Place the round prong of the iron in front of the strand, about one inch away from the scalp.
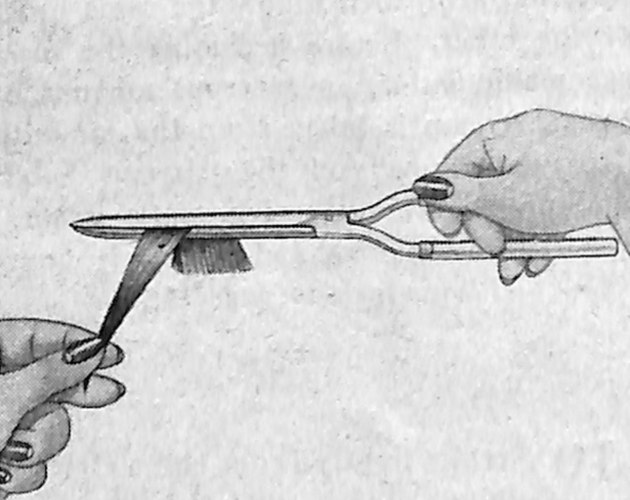
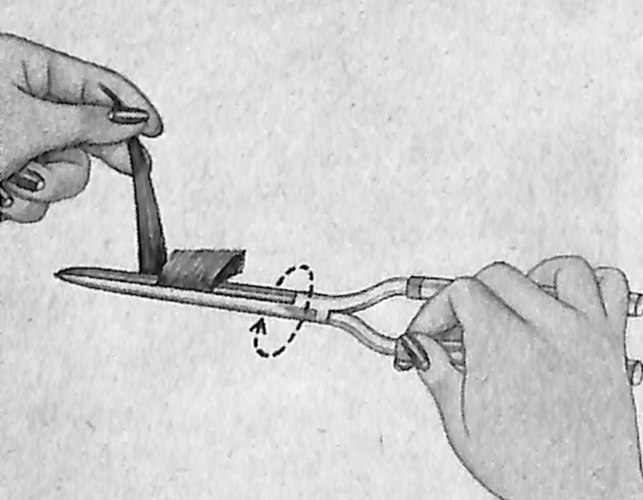
Figure 8 - Wrap the strand once around the round prong of the iron, directing the strand toward you and toward the point of the iron. Turn the right hand, simultaneously, to turn the round prong of the iron away from you and close the iron.
To Form Strong Nape Ends
Figure 10 - Nape ends are wound in the same manner described above for upward and downward curls, except that the hair is manipulated around the tapered point of the iron where the circumference of the iron is the smallest. To finish a nape curl, play the iron and roll it in a continuous upward direction near the scalp, as illustrated.
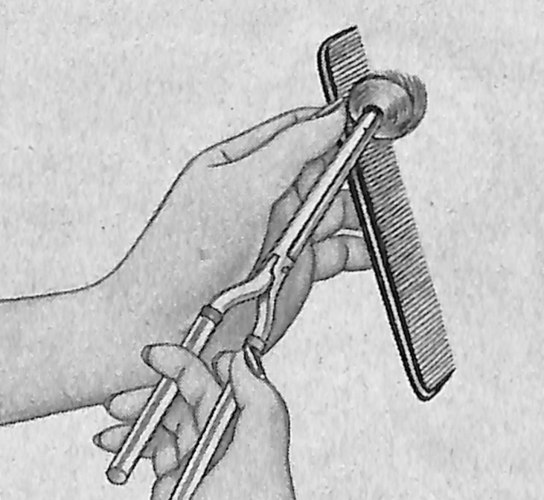
During this movement, place a comb under the curl to protect the scalp. Be sure that the comb is of a non-inflammable material. At the completion of the curl, the tip end of the iron touches the comb, as sketched, so that the pin curl is as flat and close to the head as possible.
The Coiffure Pattern
The matron's hairstyle pictured was dressed with Warm Iron Pin Curls formed as described here. The arrangement of the curls in the coiffure pattern appears similar to those in any pin curl pattern. In the diagrams of the setting, Figures 11-14, note the use of both the upward and downward curls.
Figure 11 - The front section is squared off with side parts which are connected with a horizontal part across the crown-top. Warm Iron Pin Curls are placed in four horizontal rows. Curls in the two foremost rows are directed downward and are formed with the technique outlined in Figures 7-9. Curls in the two rows nearer the crown are upward, fashioned in the manner described in Figures 1-6.
Figure 12 - On the left side, the part across the crown-top is continued down to a point on a level with the top of the left ear. Warm Iron Pin Curls are placed in four vertical rows. Curls in the first two rows are directed downward. Curls in the two rows nearer the back are upward.
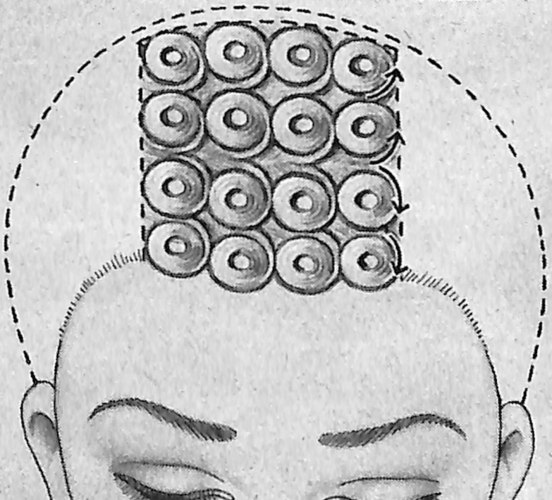
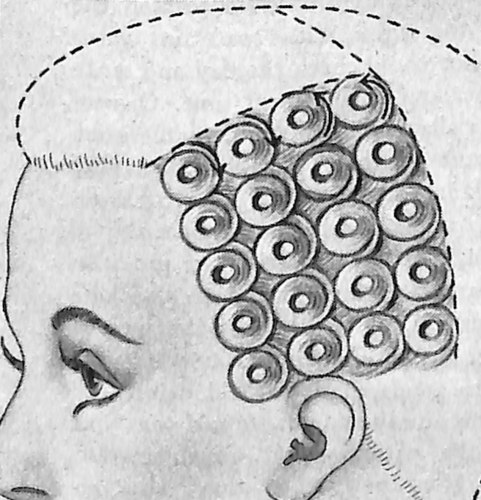
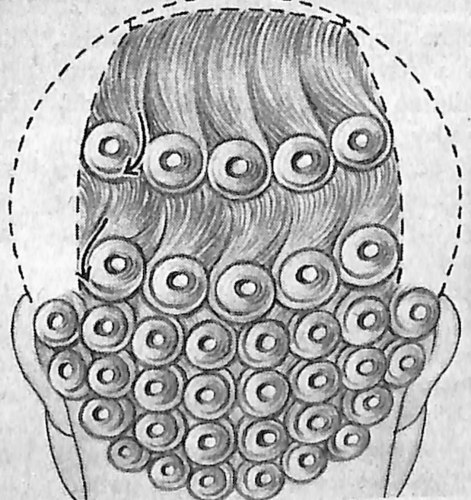
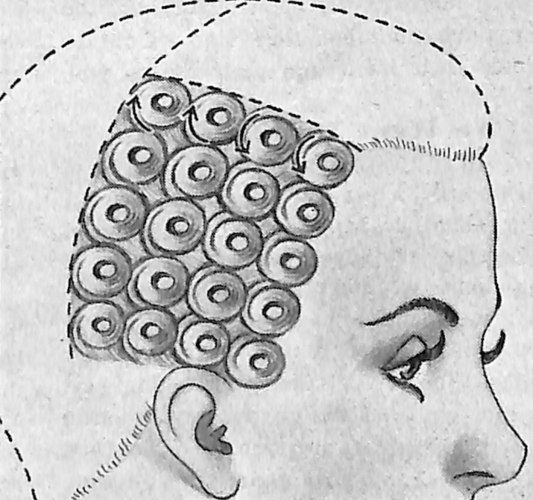
Figure 13 - In the upper back section, the ends of the hair are set in Warm Iron Pin Curls, forming two rows of long-stemmed downward curls, as sketched. The remaining nape ends, all downward, are directed toward the ears from center back.
Figure 14 - On the right side, the cross-crown part is continued down to a point level with the top of the right ear. Warm Iron Curis are placed in four vertical rows... those in the first two rows directed downward, and those in the two rows nearer the back directed upward.
Source: Mrs. Jeannette Johnson - Modern Beauty Shop - September 1944.
See also:
How to style hair
Large pin curl styling
Finger waves, pin curls and barrel curls