How to Cut a Short Stacked Bob (2)
Previous page
Cutting the Hair
Executing the cut in question is generally a straightforward proposition. Start by sectioning the hair into the standard seven-section parting. See here for instructions on the seven-section parting.
The Front/Fringe:
Once the hair is sectioned and the perimeter is left free, you can begin shaping the desired silhouette and go from there. The first step is deciding whether or not the hairstyle will include a fringe (bangs). Optimally, this decision should have been made well in advance of beginning the cut, but defining the bangs area, if any is to exist, is the first item on the agenda.
If there isn’t going to be a fringe section, you should cut a half-inch segment in the front/center of the face to the maximum length desired for the cut. Work from left to right and cut in addition half-inch segments until you reach the sides of the face. Remember not to cut the initial guides too short. You can always trim a bit more off, but growing it back takes time.
The Sides:
When it’s time to move to the sides of the head, you will need to let down only the lower half of the side sections initially. Depending on the texture of the hair, you may need to undercut the lower half of the side sections in order to prevent the sides from being too bulky. To do this, you simply want to cut the lower half of the section in a short taper, almost as though you were cutting a men’s traditional cut.
Once the undercutting has been completed, let down the remainders of the sides in half-inch increments and cut them using a curved cutting line, making the length slightly longer with each successive layer. This will ensure that the ends of the hair curl under more easily when you style the cut afterward.
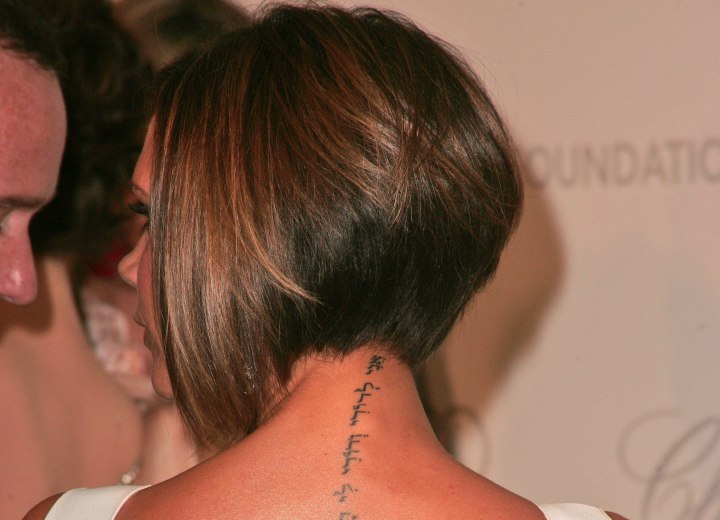
The Crown and Nape:
When it's time to cut the crown and nape sections, you may want to do a preliminary crop of the hair to create the surface "weight line" that will carry the look of the rest of the cut. Let down the crown sections and determine the path you want the "line" to follow through the crown section. Cut the weight line starting in the center of the crown and work using the left-then-right pattern used in the front of the head. The goal is a curved line that meets with the sides in a progression of length.
Once the weight line is established, you can begin layering the lower crown and nape sections. Comb the hair in sections, starting at the center back and cut the hair using a decreasing angle to form shorter lengths as you progress from the crown to the neck. Go from left to right, and then work your way down, segment by segment in order to create the stacked layers you desire.
Styling:
Once you've completed the cut, all that's left is the styling. You can blow-dry the hair using a round brush to create soft, curved lines and encourage the under-turning of the hair ends in the bob along the sides of the face. Use a smoothing serum if you need to control flyaway strands, or use a styling gel to pump up the volume in the crown section (along with redirected airflow from the dryer).
Once dry and styled as desired, you can use a light mist of hairspray and a gentle pat (or the flat of a comb) to add a smooth finish to the look.
©Hairfinder.com