Mini-Makeover: Cut and Color
A few weeks back my neighbor asked me about helping her with her hair. She’s a teacher and wanted a new look for the Summer break. So, we sat down and talked about options. She was pretty open to suggestions, so I suggested going shorter with a stacked bob/swing cut, and she readily agreed. The one thing she did want for sure was color.
The desired color was a rich, dark red-auburn, but her natural color was a dark chocolate brown – almost black – and she had had it colored a red previously, but since she didn’t like the way that had turned out, she used something else to cover it up. Knowing that I would need to know what she used, I asked her, and she told me that it was a “box color” from
The Surprise:
Not all make-over processes go as expected, and this one was certainly a surprise. Knowing that we were going to want some significant lift, I mixed powder bleach/lightener with 30-volume peroxide developer. I applied the bleach carefully to the hair, making sure not to apply it directly to the scalp. (I used an additive to make sure it was safe for skin contact, and the patch test was negative, but I didn’t want to take any chances.)
I watched carefully as the hair nearest the scalp began to lighten. However, about three inches down from the scalp, the hair had NO change in color at all. Rather than risk over bleaching the hair near the scalp, I shampooed the bleach out and rethought the process. I opted to go with foils on the dark ends in the hopes that I could lighted these target areas.
The second bleaching process was no more successful than the first, even though I also used heat on the foils to speed up the lift process. My only idea was that this was the fault of whatever product she had used previously, which I suspected had contained a vegetable dye, which can cause this kind of problem.
In a final attempt to lighten the dark hair to some way match the hair at the scalp, I purchased a color-remover kit that specified that it would work on henna colors as well as standard color. (The hope was that if it could penetrate the vegetable dye and lift it, then we could have the color balanced and be good to go.)
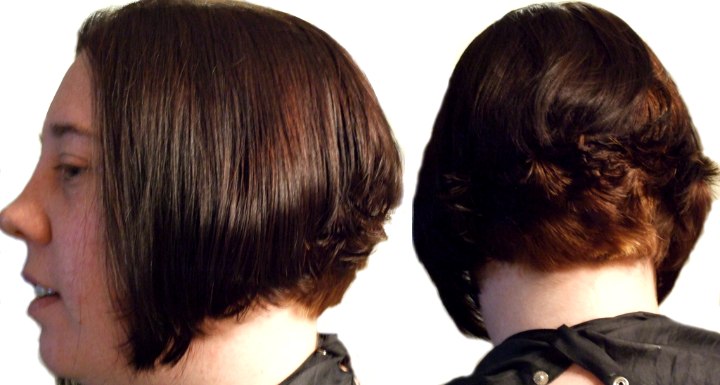
The color remover did work, just not as well as desired, only lifting the color by about 2 levels (after processing as directed for an hour). Our final decision was to try to go ahead with the darker color and see if the results would be sufficient. The final verdict was that the color wasn’t bad, it just wasn’t what we’d wanted initially, and it had the dramatic two-tone look. (See accompanying photo.)
The Resolution:
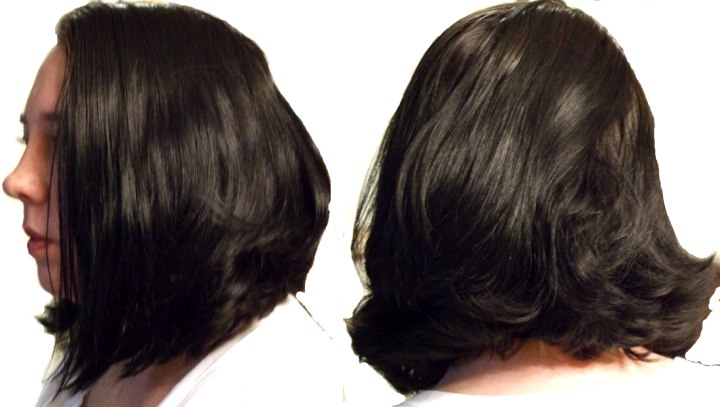
So I suggested we wait a couple of days and I would take her back to something close to her normal shade and we would work on growing out the problem color portions. We proceeded to use the dark neutral brown over the color and achieved a shade that made her happy, it’s dark, and more even and she has that hint of red she was looking for in her color. With that finished, we were ready to cut.
The Cut:
Knowing pretty much what I wanted to do, I took her straight from a shampoo and conditioning to the chair and began to work on the cut. I started in the center back and made my guide cut. I over-directed the hair at the nape of the neck up to the occipital bone and held the hair between my fingers. I repeated this moving side to side until I had established a two-inch section with a strong weight line and steep layers underneath.
I continued free-hand, along the left side to create my desired angle of descent toward the face and chin. Then, moving to the right I pulled pieces of the left side and right side back to gauge the proper lengths at varied points, so that I kept the two sides even. Once the basic lengths were established, I began combing the hair back at an angle to the nape and cutting it to establish some smoothness of layering.
Once all the layers were established I finished the cut by going over the ends of the hair with a point-cutting technique, just to slightly diffuse the cutting line along the bottom edge of the hair.
I finished the look by applying a liberal amount of "The Cream" by Paul Mitchell and giving the cut a good blow-out with a round brush to bend the ends under.
©Hairfinder.com