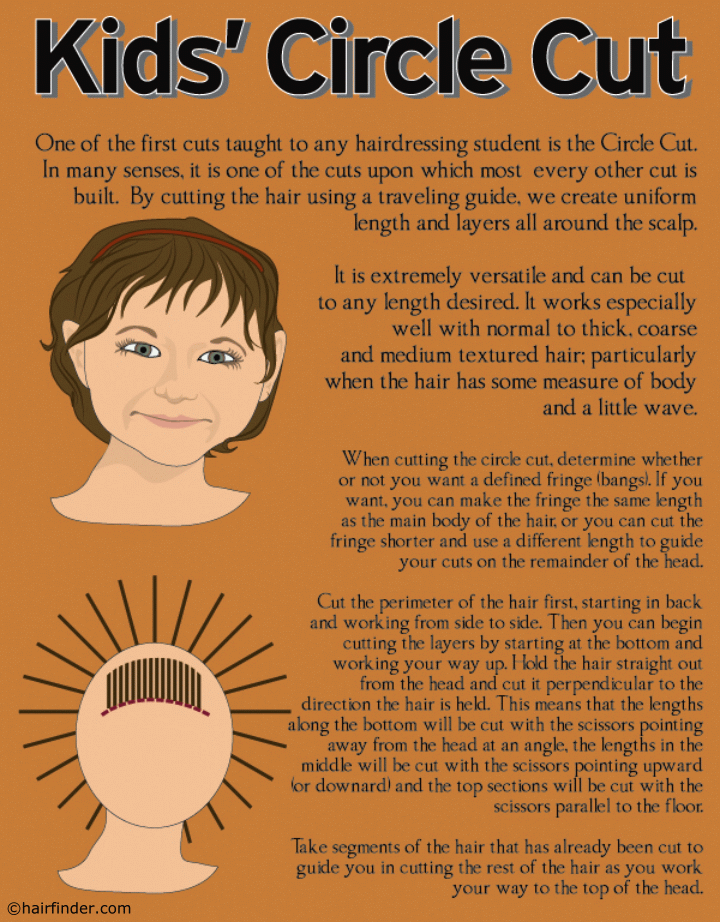
How to Cut a Circle Cut
One of the techniques every hairdressing student learns early on is the circle cut. This versatile method serves as a cornerstone for many other haircuts, making it an essential skill to master. The circle cut creates uniform length and seamless layers that flow naturally around the head. Its adaptability allows it to be tailored to any desired length, from short to long.
Before beginning the cut, decide whether you want bangs. The bangs can either blend seamlessly with the rest of the hair by matching its length or serve as a contrasting element by being cut shorter.
Start by establishing the perimeter of the haircut. Begin at the back of the head and work your way toward the sides, ensuring even length all around. This step sets the foundation for the layers that follow. Once the perimeter is complete, move on to cutting the layers. Work from the bottom up, taking small, manageable sections to maintain precision.
As you cut, hold each section straight out from the head and cut the hair perpendicular to its direction. This means that when cutting the lower sections, your scissors will point upward (or downward), while the top layers will be cut with the scissors held horizontally, parallel to the floor. This technique ensures a smooth, blended transition between layers.
To maintain consistency, use previously cut sections as a guide as you progress toward the crown. This step-by-step approach guarantees that every layer aligns perfectly with the one below it, creating a harmonious, circular shape. For added refinement, slightly elevate each new section to connect it seamlessly with the previous layer, ensuring no harsh lines or unevenness.
See also: More Hairstyles for Little Girls