Multi-Braid Mixed Style
How to Create this Complex Style
When most people think of wearing a braided hairstyle, the first thing that comes to mind is a classic style like the French braid, or Herringbone braid. But braided hairstyles can be much more complex and intricate, taking hours to complete.
Few women have the time or inclination to sit through hours of weaving and pulling to get a hairstyle they might want to change tomorrow. So, we've come up with a braided hairstyle that can be accomplished in less than half an hour.
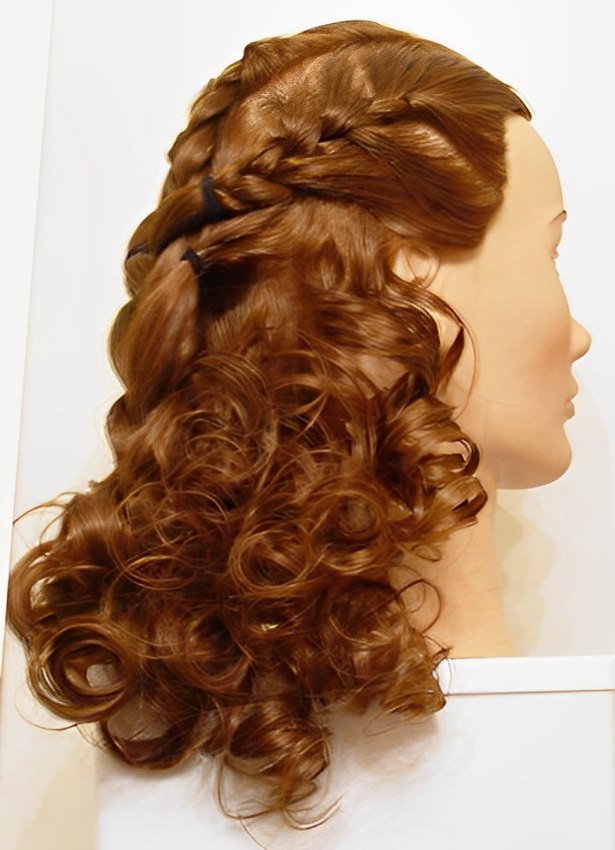
We begin our demonstration with a manikin with dry hair that has been brushed smooth. The manikin's hair is then lightly misted with a leave-in conditioner to moisten and make it easier to handle while sectioning and braiding. The moistened hair is divided into three panels - on the left side, top, and right side - from the face to the crown of the head. The hair at the back of the head (from the center crown to the nape of the neck) is then secured with a snag-proof elastic band.
Using the French braid technique, braid each of the front sections of the hair beginning in the center section. Continue the braid as far as possible while keeping a smooth-looking braid. Clip the ends of these braids forward out of your way and move to the crown and nape area of the head.
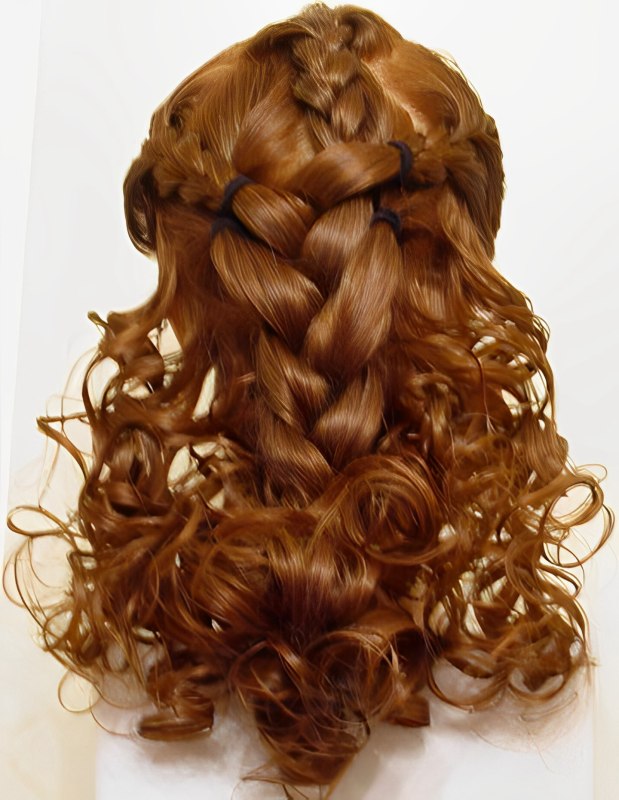
At the back of the head, isolate the center section of hair by leaving down a 1.5 to 2 inch perimeter of hair at the hairline. Clip the hair at the perimeter to keep it separate. Take the center section and divide it evenly into two vertical sections. Choose one to begin working with and tie the other out of the way. Braid these vertical sections in the French braid technique, once again continuing the braid as long as it can be maintained smoothly.
With these initial braids completed, we continue the style by taking the foremost three braids and weaving them into a three-strand braid. As this braid reaches the bottom of the two back braid panels, pick them up and incorporate them into the central braid. Tie the ends of this braid with a snag-proof elastic band and comb out the end of the braid to make it smooth.
Creating the Style: Curls and Finishing
Now that we've completed the braiding portion of the style, we can release the clips holding the hair along the perimeter. We finish off the style by making 1/2-inch slices in the perimeter hair and forming spiral curls using our curling iron. Be sure to mist each slice of hair with hairspray and allow the curls to cool completely before handling them.
Once the perimeter hair has been curled, we can add curls to the tail of the central braid by taking slices and forming barrel curls using the curling iron, alternating in different directions. Allow these curls to cool, and then run your fingers through the curls on the perimeter and tail to separate them and style them as desired.
Mist the whole head with hairspray and gently pat down any flyaway strands, ensuring definition in the cascade of curls at the nape area.
The finished look is detailed and dressy, suitable for an afternoon occasion. It can also be adorned with small jeweled pins or other accessories for evening or more formal wear.
See also: More about Braiding