Bleached Foil Highlights Retouch
A: Retouching bleached foil highlights requires a systematic approach to ensure even processing and prevent over-lightening of previously highlighted sections. The key to success lies in proper sectioning, timing, and having the right tools ready before you begin.
You're absolutely right to start at the back of the head. This is standard practice because the back sections typically take longer to process due to lower scalp temperature and less heat retention. Begin by dividing the hair into three main sections: the back crown area, left side, and right side. Depending on the density of your hair and how quickly it processes bleach, you may need to create smaller subsections within each of these areas. This prevents you from getting overwhelmed and allows for better control over timing.
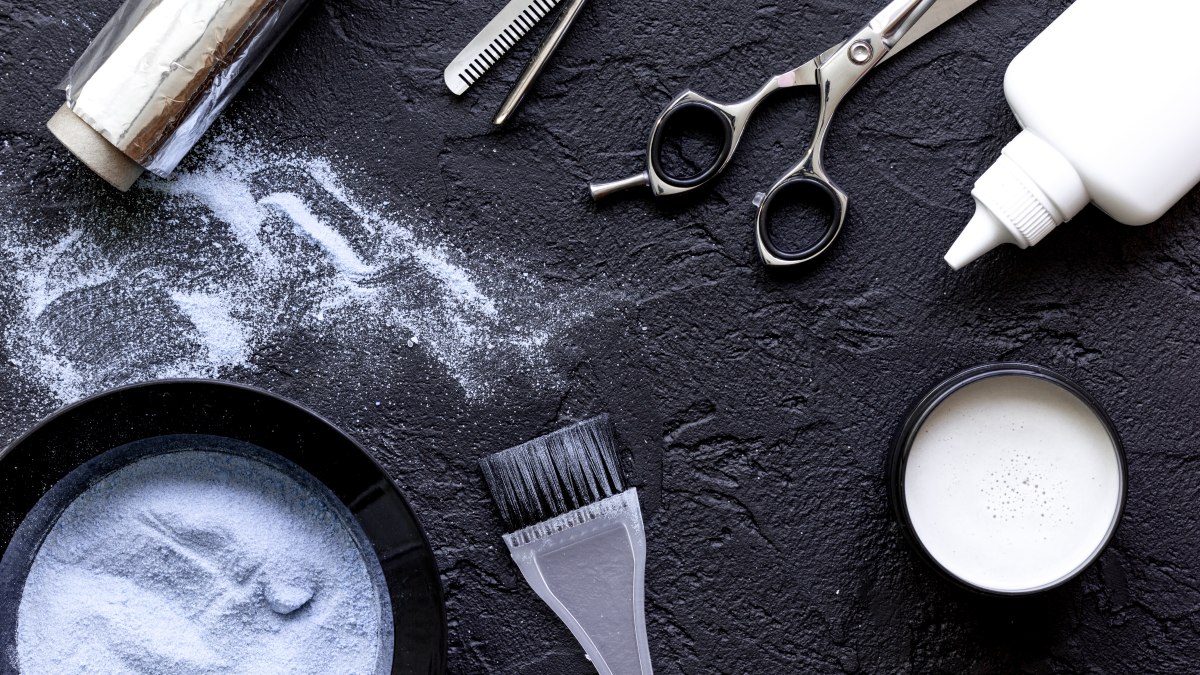
2. Essential Tools and Setup
Before you start applying any bleach, make sure you have all your tools within easy reach. You'll need your standard foiling supplies, plus some additional items that make the retouch process much smoother. Prepare a spray bottle filled with a diluted shampoo and water mixture (about a 1:4 ratio works well), another spray bottle with clean water for rinsing, and several clean towels for blotting.
3. Application and Processing
When applying the bleach, work from the bottom of each section upward. This technique ensures that the hair closest to the scalp, which processes faster due to body heat, gets the bleach applied last. Use your foils to completely isolate each strand you're working on. This prevents the bleach from spreading to areas that don't need retouching and gives you better control over the lightening process.
Keep a close eye on how quickly each section is processing. Hair that was previously highlighted will often lift faster than virgin hair, so timing becomes crucial. Check your sections every 5-10 minutes, looking for the desired level of lightness.
4. The Rinsing Process
Here's where your preparation really pays off. When a section has reached the right level of lightness, you don't need to rush to a shampoo bowl. Instead, spray the processed hair generously with your shampoo mixture and work it into a light lather. This immediately stops the bleaching action and begins the cleansing process.
Next, blot the lathered section thoroughly between the folds of a clean towel. This removes most of the bleach and suds. Follow up by spraying with clean water and blotting again to rinse away any remaining product. The towel technique is gentle on the hair and prevents you from having to move around too much while other sections are still processing.
Continue this spray-lather-blot-rinse process as you work your way through all the sections that need retouching. The beauty of this method is that you can take care of each area as it finishes without disrupting your workflow or risking over-processing in other areas.
5. Final Steps and Aftercare
Once you've completed the retouch process on all sections, it's time for a thorough shampoo and conditioning treatment. Use a gentle, color-safe shampoo to remove any remaining bleach residue, and follow with a deep conditioning treatment to help restore moisture and strength to the hair.
Finish with a cool water rinse. This helps seal the hair cuticle and lock in the conditioning treatment while adding shine. The cool water also helps minimize any potential irritation to the scalp.
©Hairfinder.com
See also:
Is it possible to retouch your roots and highlights at the same time?
How long do highlights last and how often do you need to touch them up?