Progression Hairstyles
From Short to Long in Gradual Steps
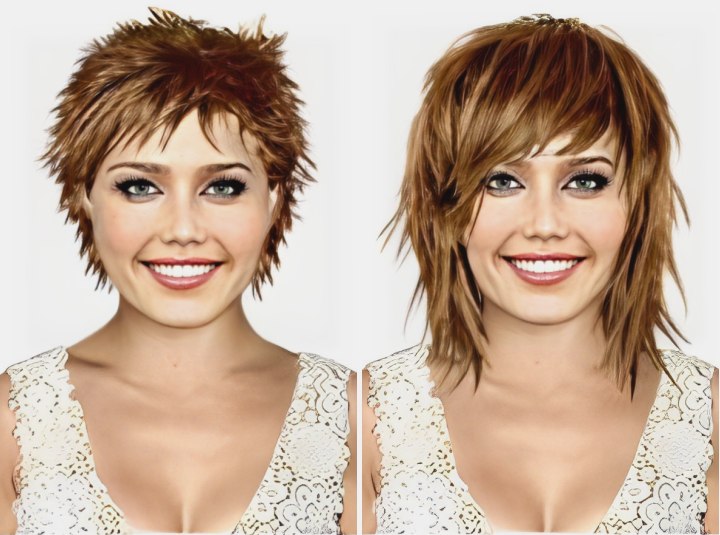
Many women who wear their hair short often feel that they are "stuck with" short hairstyles because they know it will take a long time to grow out their hair, and they think there's no way to keep it looking good at the stages between lengths. The secret is to look for hairstyles that are similar but feature different lengths.
Here, we show you four different haircuts that are all similar and can be used to take you from your short style to long hair in gradual, progressive steps.
Style One: Short and Sassy
This heavily-textured short hairstyle is razor-cut and scrunched to give maximum definition to the choppy layers. This is a popular short hair style, and many women choose this type of cut because it is easy to care for and maintain. However, because it is very short, some women think that it is a major commitment, not realizing that the stages of transition can make for a more rapid progress in changing their hairstyle.
Cut the hair in layers, working from the bottom up and starting in the center back and working back to front on each side as you go. Use the length of the bangs as your traveling guide for the top and crown area lengths and blend the lengths of these areas with the lengths cut on the sides and back.
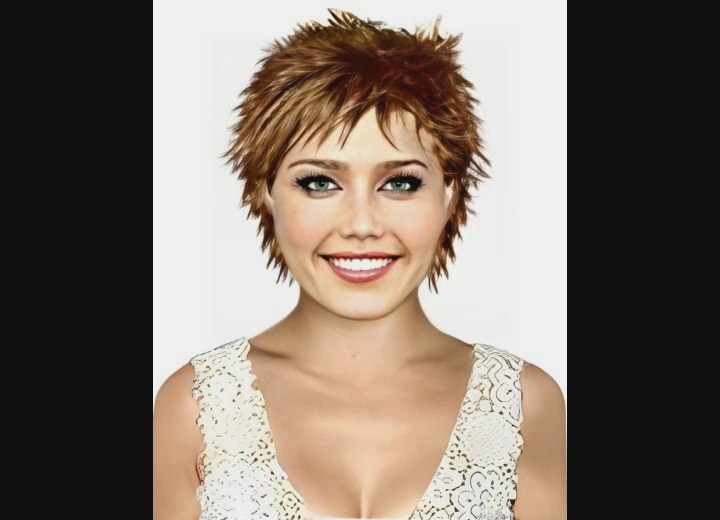
Once you've completed the base cut, go back over the head using the razor tool to texturize the layers and create a choppy, disheveled effect. The hair can be styled by blow-drying using a diffuser attachment and a foam wax/mousse product to give maximum hold and definition. If the hair is too "fluffy" when completely dry, simply moisten your hands with water and run your fingers through your hair to add some definition.
Style Two: Chunky Layers
This is a longer hairstyle that makes an ideal stepping stone when you want to progress from the super short hairstyle shown above. It's just as sassy, but the cut and layering are so similar that much of the subsequent "cutting" will consist simply of reshaping the lower parts of the hair to allow for the extra length. The style can be created with about 2-1/2 to 3 months of growth.
Work from the previous cut with the additional length growing out of it and trim the ends to ensure evenness at the perimeter. Make some additional cuts in the lower third of the hair to taper the layering more, since the new growth will have resulted in additional bulk at the bottom of the style.
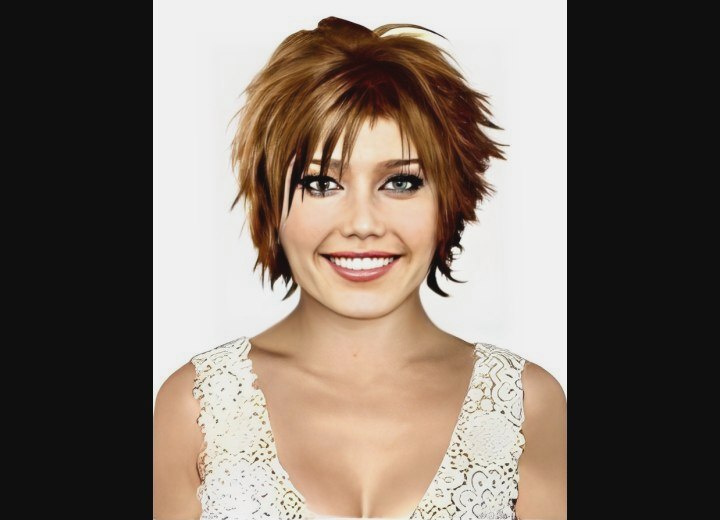
As you can see from the image, the majority of the bulk of the cut and what weight line there is should fall between the temple and ear level on the head. A few tapering strokes with the razor will emphasize the angle of the bangs cut, and after a little more texturizing in the top of the hair (although not too much, since we want to keep the length) the cut is finished.
Styling this is similar to the previous cut, except that in this case you will want to use a large round brush to create a smooth arc in the hair. Once the hair is fully dry, you can use a touch of styling wax/pomade to add some definition to the razor-cut layers and finger-comb the hair to the desired style.
Style Three: Smoothed Layering
In this third style, we see the effects of approximately 4-5 months of growth on the previous style. The top and crown sections of the hair have grown out. The lowest lengths of hair will have begun to reach the top of the shoulders, and the bangs area will have grown out to the eyebrow level or lower (depending on the starting length).

This cut will be created from the previous style by following the perimeter to ensure even length all around, and making a curved line up to the face to merge with the fringe area. Trim the lower quarter of the hair to keep the level of bulk in balance, and note that the "weight line" of the style has moved to the point at the middle and lower areas of the ears. Below that, the layers taper to a slight wispy look. Be sure to only use the razor to smooth the layers and transition from the midpoint of the head to the ends of the hair.
The cut would be styled using a blow dryer and a paddle brush to create smooth lines in the hair, blowing the length straight. As the hair approaches the "mostly dry" state, you can use a large round brush to flare out the ends of the hair if you wish, or to curve the ends under for a tidier, more controlled look. Use a light application of silkening/smoothing serum to add some sleekness and control any frizz and finger-comb the hair to direct locks as desired.
Style Four: Razor-cut Rocker Chic
This is a long-layered look that becomes achievable with another 6 to 7 months of growth. The haircut now features consistent bulk along the full range of the head top to ends and the layers are cut to be more random than a traditional long-layered cut. This allows the creation of a wild, tousled look that can also be styled smooth and sleek, with enough length to be worn up for more formal occasions.
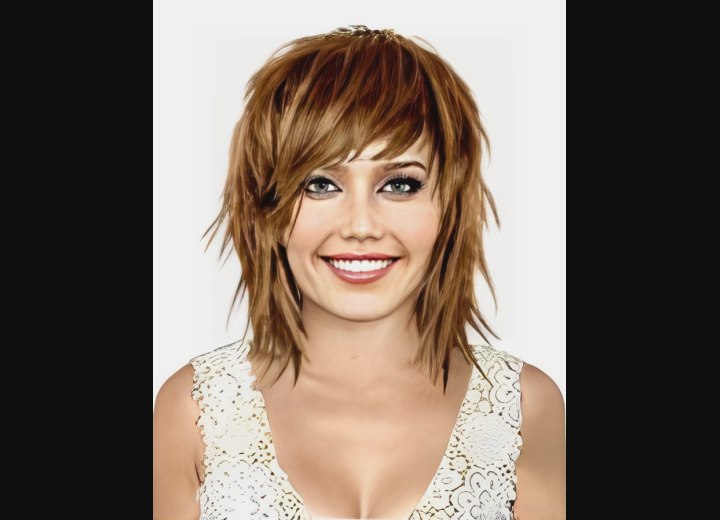
Once again, this cut has a perimeter trimmed to ensure even length from side to side around the back (or it can follow whatever line is desired). The fringe area is razor cut to create angled bangs that have softened ends. The length is layered to evenly distribute the bulk of the hair, and is texturized using a long sweeping slice along the length to give some added definition to the finished cut.
Style the cut by blow-drying using a paddle brush and styling the lengths straight in a downward and forward-angled direction. Apply a smoothing serum and styling gel/lotion while the hair is still damp (before drying begins). This will enable you to create smoother, defined tresses. Once the hair is dry, apply a small amount of pomade or styling wax to your fingers and pass locks of the hair through them to give added definition and separate individual locks.
When used in sequence, these four styles can ensure that you can progress from short to longer styles with minimal frustration from in-between stages. Just remember that you need to remind your stylist that you are planning to grow your hair out. If possible, have your stylist create a file on your hairstyle plans, showing the different stages and working out a timeline for you so that you can stay on track with the look you are trying to achieve.
If we can help women (and men) to understand how to plan for their hair growth progress, perhaps fewer people will be afraid of making changes to their appearance. Who knows, you may find you prefer shorter lengths. And if not, you'll have a game plan to take you from short to long again.
©Hairfinder.com