How to Blow Dry a Short Bob
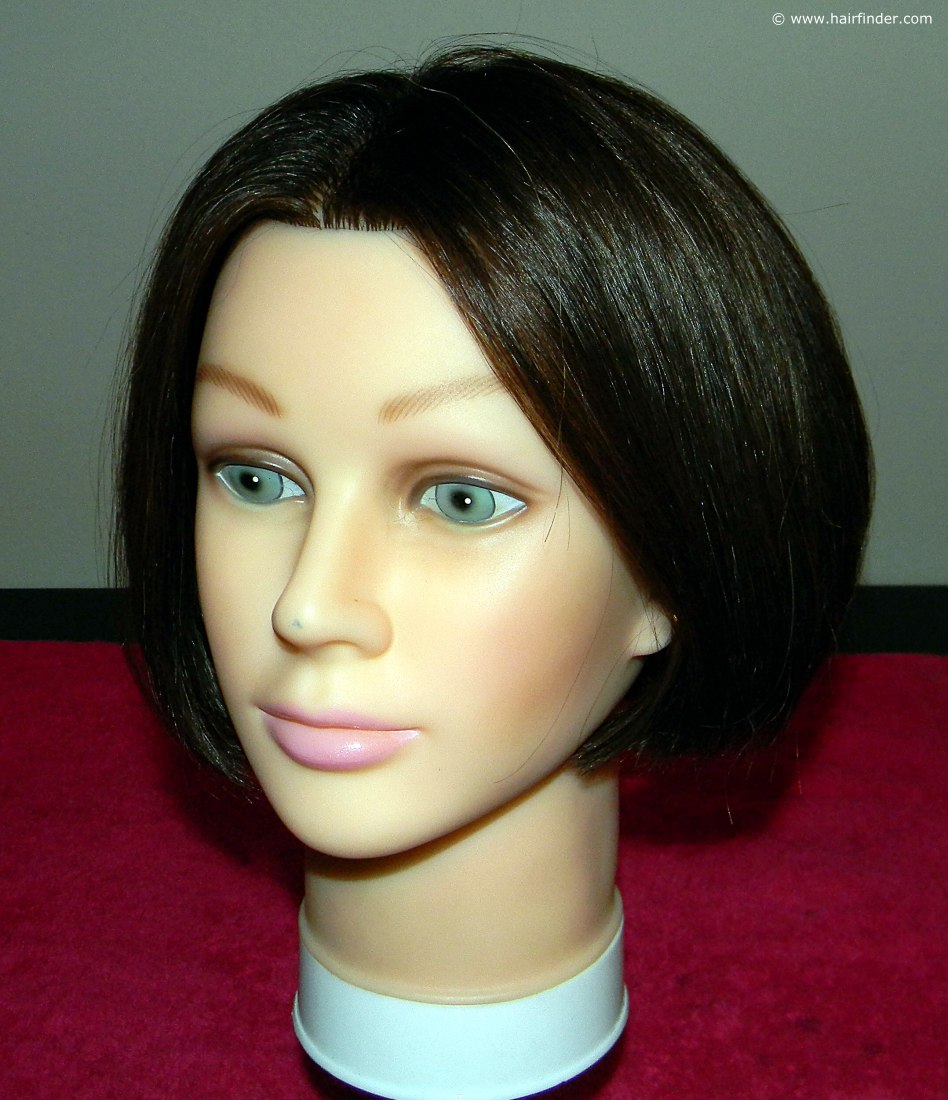
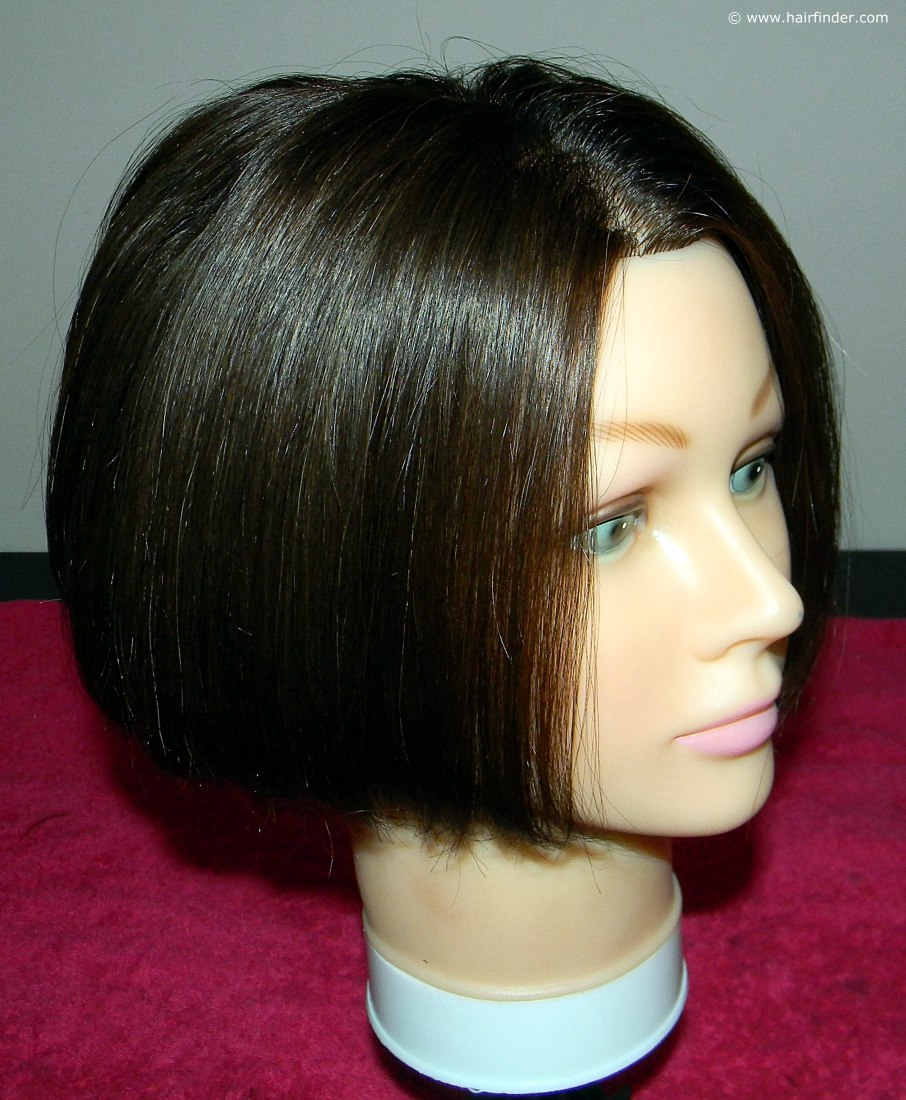
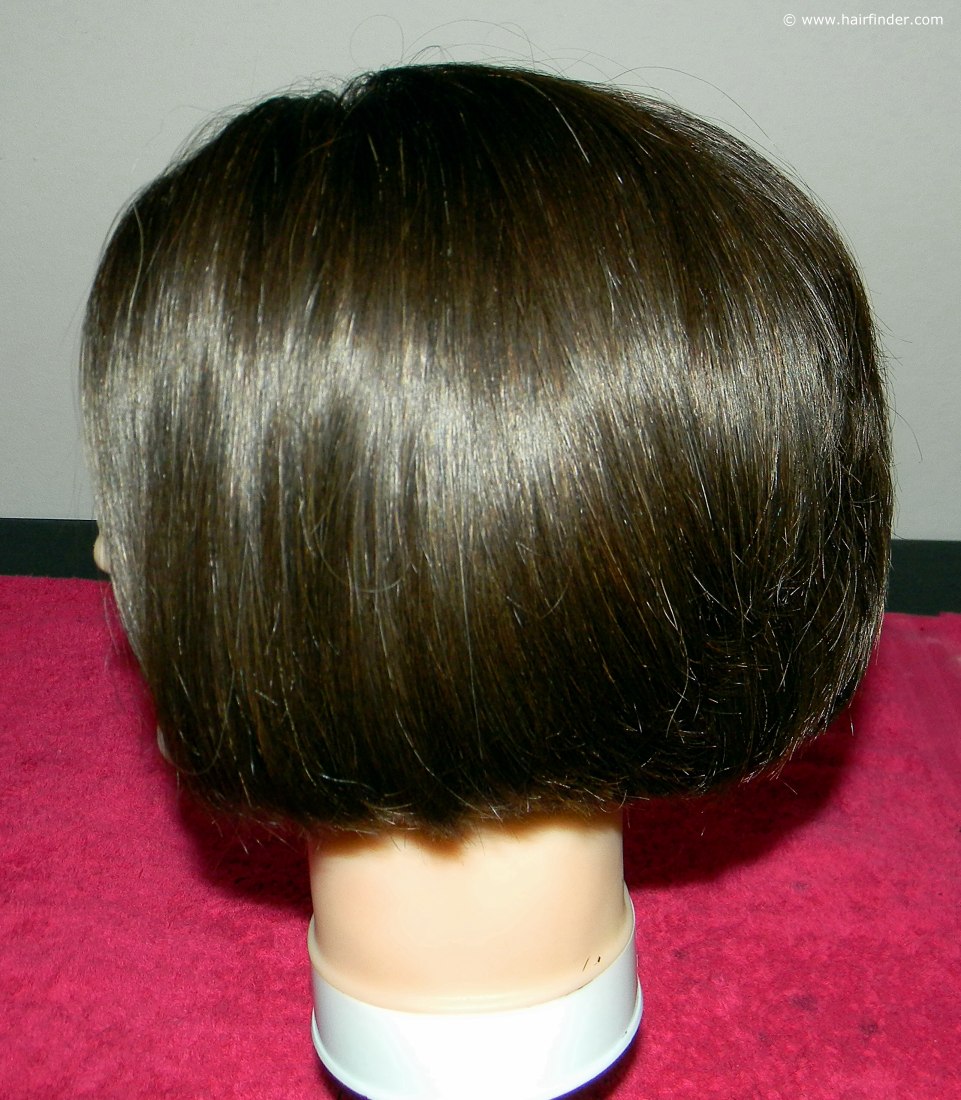
This tutorial shows you exactly how to blow dry the classic short bob into the quintessentially timeless style that the short bob was initially created for.This hairstyle is sleek and flawless, and works well with an oval- or heart shaped face and striking facial features. This style is feminine and grown up, but with a slightly playful twist.
1. What you’ll need: Blow dry brush, Heat protection product, Clips, Hairspray and hairstyling products.
2. Note that we’re working with wet, freshly washed hair. If necessary, spray a detangling product on to the wet hair, and comb the hair out to get rid of any tangles or knots. Spray the hair with a heat-protection spray to protect it from the heat-styling devices that we’ll use in this tutorial. It is paramount to always use a heat-protection product when you’re applying heat-device techniques on a client’s hair.

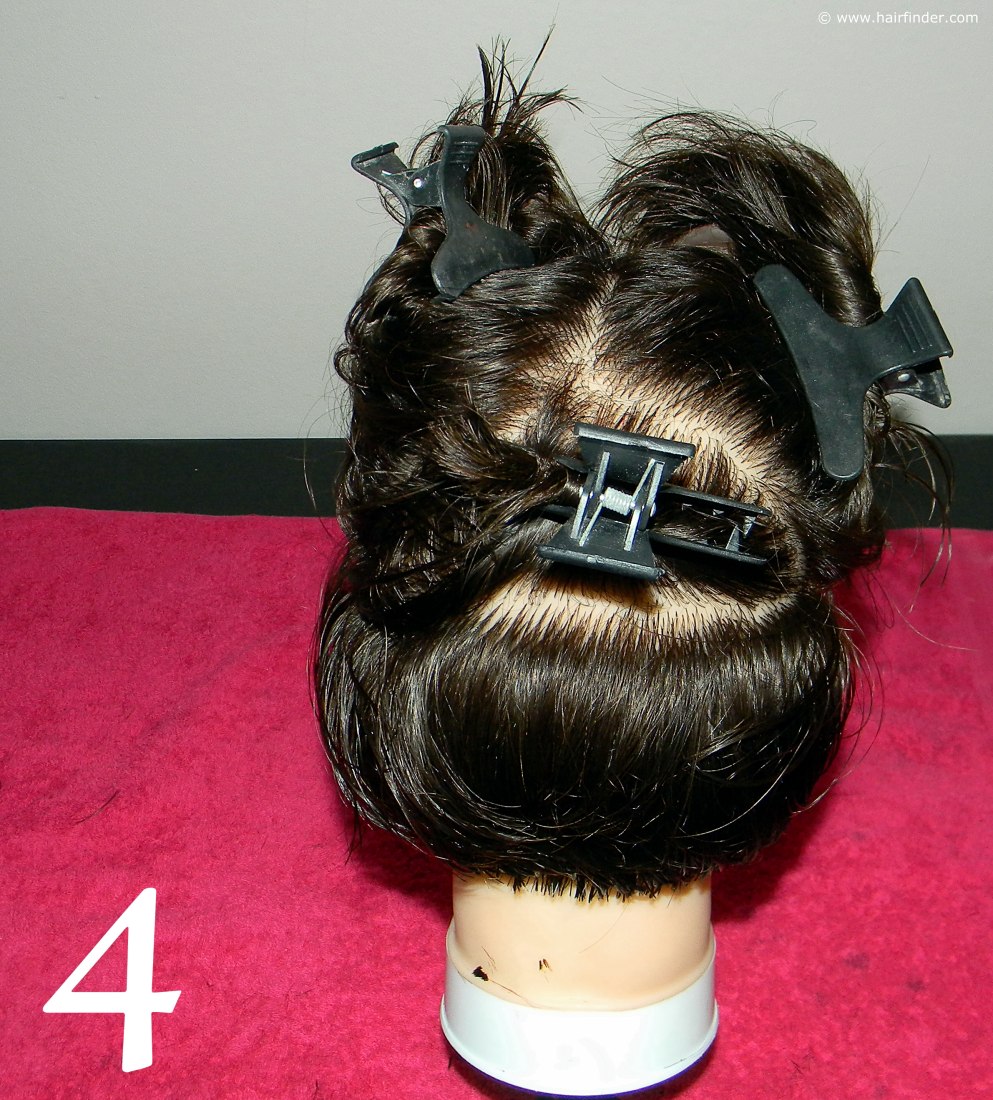
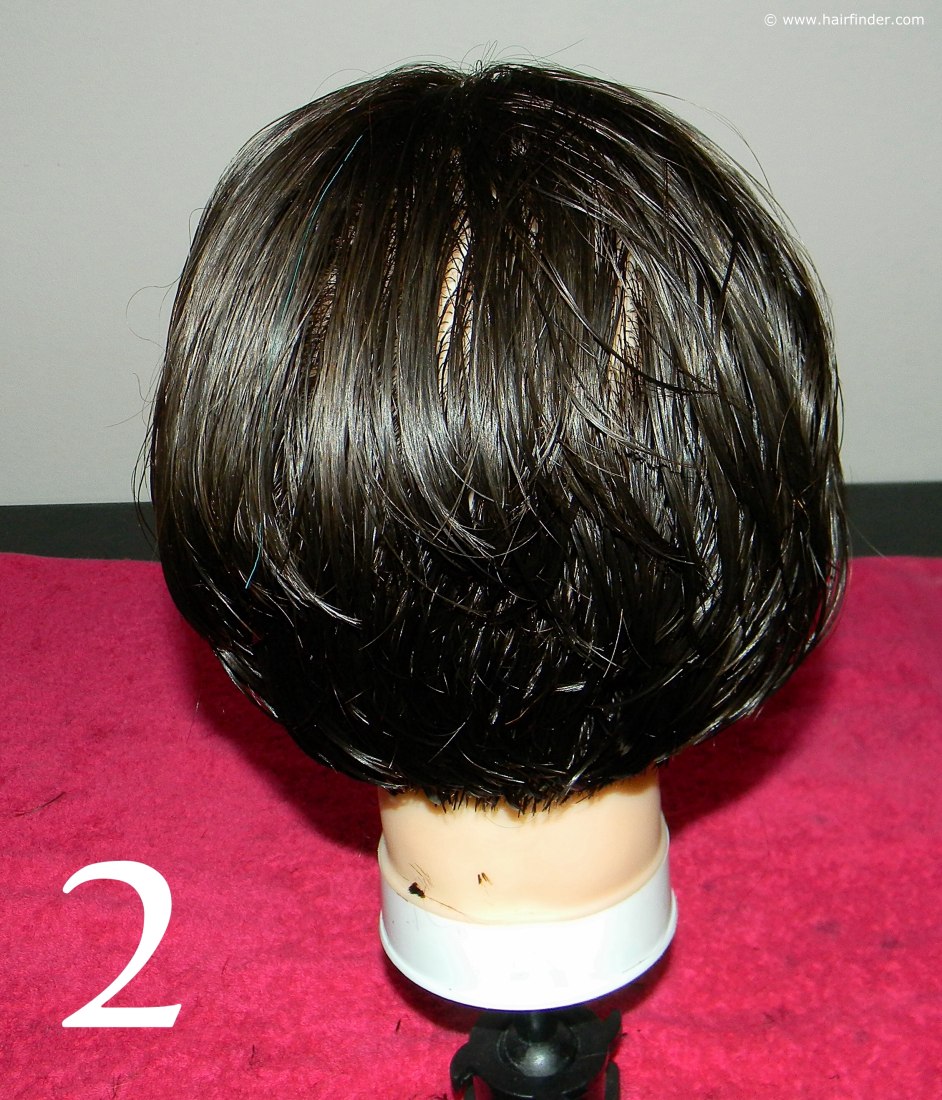
4. Clip the hair into three sections, two equal sections on top of the head, and a larger one at the back. Leave a two inch section out at the bottom, which you will now proceed to start blow drying. Always be careful when working at the nape of the neck of your client. There is limited working space in this area as the hot air easily comes into contact with the neck area.
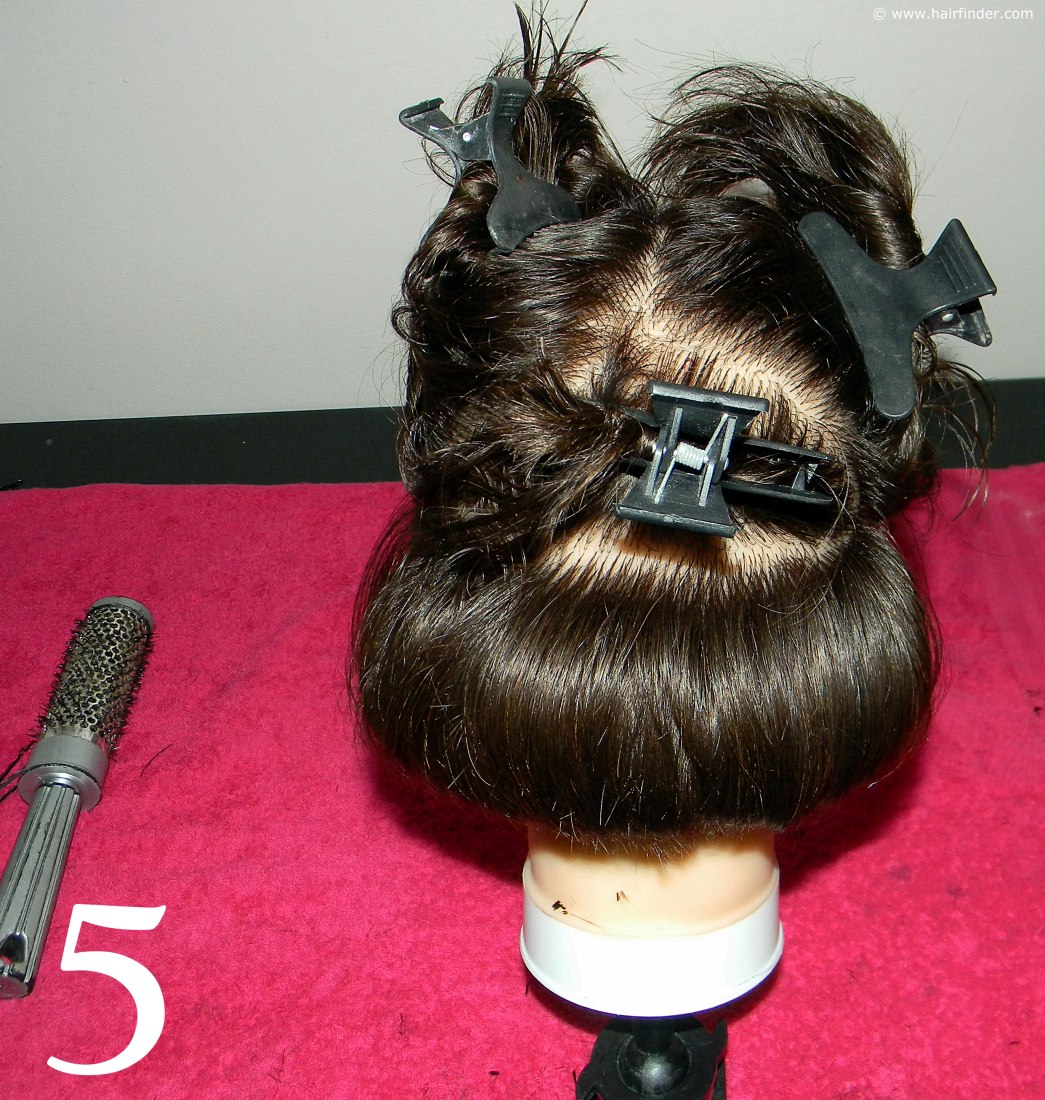
 5. Use your round blow drying brush to blow dry your first section of hair. Turn the blow dry brush in a continuous fashion around in your hand while using the blow-dryer to dry the hair curled around the brush in the
other. Blow dry the section in this manner until it is 100% dry and styled into a curve.
5. Use your round blow drying brush to blow dry your first section of hair. Turn the blow dry brush in a continuous fashion around in your hand while using the blow-dryer to dry the hair curled around the brush in the
other. Blow dry the section in this manner until it is 100% dry and styled into a curve.6. Continue the above procedure all the way through the back section until you reach the top of the head.
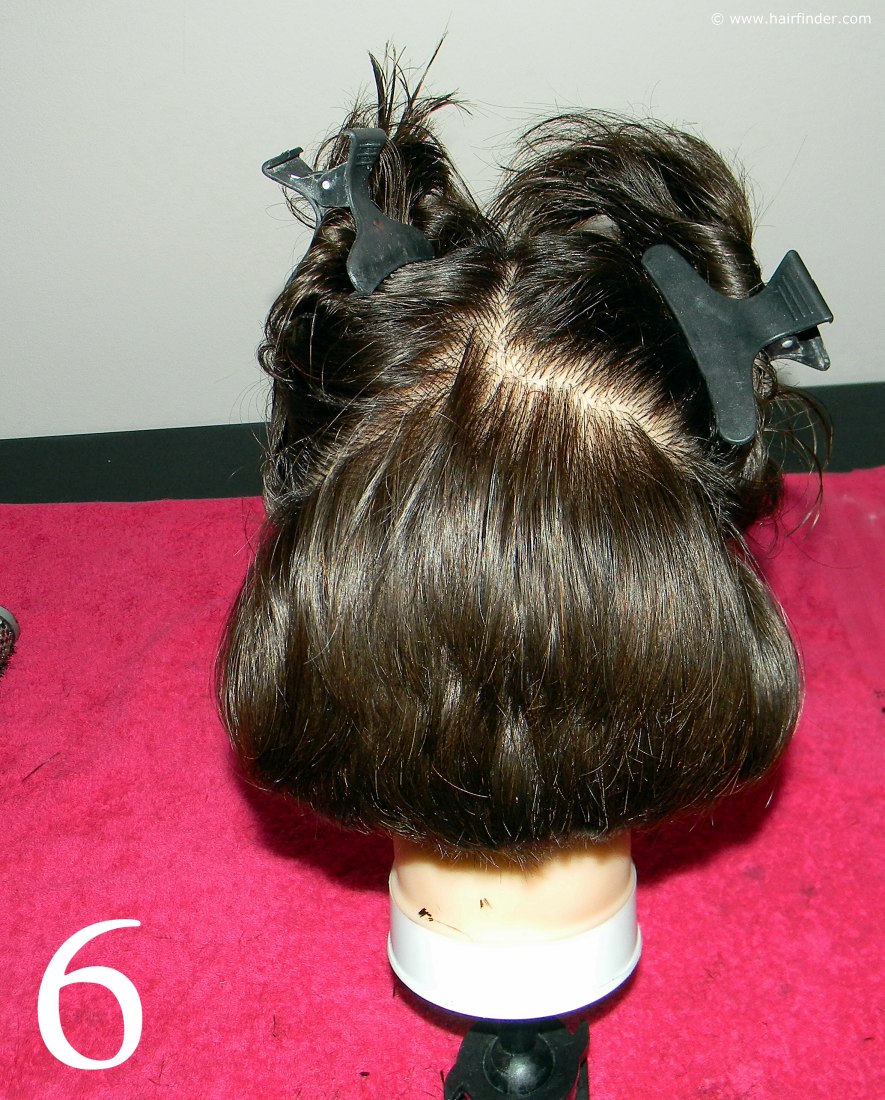
7. Proceed to the side of the model’s head. Note the classic form and founding silhouette of the bob that you can start to see at the back of the model’s head.
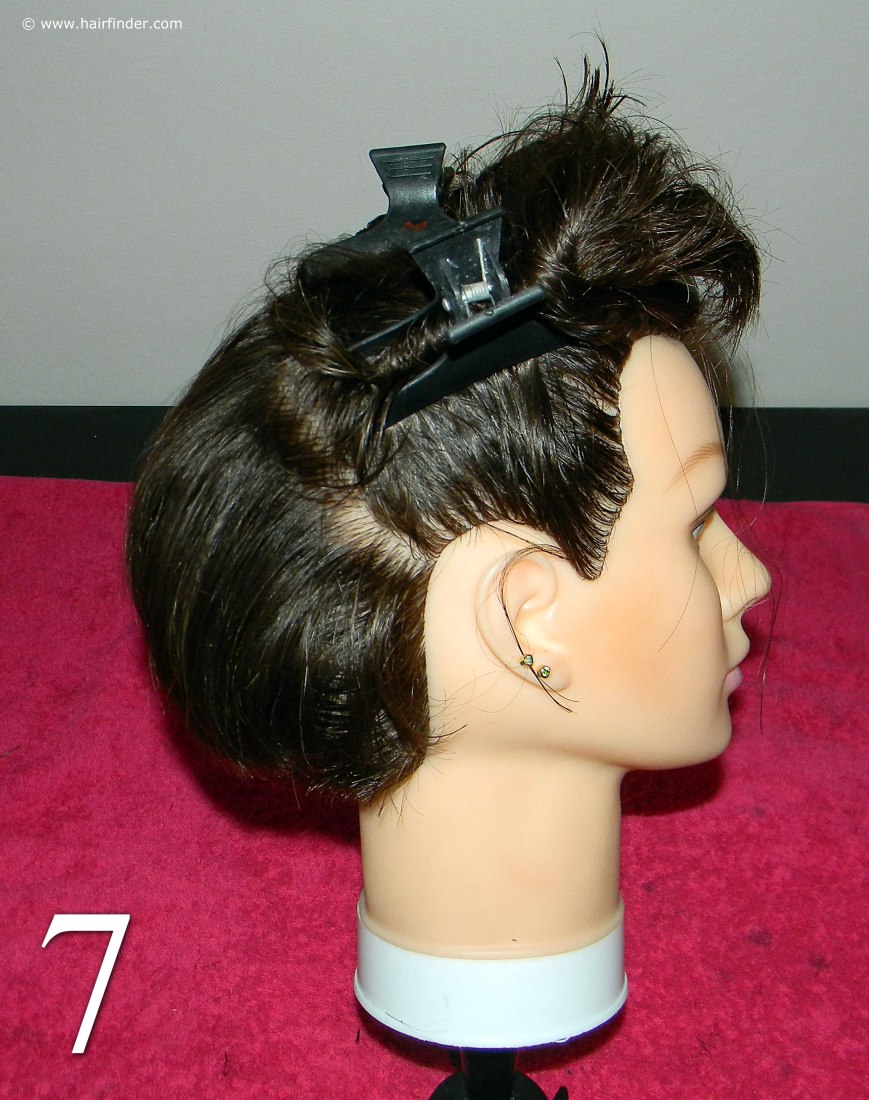
8. Loosen the first side section and draw a parting at the bottom of the section to separate a two inch segment. Clip the rest of the hair up again, and start blow drying the hair in the same manner that you did at the back of the head. On the side sections, you may blow dry the hair with decreased volume, as you don’t want the curve of the hair to be excessive around the face.
Round hairstyles often make the face of the model look round as well. Don’t worry if it looks too round for you at this stage though; we’ll be using a flat iron to correct the side sections at the end of the tutorial.
Next Page