Styling Without Appliances
We're very lucky to have so much available today in the realm of hair care and styling appliances. There are curling irons, flat irons, hair dryers, hot combs, hot rollers, crimping irons, etc. There are items to do almost anything you can imagine to your hair. This wasn't always the case. In days gone by, our foremothers had to style their hair without any appliances.
As cosmetologists, we have to learn to style hair in some pretty basic and seemingly primitive ways. But, if the truth be told, once you master these techniques, they can be a valuable skill. With nothing more than a comb, a handful of pins or clips, and some styling product, you can create some beautiful looks for yourself.
Finger waves:
If you've seen the hit movie "Chicago" and admired Renee Zellweger's lovely hairdos, but wondered how she could have managed it locked in her jail cell, the technique is known as finger-waving.
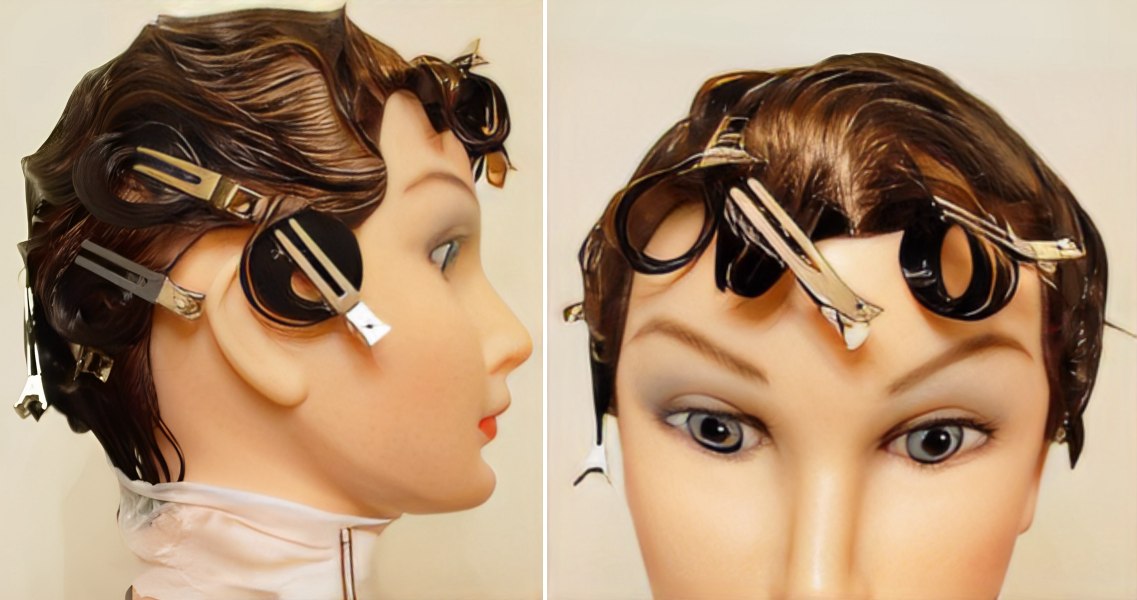
In finger waves, you take wet hair, with styling product added liberally, and you comb the hair into ridges and curves with your fingers. Decide where you want to begin the waves and lay your middle finger flat across the hair. Then, take your comb, press it against the side of the finger, and in one-inch sections, drag the comb (teeth straight down) sideways along the finger until a ridge forms. Without lifting the comb, lay it flat against the scalp.
Next, press your index finger down beside the middle finger and gently press the ridge to hold it tight. Turn the comb teeth back to vertical and comb the hair out and curved back in the opposite direction. Shift your middle finger down so that you can continue building the ridge as far as you want. You should end up with a ridge of hair moving in one direction and a "C-shaped" wave in the opposite direction.
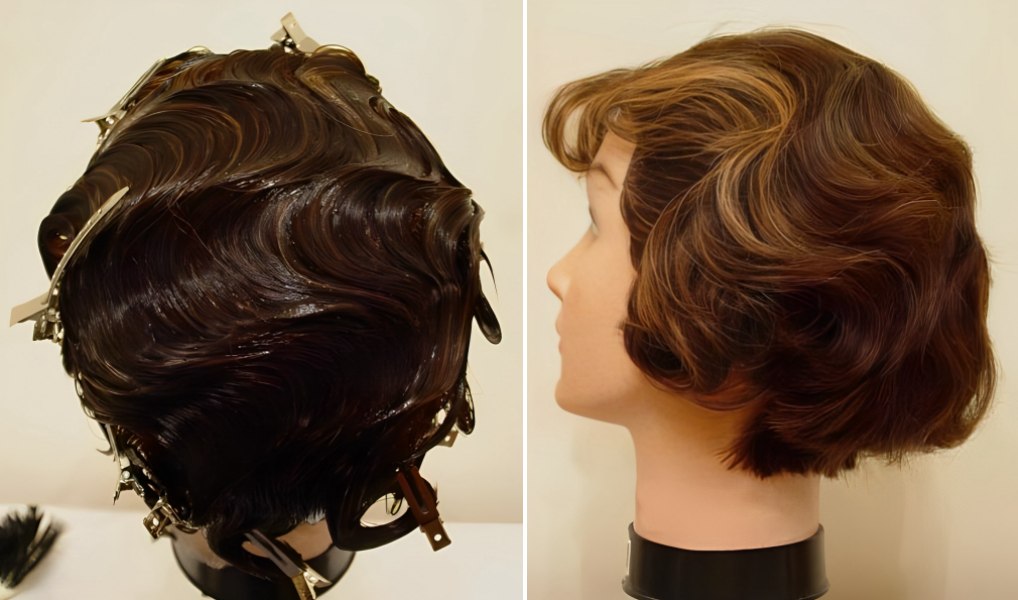
Next move down along the hair about one or two finger-widths and start making another ridge in the same direction as the curve above it. Build your "waves" down as far as you want.
When allowed to dry, finger waves can be combed out gently, resulting in a soft wave pattern in the otherwise straight hair.
Continue reading ... (Pin curls & barrel curls)
