Justin Bieber's Haircut

He has also become something of a style icon, as hairstyle inspirations for young Caucasian men are somewhat uncommon. We've received many requests for descriptions of Justin Bieber's hairstyle, tips on achieving the style, and breakdowns of the cut.
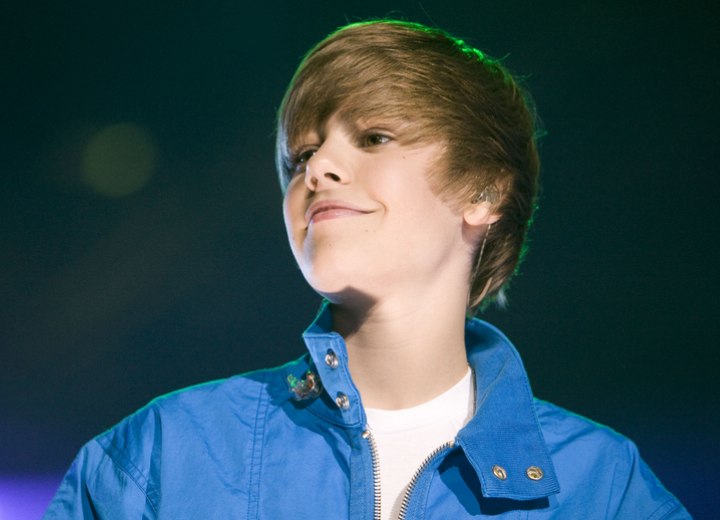
Justin Bieber’s hairstyle in the photo above, from when he was younger, is actually a fairly straightforward cut and style. His hair is mostly straight with a fine to medium texture, and the cut resembles a modernized bowl cut with feathered layers in the interior.
The Cut:
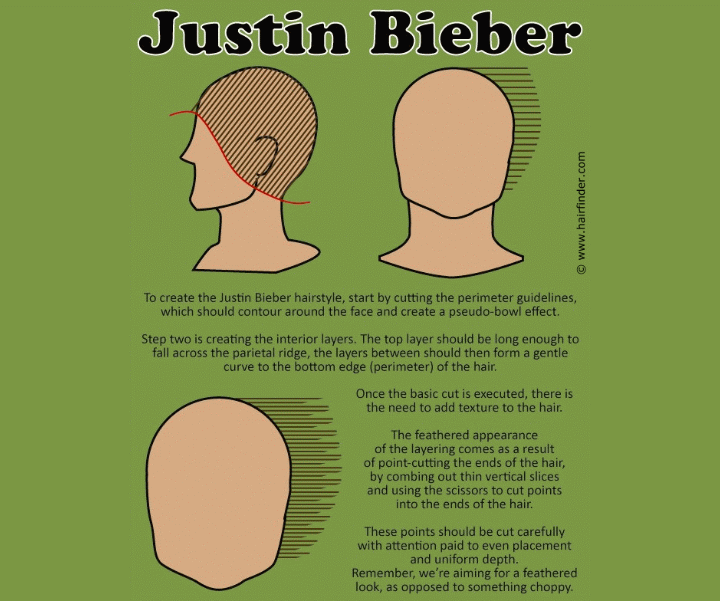
Start with freshly washed hair and comb it down around the head to lie straight. Begin by cutting the perimeter, starting at the forehead and working from side to side to create curved lines that frame the face and brush along the bottoms of the earlobes.
Continue the cut line in a gentle curve at the nape to maintain a smooth outline and provide a base for the interior layers. The nape lengths should be long enough to lie flat along the neck, leaving room for the texturing stage.
To create the interior layers, note that the top layers should lie flat along the crown. Begin cutting the layers longer than initially needed, as you will go back to add texture and may trim further.

After establishing the upper guide lengths, comb out vertical sections of hair and cut the layers with a curved line. Start at the bottom edge of the perimeter, cutting "short to long" with scissors angled up and outward. Progress upwards with a slightly reduced angle to gently curve between the top layer and the bottom perimeter. Leave the fringe area for a shallower layering approach.
For the fringe, elevate the hair more before cutting to maintain a smooth perimeter line. Cut with a shorter curve to avoid reducing the perimeter length further, blending carefully at the sides.
Once the main cut is complete, go back over the hair, taking thin vertical slices and point-cutting the ends to achieve a feathered look. This should create a fine-grained texture rather than a choppy appearance.
The Styling:
After texturing, apply styling mousse evenly through the hair. Dry with a round bristle brush and a blow dryer to create a slight curve and radial pattern around the head. The finish should be soft and smooth. Use a small amount of pomade on fingertips to define the layers.
©Hairfinder.com
See also: Justin Bieber Hairstyles