Curly Hair Styling Progression
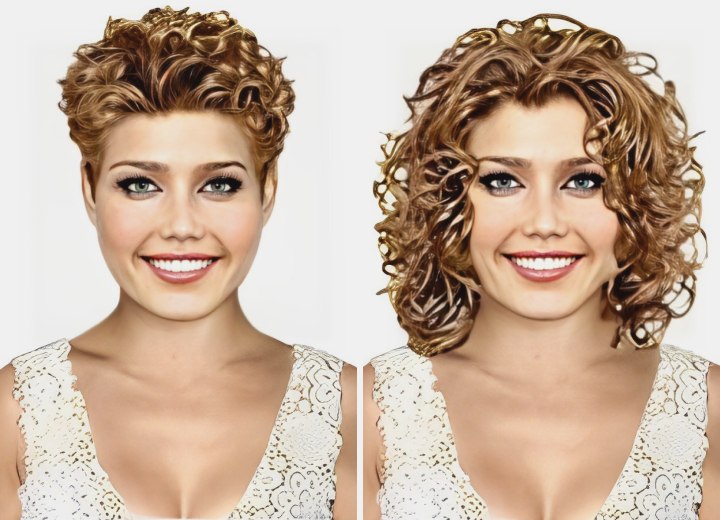
From Short to Shoulder-length in Different Stages
We've all been in the position of having a haircut that we once liked, but now it's starting to feel outdated since we've had it for a while. The problem is that it's a short style, and sometimes we can't envision how we'll transition to a longer style. Consequently, we end up sticking with what we know because we fear dealing with the in-between stage.
Well, I'm here to help you navigate the journey from short to long hair with minimal stress and struggle. As with the previous discussion of straight hair types in a progression from short to long styles, the key is to identify "stages" that will aid you in transitioning. By doing so, you can minimize the time spent in the "in-between" looks.
The Starting Point
Our initial style is an almost gamine-short haircut. The length on top of the head allows the full femininity of the hairstyle to shine through. For women with naturally curly hair, this is a low-maintenance pixie cut.
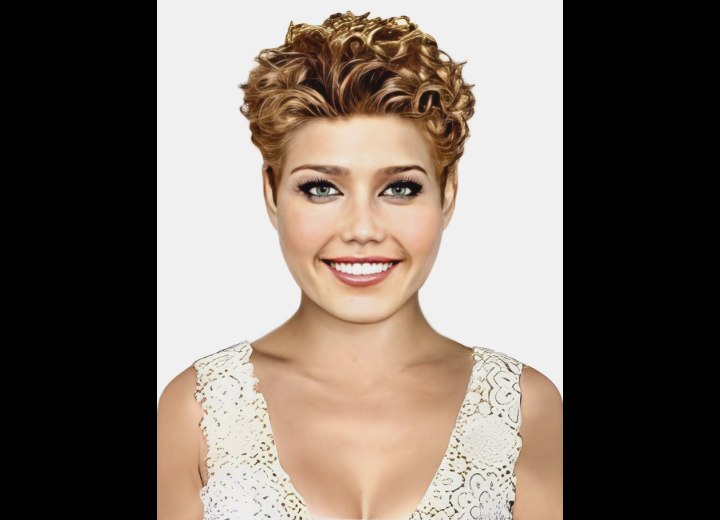
All that is needed - after shampooing and conditioning - is the addition of a little gel or mousse, and blow-drying with a diffuser and the fingers to scrunch the curls and finger comb the hair into shape to create a flattering and long-lasting. This style is especially suitable for those with a round or wide face, but it can be adjusted to accommodate other face shapes.
Stage One:
To progress to stage one of our transition from short to long hair, all we need to do is let the hair on the back and sides grow naturally for a couple of months while transitioning to a more uniform-layered style. If certain areas of growth become bulky, they can be thinned to ensure an even distribution of hair volume as necessary.
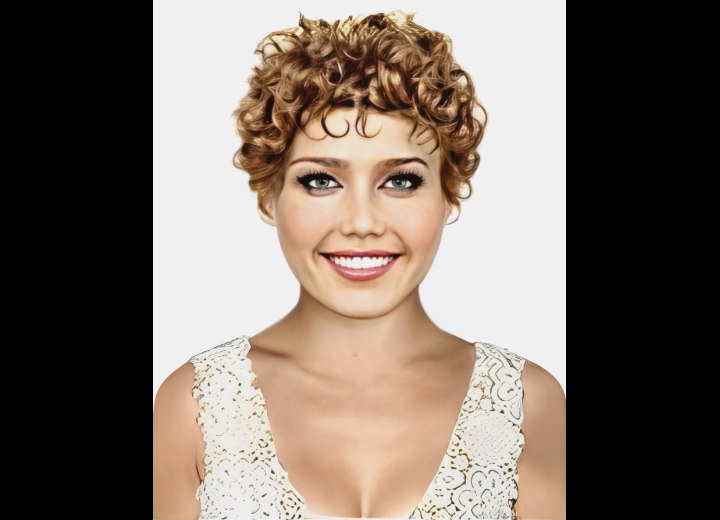
Once again, styling is easily managed, by using a diffused hair dryer and the fingers to scrunch and direct the curls. This transition takes us from a super short style to one that is more commonly known as a "bubble cut."
The time required between the starting point and stage one should be approximately four to six months, depending on the individual's hair growth rate.
Stage Two:
During stage two, the "bubble cut" continues to grow out on the top, back, and sides. A weight line begins to appear at the temples as the length on top reaches a critical mass. The sides and back are trimmed to initiate the transition from uniform layers to a more blunt style. The resulting effect is akin to a "wedge" cut.
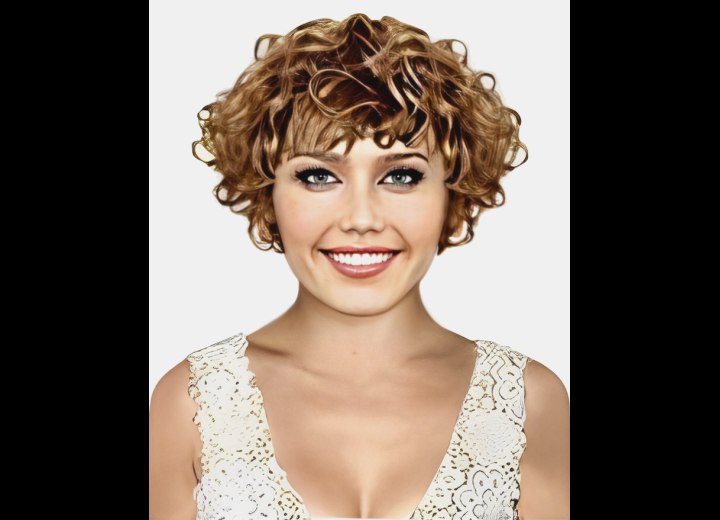
Styling this stage is still easy, involving diffused blow-drying and finger combing. Additional volume can be added to the top of the hair as needed to balance the facial features and prevent the look from appearing too wide. Stage two can be achieved within another six to eight months after reaching stage one.
Continue reading ...