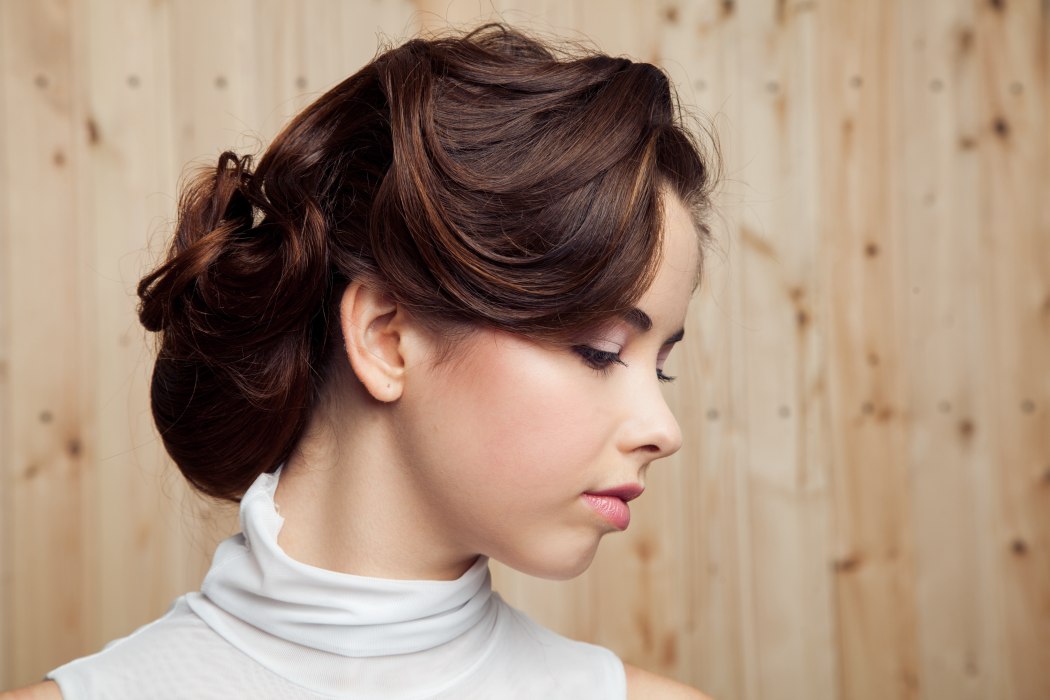
French Y-Braid with Chignon
There are many different looks that can be achieved with braiding. Even one braiding technique can provide dozens of different possibilities for braided styles. What follows is a simple variation on the classic French braid. It uses the French braid technique to create a visually interesting hairstyle with a simple finish.
We started this look with clean hair that had been blow-dried using a bit of styling gel to provide some structure and grip. We also used Ion Silk Drops serum for added smoothness and shine. Once dry, the hair was brushed smooth using a natural boar bristle brush.
We parted the hair down the center of the head and secured the left side out of the way with a snag-proof elastic band. The right side of the hair was then misted with a leave-in conditioner for control and braided in a French braid style, keeping the braid low on the side of the head, from the forehead to the nape of the neck and a little beyond. We then bound it with a snag-safe elastic band.
Then, we repeated the process on the left side of the head - misting with the leave-in conditioner and weaving in the classic French braid. It's important to try and mirror the appearance of the right-side braid to ensure balance in the hairstyle. In our demo, we had to go back and re-braid the right side to match the left because the left side proved more difficult to braid similarly.
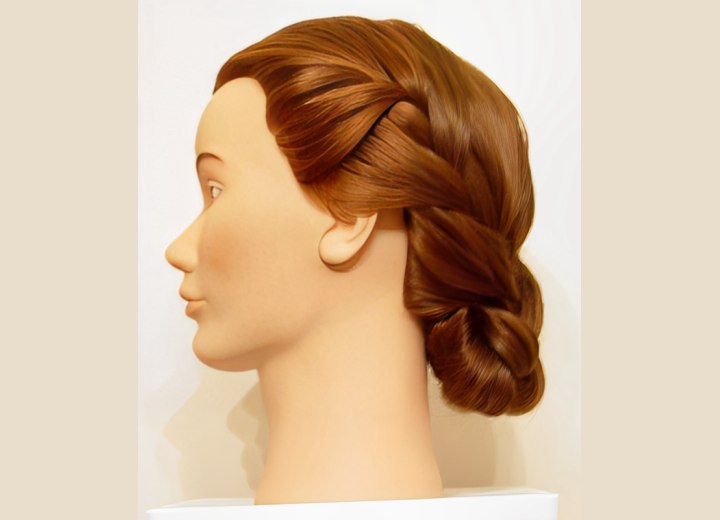
Once the two sides were balanced and braided, we pulled the braids together at the nape of the neck and removed the elastic bands. The hair was then combed until it blended and divided into three even strands. We wove the strands into a traditional three-strand braid as far down the length of the hair as possible while maintaining a smooth braid.
After completing the braid, we took a small amount of pomade into our palms and rubbed it to emulsify. We smoothed the braids with the pomade to control flyaway hairs and enhance smoothness. The idea to finish the style as a chignon was born because leaving the lower braid down looked too casual.
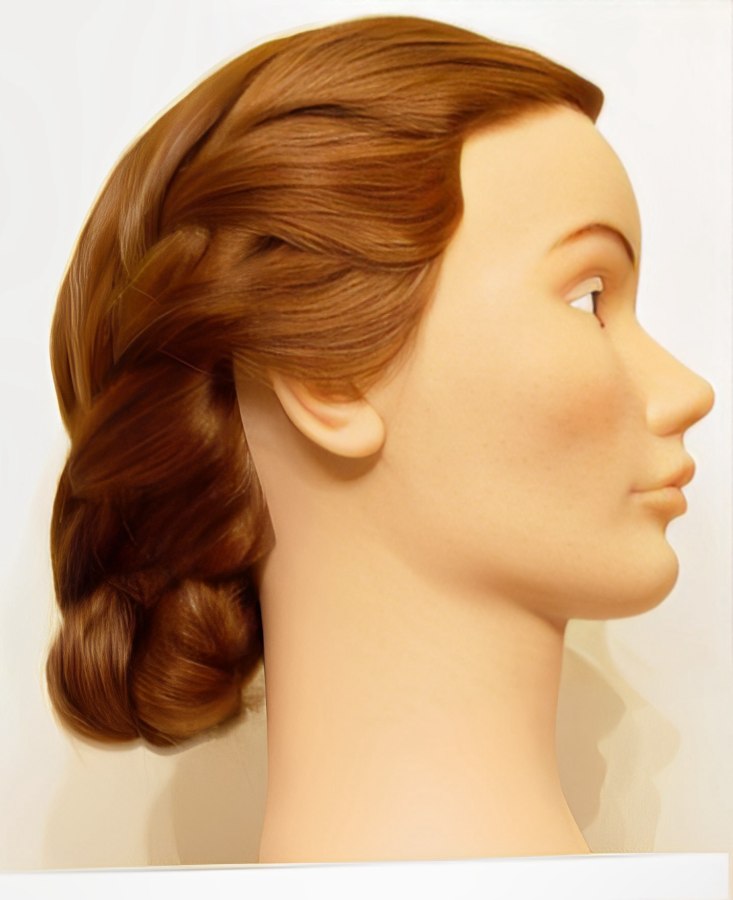
So, we bent the tail end of the braid at the elastic band and rolled it under, being careful to tuck any stray hairs back into the roll as the braid widened. Once the rolled braid was fully tucked up into the nape area of the neck, we used two large bobby pins to anchor it in place. The pins were positioned one on each side of the newly formed chignon in an "X" pattern to allow them to hold onto each other.
The resulting finished style was relatively easy to create, looked neat and tidy, but was visually intriguing. Unadorned, the style would serve in almost any environment, from offices and other workplaces to afternoon weddings and luncheons.
The style can also be decorated with jeweled pins, combs, flowers, ribbons, or other hair accessories for a more formal occasion. It would also make a good bridal hairstyle for a garden wedding, as the braids provide a secure place to anchor a bridal headpiece and/or veil.
See also: More about Braiding