Pulled Back Temples
There is a classic look for long-haired women that has been around for centuries – literally. Not only is it attractive, but it is functional. Yet, it does not have a name, per se, just a description: pulled back at the temples.
At some point in your life, I’m sure you’ve seen the look. A young girl or woman with long, flowing locks has taken a small lock of hair from the area of her temples and pulled them back and tied them together behind her head.
There are numerous versions of this look, especially if your hair is long enough. You can braid the locks at the temples and let the "tails" of the braids combine where the braids meet in the back. You can use multiple locks from each side and gather them all into one join in back, or into separate joins - one above the other for a tiered effect. The limit is the length of your hair and your imagination.
I’ve done the most basic example of this style (with a single lock from each side) in two different versions (braided and unbraided) to show how easily this style can be achieved.
How To:
For our demonstration, the manikin’s hair was washed, conditioned, and blown straight then smoothed with a flat iron. Once the hair was smooth and flat, I simply separated a square section of hair at each temple approximately 1.5 inches by 1.5 inches. I lightly misted the locks with hairspray and combed them to help them stay in place. The locks were secured with small clips while I brushed the remaining hair into the desired style.
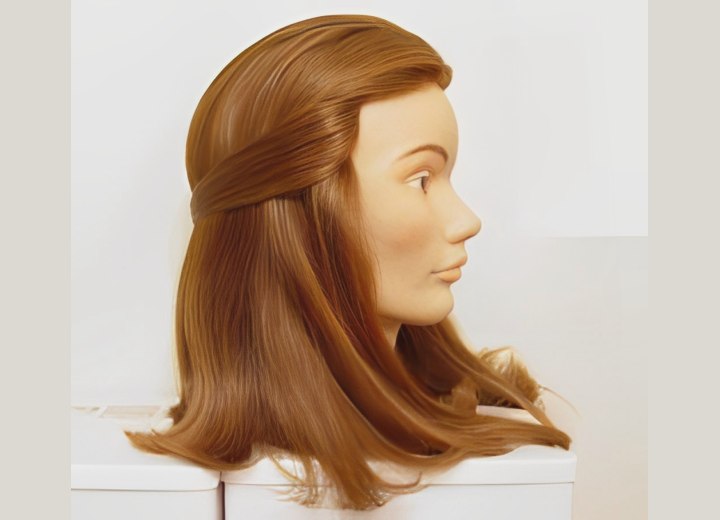
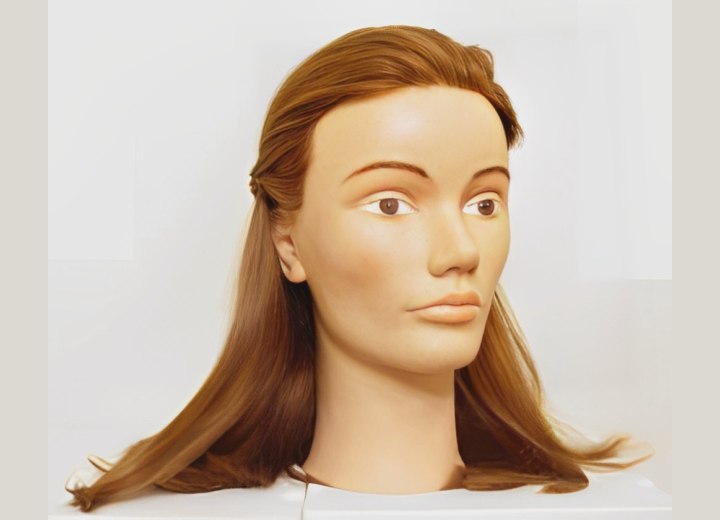
You can style the rest of the hair in any way you choose. I chose to brush the hair straight back, but you could use a center parting, side parting, or be creative and use a zigzag or woven parting if you prefer. Once the remaining hair was styled, I brought the two strands I had previously prepared to the back of the head and joined them using a snag-free elastic band. The ends of the hair below the join were combed to blend into the rest of the hair.
The pulled-back locks were draped with a minimal amount of tension to give a slight curve to the effect.
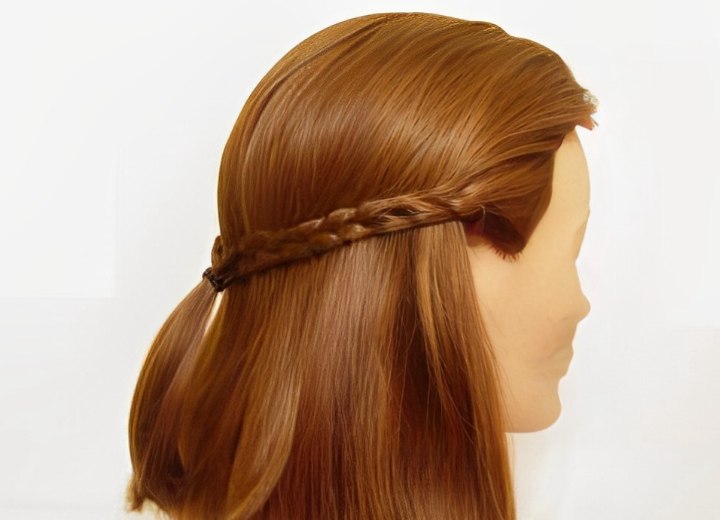
For the braided variant, I used slightly larger sections of hair at the sides and wove them into basic three-strand braids. The ends of the braids were secured using small clips while I styled the rest of the hair.
Because the braiding made the effective length of the strands shorter, I brought the two strands straight back around the head to the bottom of the crown section of the scalp. The braids were joined with a snag-free elastic band, and the ends were brushed to blend them with the rest of the hair hanging down the back.
Now you have the basic idea, so feel free to take the idea and run with it. It gives you a simple, attractive look for long hair that can be completed quickly. I’ve seen it used on young girls with beautiful results. And they don’t put up a fuss, because it’s so quick and easy.
©Hairfinder.com
See also: More tips for long hair
