Quick Fixes for Long Hair
The Braided Bun
There are many reasons for trying a new hairstyle. Maybe you're sitting in front of the mirror getting ready to go out, and you just can't decide what to do with your hair that you haven't done a hundred and two times before. You need something different and you need it to be quick and easy. Well, here's a playful style that's great for a night out dancing and dining. We call it the Braided Bun.
It's based off of simple braiding techniques used to create a knotted bun at the top of the head. The style is easy to create and can be finished in minutes.
• Snag-free Elastic Bands
• Assorted sizes of Bob Pins
• A Sprayer Bottle with Leave-in Conditioner or Setting Lotion
How to create the style:
This is one of the few up-styles that can be performed on freshly washed hair, but it is not necessary. If you are working with unwashed, dry hair, lightly mist the hair until it is barely damp. Comb the hair until it is smooth and free of tangles.
Begin styling by dividing the hair of the head into four sections (see the diagram). The vertical and horizontal partings used to create these sections should intersect at the center of the crown of the head. You should be sure to secure the sections before you begin the braiding portion of the style on your first attempt, although you can feel free to just braid as you go in the future if you feel comfortable doing so.
Once the sections are secured, you begin performing a simple three-strand braid on each section. The important thing in creating the braids is to angle the tension toward the crown of the head and the cross-point of the partings. This results in the four braids being positioned closely together at the center crown, which is what you want. In forming the upper two braids, you should braid the hair as far as you can go and still have a smooth braid. For the lower braids, you can (as an option) leave 3-4 inches of hair free at the ends for added styling options; otherwise, braid these as you did those above.
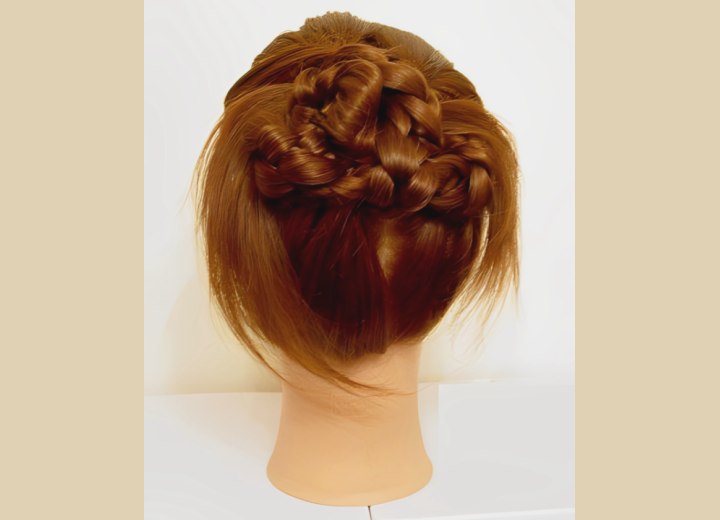
After the braids have been formed, we create the "bun". Technically, it is more of a knot, but the look is sufficiently similar. To make the instructions as clear as possible, our diagram has labeled the four braids "A" through "D" starting from the upper left braid. To form the bun, we begin by taking braid "A" and wrapping it clockwise around the base of braid "B", then going diagonally and wrapping it counterclockwise around the base of braid "C". Secure the braid in place using bobby pins as you go. Tuck the end of the braid back under itself and secure it with a bobby pin.
Next, take braid "B" and do the same, in reverse, wrapping the braid around the base of braid "A", diagonally to braid "D" and tucking its end under itself. Secure the braid and the end with bobby pins.
For the two lower braids, we take the braids in hand, cross them, and bring one over and under the other to form a half-knot. Then curve the braids around their opposites' bases and tuck the ends back underneath in the center. If you took the optional step of leaving loose hair at the ends of the lower braids, you can do as we did with our demonstration and simply tuck the elastic bands underneath the center mass, leaving the loose hair sticking out.
These "sprays" of hair can be left natural, can be curled with a curling iron, or can be misted lightly with hairspray and smoothed out with a flat iron to form somewhat spiky fans of hair on each side. How you choose to finish the style is up to you, but here are some ideas to get your creative juices flowing:
• Try adding ribbon to each of the four sections as you begin braiding them. This will give the finished "bun" even more detail, and would make for an even more festive look.
• Use a beaded or jeweled hairnet over the finished "bun" to add interest.
• Tuck small flower blossoms or sprigs of baby's breath into the bun.
• Try using "hook style" earrings as ornaments on the braided bun, or perhaps a gold or silver chain, draped on the braided bun, or wrapped around the bun.
The finished style is one that can be whimsical, funky, or sophisticated, depending on how you choose to finish it. When we created this style for the demonstration, discussion was made about using it for a young woman in an afternoon wedding party, and adorning the style with small roses and baby's breath.
©Hairfinder.com
See also:
How to make a curl fall for long hair
How to make a layered ponytail
