How to Wrap a Perm
Wrapping Techniques for a Body Wave
The biggest factor in a successful perm is the perm wrap. How the hair is wound on the perm rod, the size of the rod, and the number of rods used all effect the outcome. So, we're going to show you how to "Wrap a Perm."
For our demonstration, we will be wrapping the hair for a "body wave." The difference between the standard "perm" and what is called a "body wave" is simply the size of the tools used.
The perm wrapping tools come in many sizes, from the tiny rods (usually bright red) to large, thick rods (usually orange or purple in color), and many steps in between. The smaller the rod is, obviously, the tighter the curl.
You need: Hair clips, perm rods, end papers, tail combs, and a spray bottle of water.
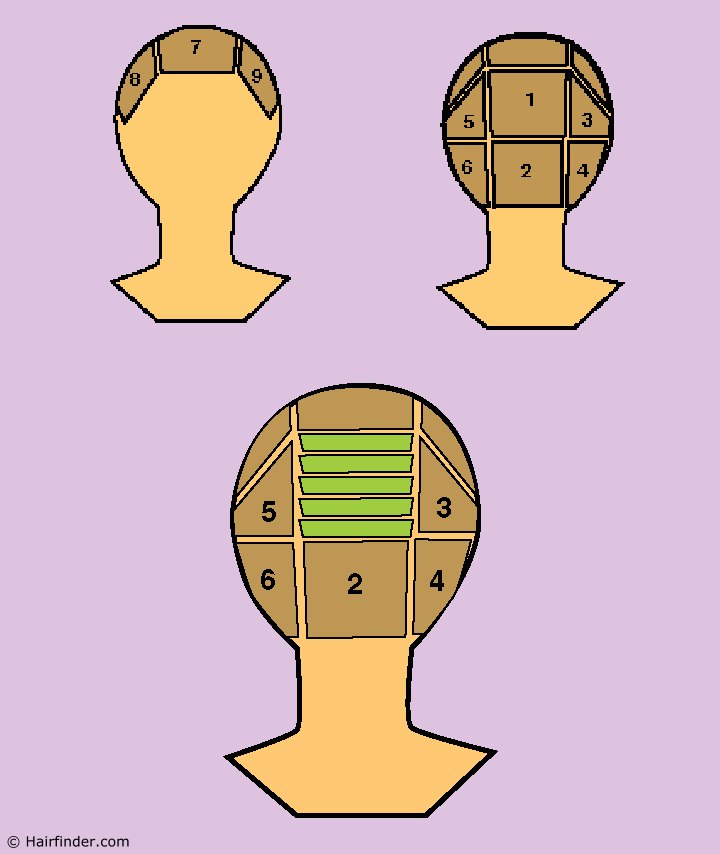
Shampoo the hair twice with a clarifying shampoo. Do not apply any conditioner or other product, so as not to hinder the hair's absorption of the waving lotion. Section the hair on the head into nine sections.
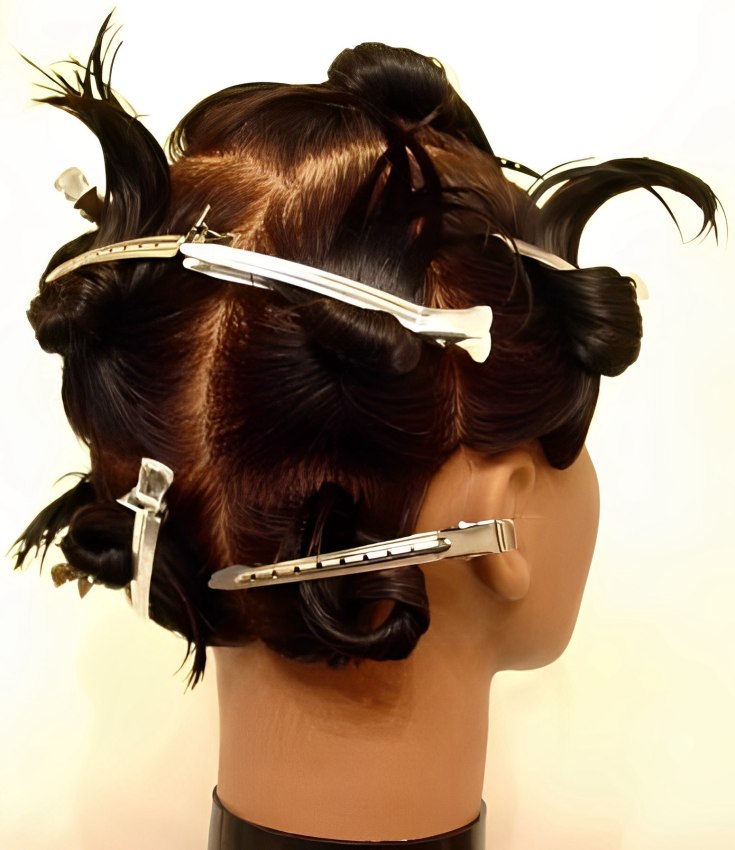
The sections should be a little shorter than the length of the rod you will use. Sectioning the hair makes it easier to work with as you wrap the perm, keeping the hair not being wrapped out of the way.
Step Two:
Begin with section one (center crown section, see diagram) and slice a segment of hair approximately as thick as the rod you are using. Comb out the section until it is smooth and fold an end paper over the segment about 1/3 of the distance from the end of the hair. Lightly mist the folded end paper and hair segment (allowing the end paper to "grip" the hair segment) and slide the end paper down past the ends of the segment.
The purpose for end papers is to make sure that the ends of the hair wind around the rod smoothly. Without using them, the ends of the hair can get folded back onto themselves during the wrapping process and cause "fish hooks" in the finished perm.
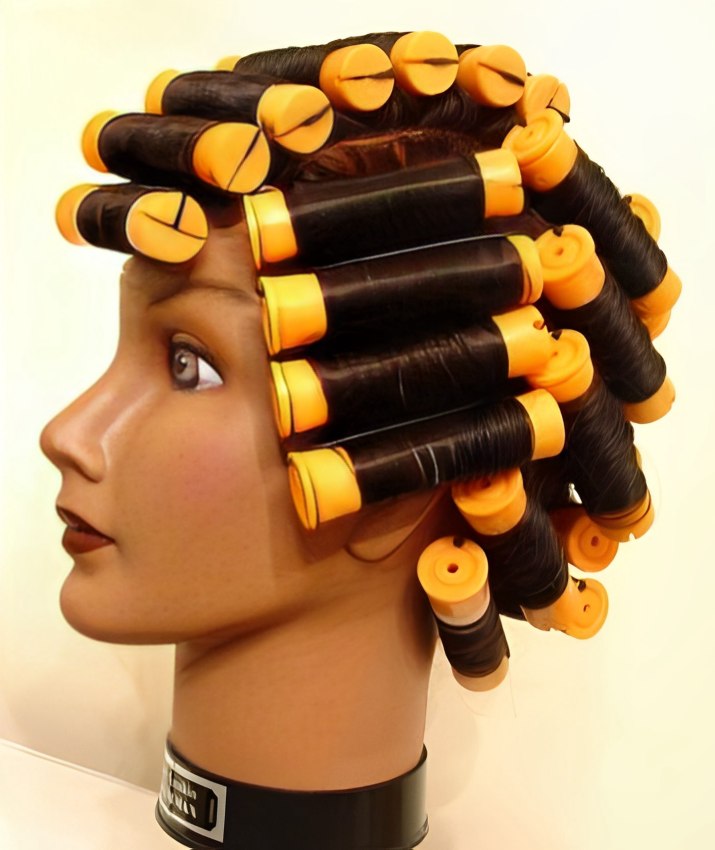
Wrap the protruding end paper over the rod and turn the rod "under", winding the hair evenly onto the rod. Keep even, gentle tension on the hair as you wind the rod, and once you reach the scalp, secure the rod as appropriate. Most rods today have an elastic tether that extends across the wrapped segment and an end cap that fits into the opposite end of the rod.
Slice another segment below the first and repeat the process.
Step Three:
Continue with section two (center nape), then sections three and four (right crown, right nape), five and six (left crown, left nape), seven (right side), eight (left side), and nine (top). Wrap the hair "downward" in each section - toward the neck in the back sections, toward the ears on the left and right sides, and toward the face on the top section.
If you notice that your perm rods look "crowded", then your segments are too thin, if you can insert a finger between the rods, then the segments are too thick.
Getting the hair wrapped evenly for the perm is important so that the waving solution processes evenly and you get the optimal results. The majority of issues with at-home perms are a direct result of poor wrapping techniques. A good wrap ensures even curls and processing.
Once wrapped, you're ready to follow your package guidelines for your at-home perm. Enjoy!
©Hairfinder.com
See also:
Perms Q&A
How perms work
The different formulations for perms
