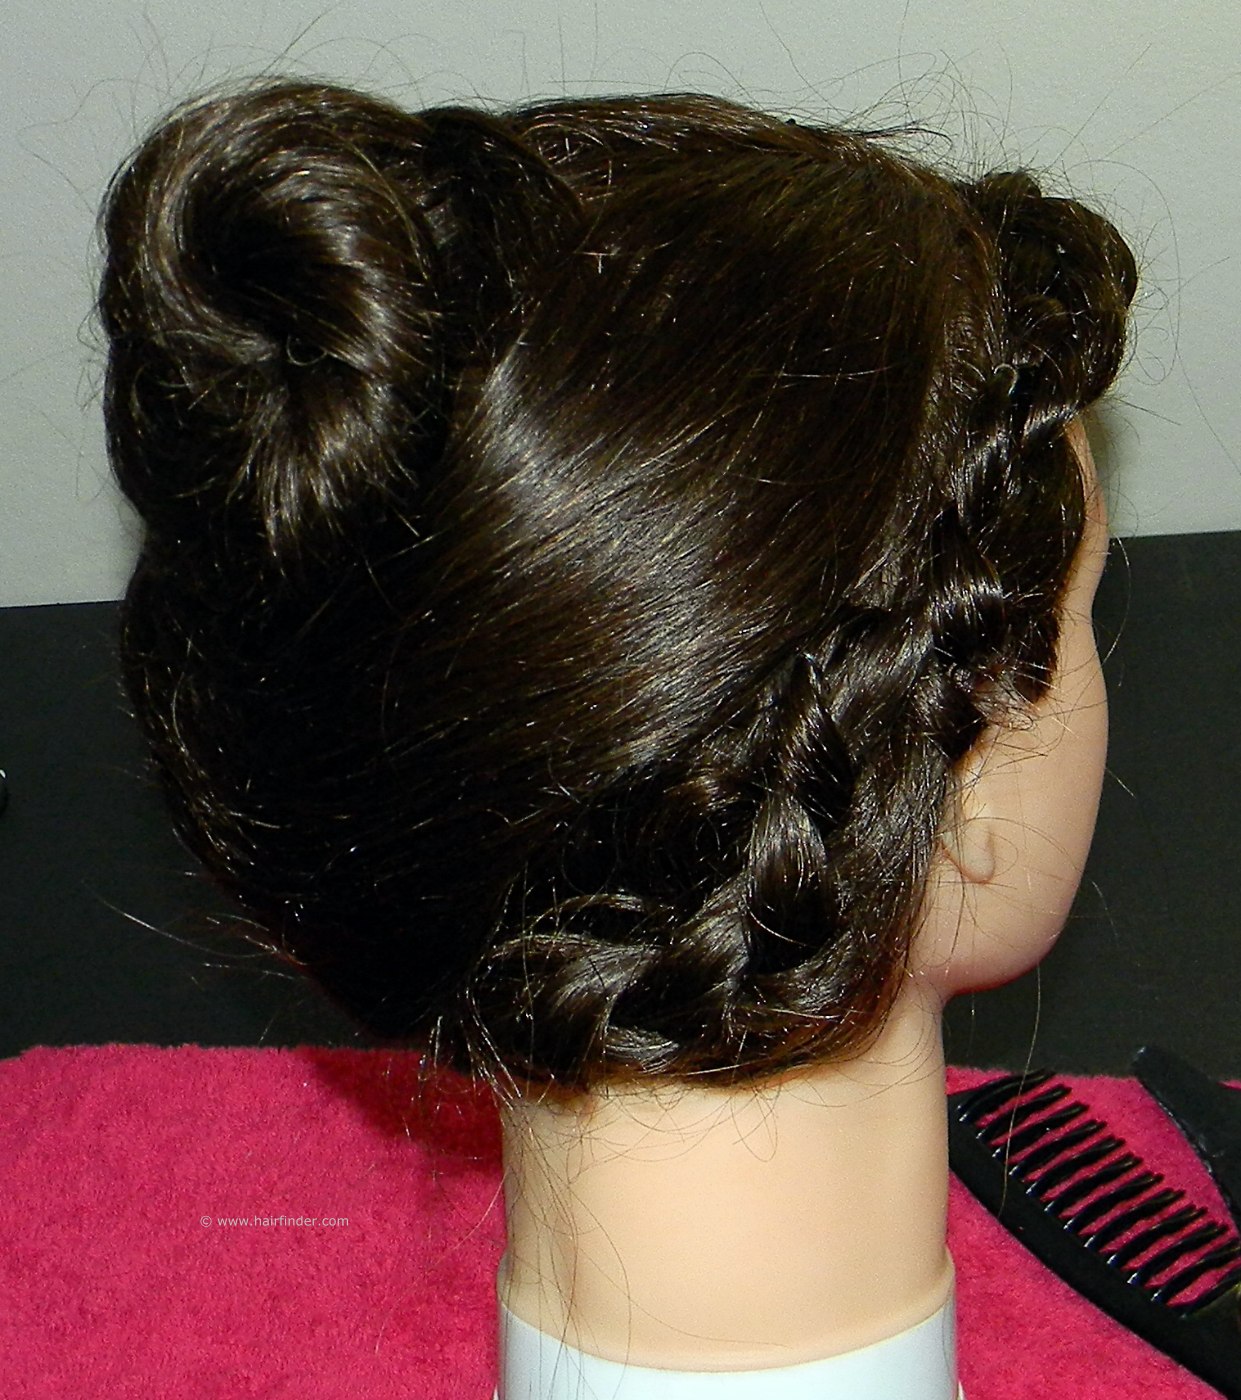
Hairline Braid with a Twisted Bun - How To
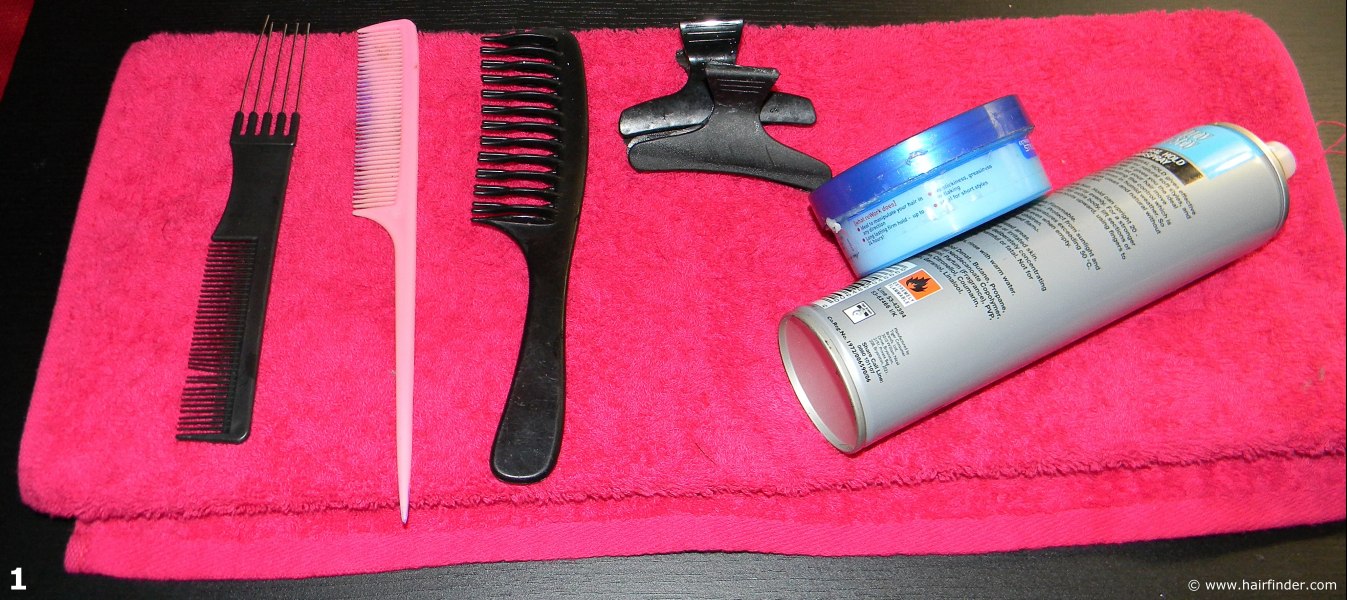
1. What you will need:
a. Wide tooth comb
b. Tail comb
c. Tease comb
d. Clips
e. Hairspray and gloss product
f. Bobby pins
2. Use your tail comb to separate the hair. Follow the line of the occipital ridge as a parting guideline. Secure the hair with a clip on top of the head. Brush the bottom section out to get rid of any tangles.
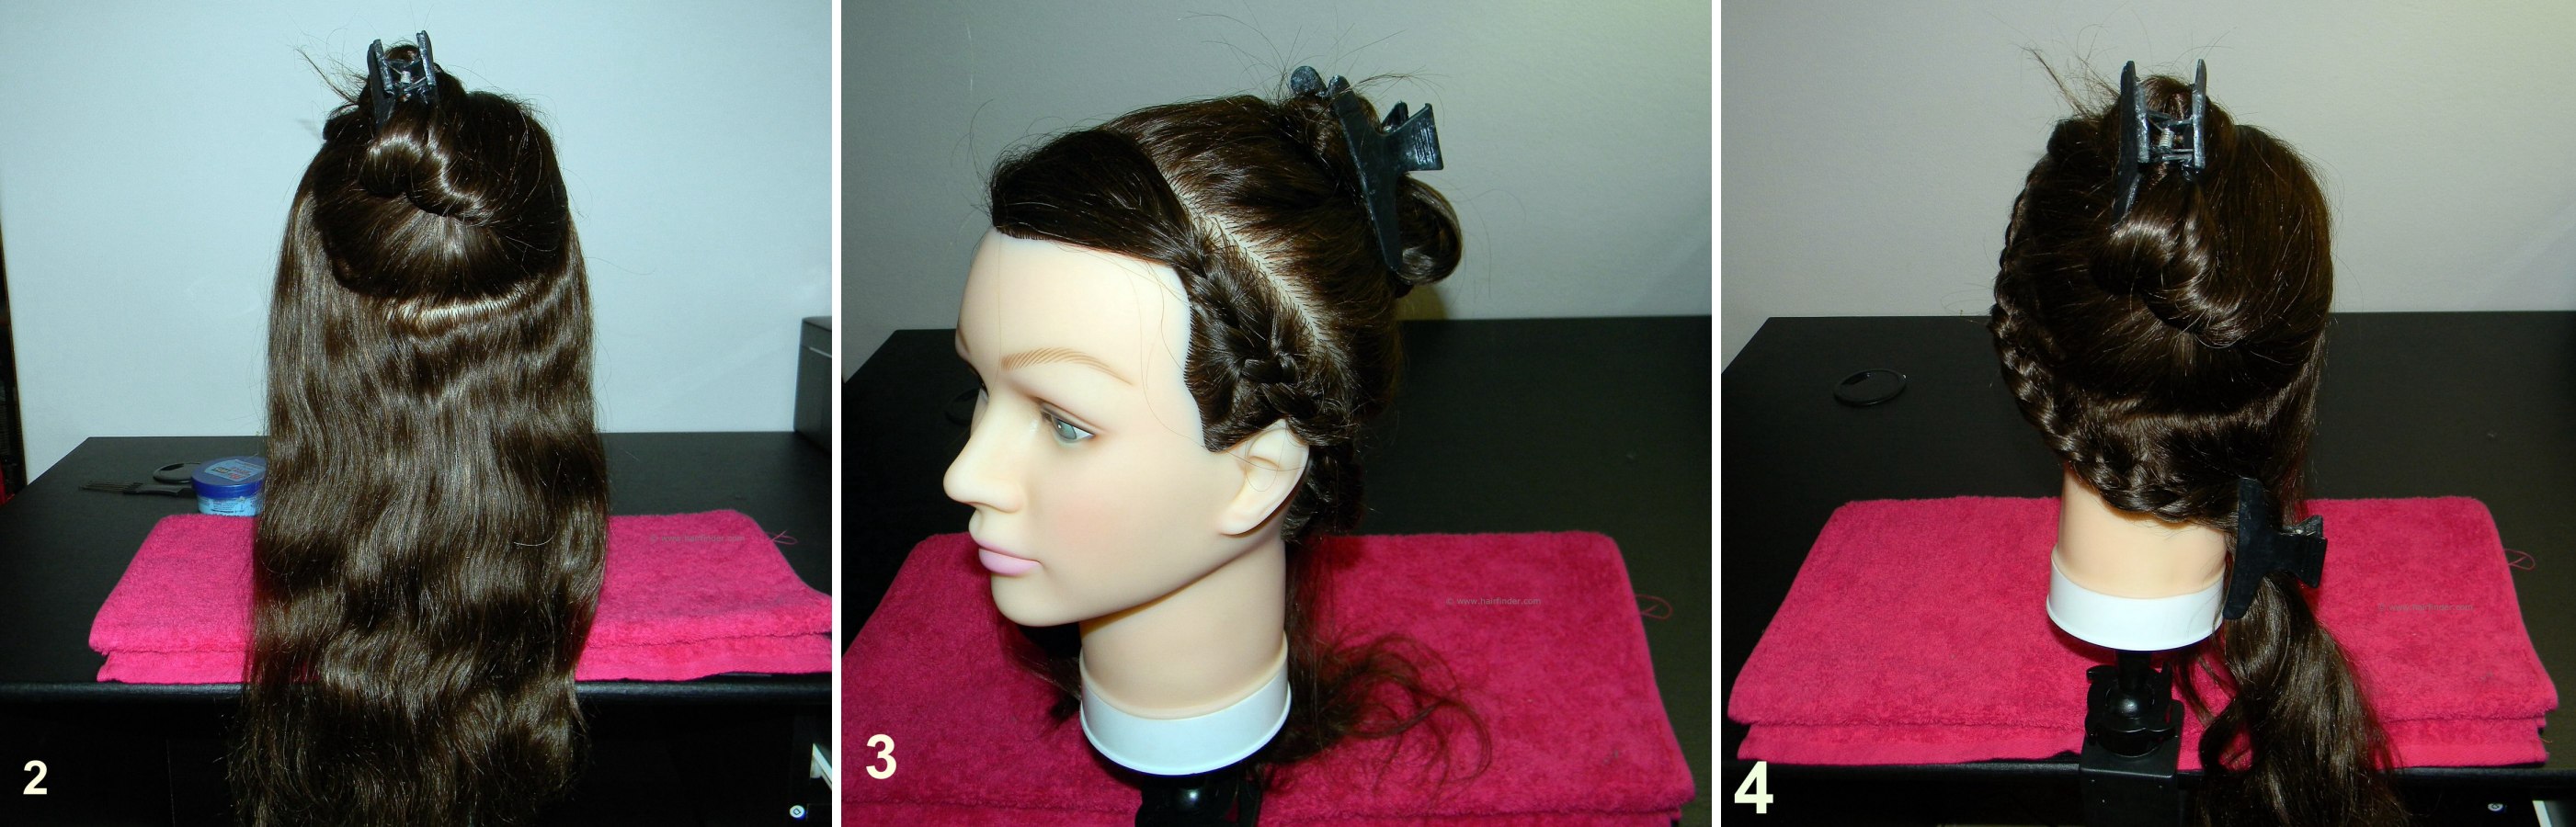
4. When you get to the nape area, you’ll have to change the angle of your braid. Ask your model to adjust the angle of her head so that you can work more comfortably. If you’re doing the style on your own head, you’ll be able to adjust the angle for your own comfort. Tension is very important at the nape area, as the braid tends to go slack here.
5. Follow this same procedure around the opposite side of the head as well, so that the braid goes around the entire circumference of the head. Remember to keep your tension tight, and try to work as neatly as possible. This may take some practice if you're not experienced in doing braided styles.
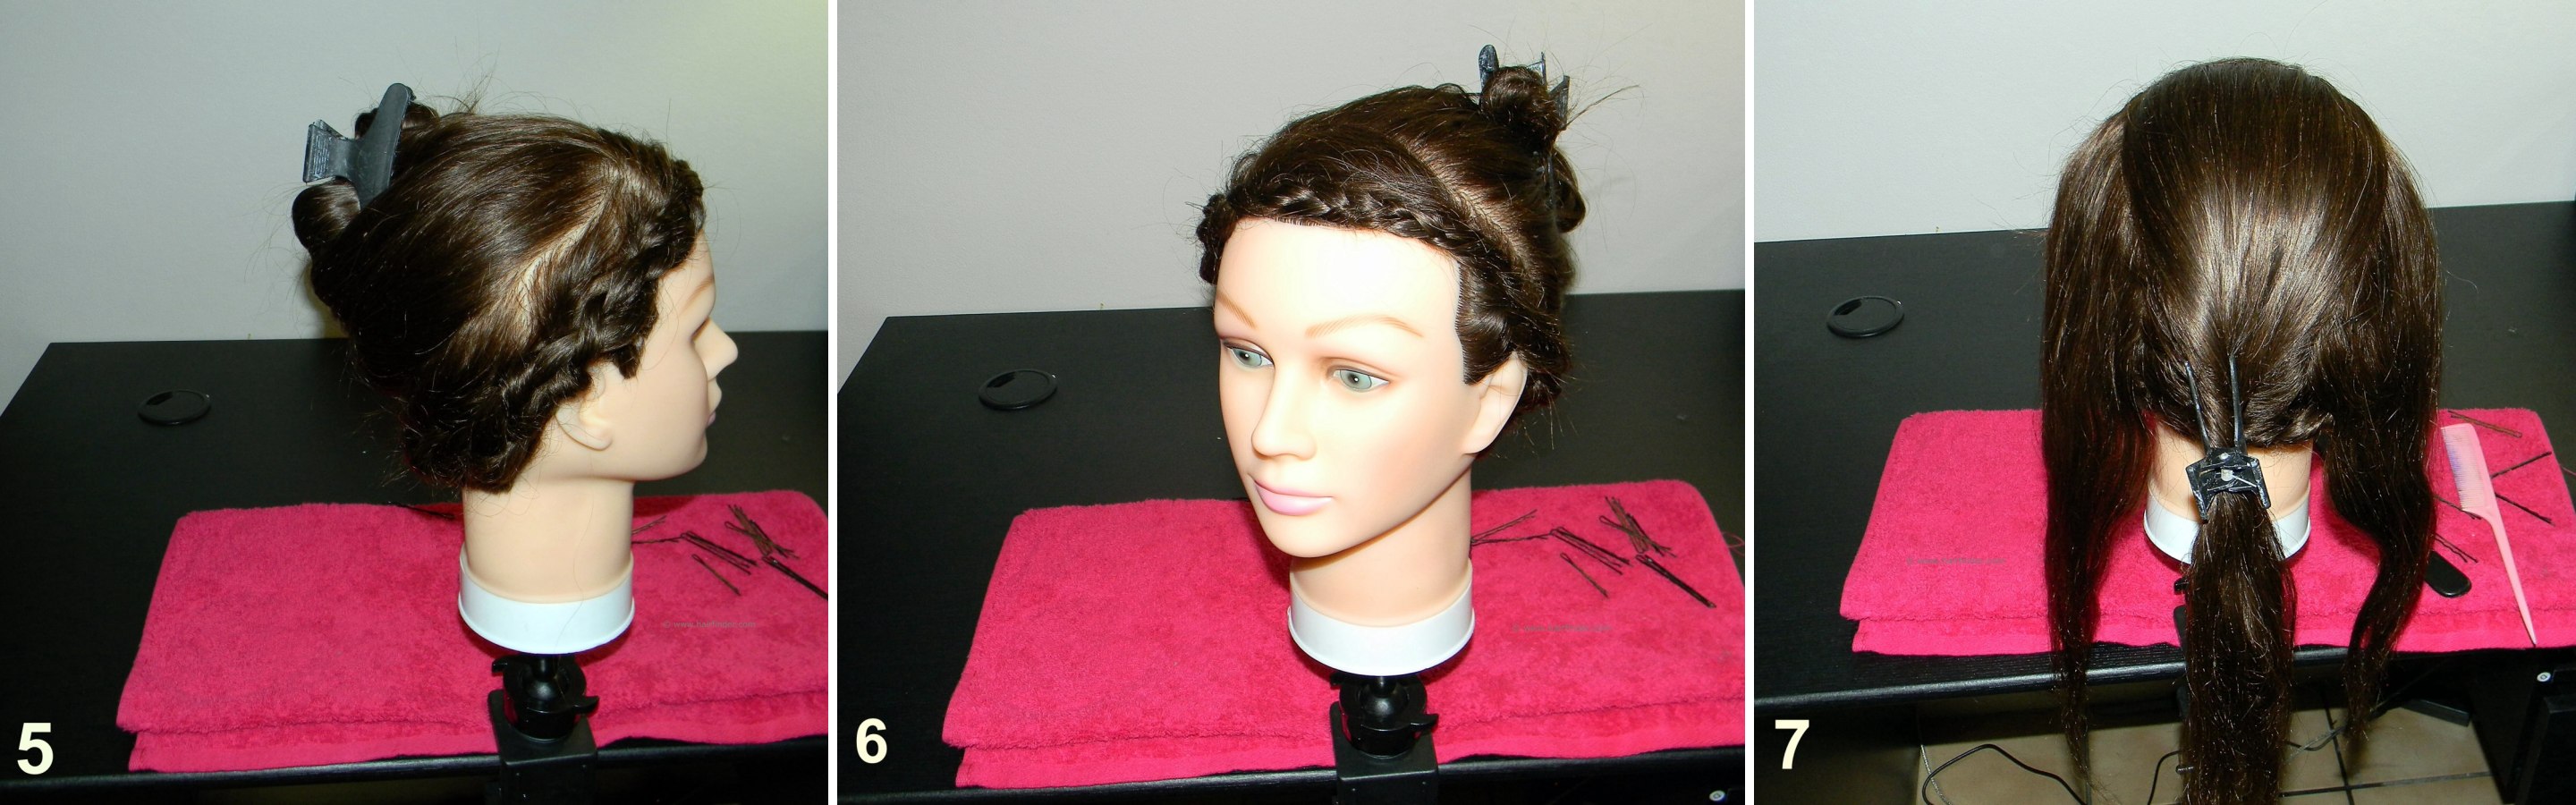
6. Braid the hair until you reach its point of origin. Neatly tuck the tip of your braid into the inside fold of the origin part of the braid, and secure it here with a bobby pin. Make sure that this is done discreetly so that the braid appears seamless, following the hairline like a halo. If you have dark hair, use a brown or black bobby pin. If you're blonde, use a silver bobby pin.
7. Loosen the hair that was secured on top of the head, and use your tail comb to separate this region into three equal sections. Again secure the middle section to make sure that the sections stay apart. Comb the hair out neatly, being careful not to damage the braid.
Continue reading ...
