Short Graduated Crop
Step by step guide on how to cut a short graduated crop with a versatile sweeping fringe, from Stacey Broughton, myhairdressers.com
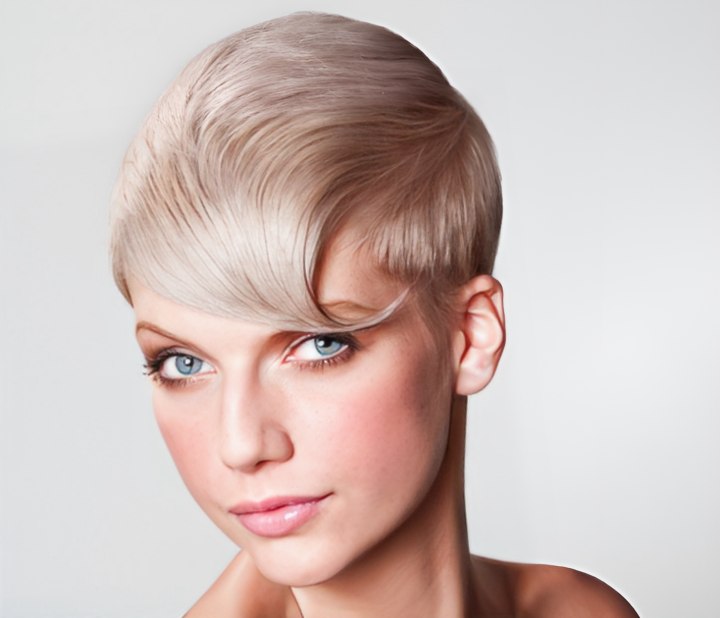
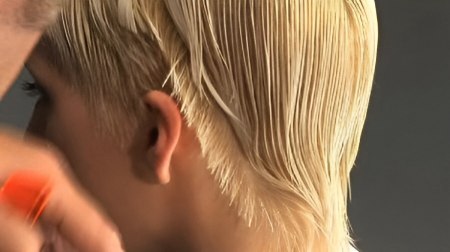
A short graduated pixie cut, full of technique, discipline and a well worked disconnected L-shaped panel. The end result is a short and elegant, weightless graduated shape with a versatile sweeping fringe. This is a truly beautiful and versatile haircut, that can be dressed up, down and all around.

Before: Katie before the cut and color.
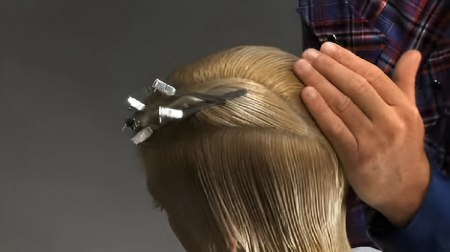
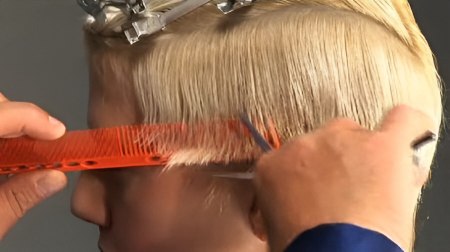
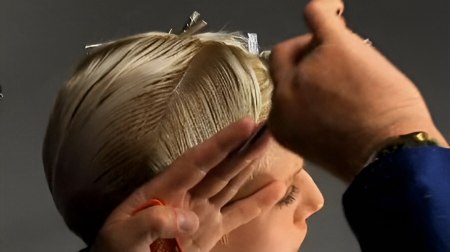
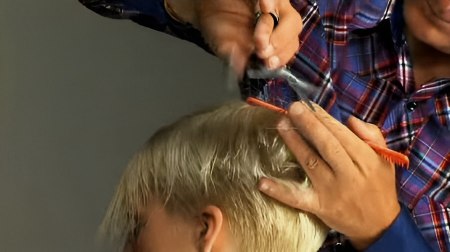
Step 1: Sectioning. Create an L-shape section across the front of the head and back into the crown on one side. The left hand side begins in the temple and follows the round of the head to just below the crown.
The horizontal of the L-shape runs across the front of the head, from temple to temple, and is approximately three centimetres deep. Please note the side tapers around the crown area.
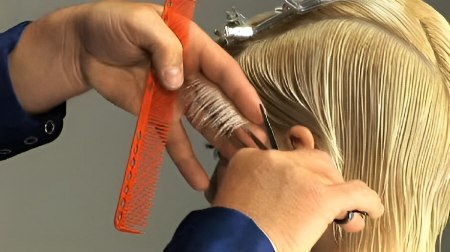
Step 2: Begin on the right-hand side, taking a diagonal section from the top of the temple to just in front of the ear, following the hairline. Elevate this section and pull it straight out. This increases the graduation of the internal shape.
Please note that your first section defines your internal graduation and needs to be planned according to the individual's bone structure and hair texture. Graduation is a flexible tool.
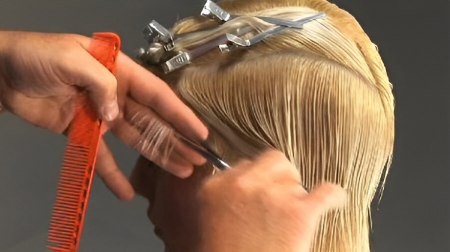
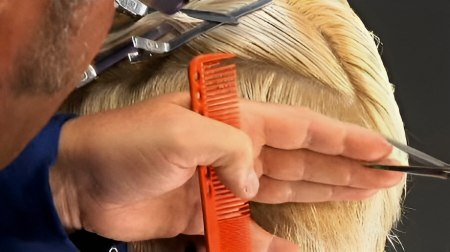
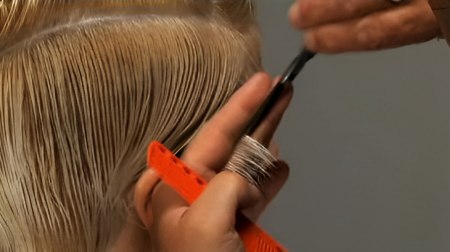
Step 3: Then take parallel sections, using the previous section as a guide, using a small amount of over-direction. Please note that Stacey angles his fingers in so the longer point is at the top of the section.
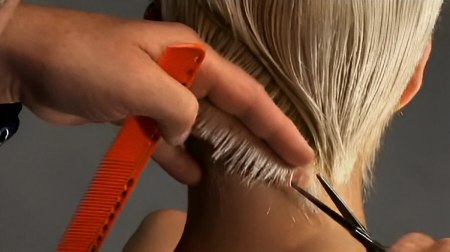
Step 4: Once you reach the back of the ear, continue this line into the back hairline. Please note that Stacey is comfortable with the amount of hair in the back hairline as he had made an allowance for this when he cut his initial section. This leaves room and hair length for later refinement.
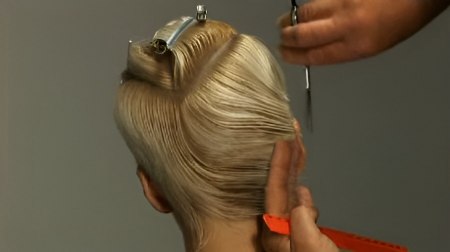
Step 5: Once you reach the curve of the head towards the back, the over-direction increases to maintain length and to enhance the head shape.
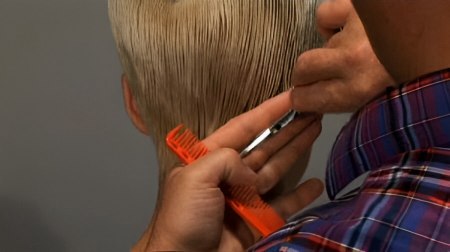
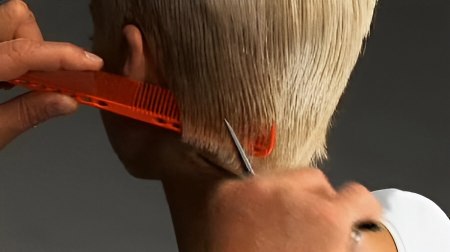
Step 6: Continue with this process in to the centreback until you reach the end of the section. Please note that Stacey once again increases his over-direction, especially in the nape area. You will return and refine this central back area at a later stage. Initially, the main focus is to run the graduation from front to back evenly.
Step 7: Next cross-check your work using horizontal sections.
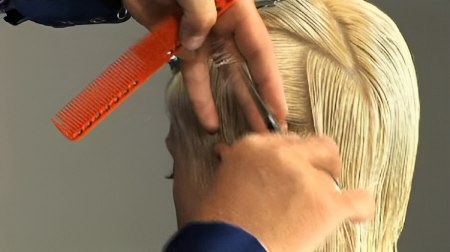
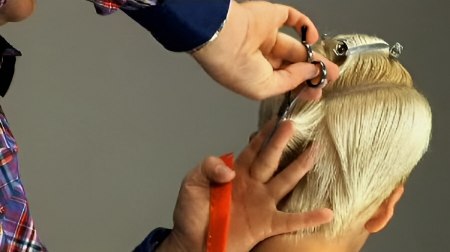
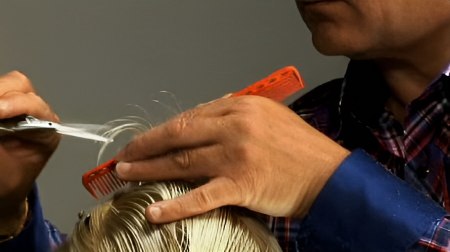
Step 8: Then refine this area using a scissor-over-comb technique starting in the front.
Step 9: Now, create a new section reflective of the first side, running from temple to crown. Repeat the same process on the second side.
Step 10: The ample over-direction allows for the next tailoring process. Stacey has broken down his technique into two sections, first establishing graduation and length, then refining and contouring the head shape.
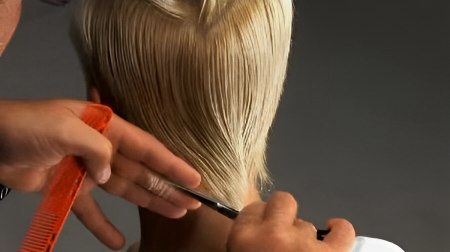
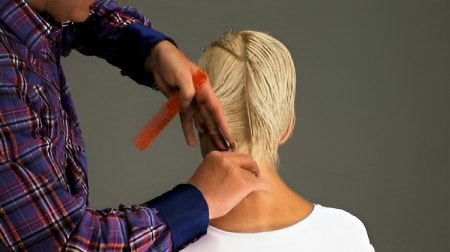
Step 11: Return to the original side and start to work with diagonal sections behind the ear, tailoring the nape area. You want to create a fitted edge under the occipital bone, with weight sitting on the top.
Step 12: Continue this process to the top of the section crossing over the diagonal lines.
Step 13: Now cross-check in the opposite direction.
Step 14: Repeat this process on the second side.
Step 15: Next, refine and blend through the perimeter with a scissor-over-comb technique.

Step 16: Next, work with the top section on the right-hand side. Take a diagonal section from the L-section to the underneath guideline in the side. Elevate and over-direct and cut from long to short, using the underneath as a guide and continuing the line.
Step 17: Repeat this process throughout this section, increasing the diagonal as you work towards the back and cutting from short to long, maintaining length in the top of the section. This initial process gives you the weight you require at the round of the head.
Step 18: The next process will allow you to blend the length of the L-shape with the right-hand side. Remove weight from the top by working with horizontal sections, elevating straight up and cutting from shorter to longer using a pointing technique.
Work first from the centre to the front, then from the centre to the crown. This will create a wrapping fringe across the top once the L-shape is brought down and refined.
Step 19: Please notice that when Stacey reaches the crown he pivots the section.
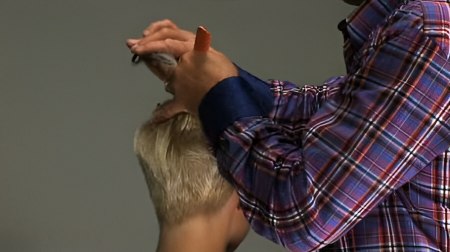
Step 20: Dry off the hair and refine, using freehand techniques.
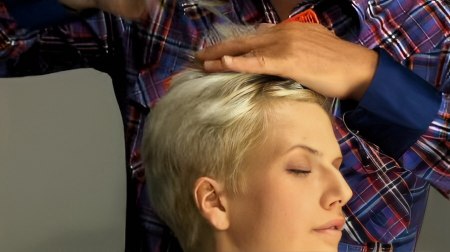
Step 21: Next, bring down the L-shaped section and connect the back area of the section into the crown, working to a longer point towards the fringe.

Finish: The result is a short pixie cut with an elegant, weightless, graduated shape and a versatile sweeping fringe.
Text and photos by MHD. Subscribe to view the training video!
See also:
How to cut a short graduated haircut
How to cut a short hairstyle with round graduation
How to cut a very short hairstyle with layers
